
 You might also like
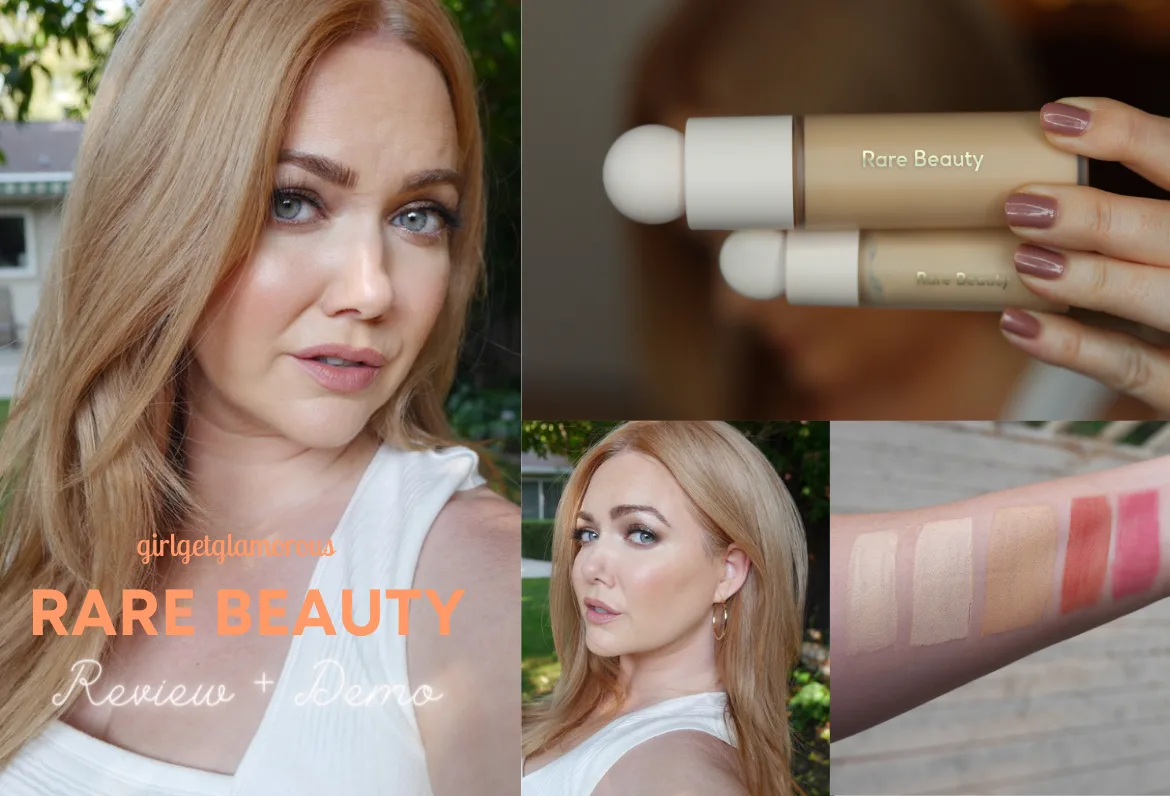 Makeup
Makeup
Makeup 


Welcome to the GirlGetGlamorous blog!
Subscribe for monthly emails of the latest
blog posts and videos, sent right to your inbox.
I got so many requests for this routine for drugstore and affordable foundation and concealer. I’m so happy to be able to share this routine with you, because not only do I like the finished look, but it also lasts all day!
This combination looks really beautiful on mature skin and has a smooth finish that doesn’t accentuate fine lines or pores. The two key things to this routine are prep and placement.
Let’s get started!
HIT PLAY
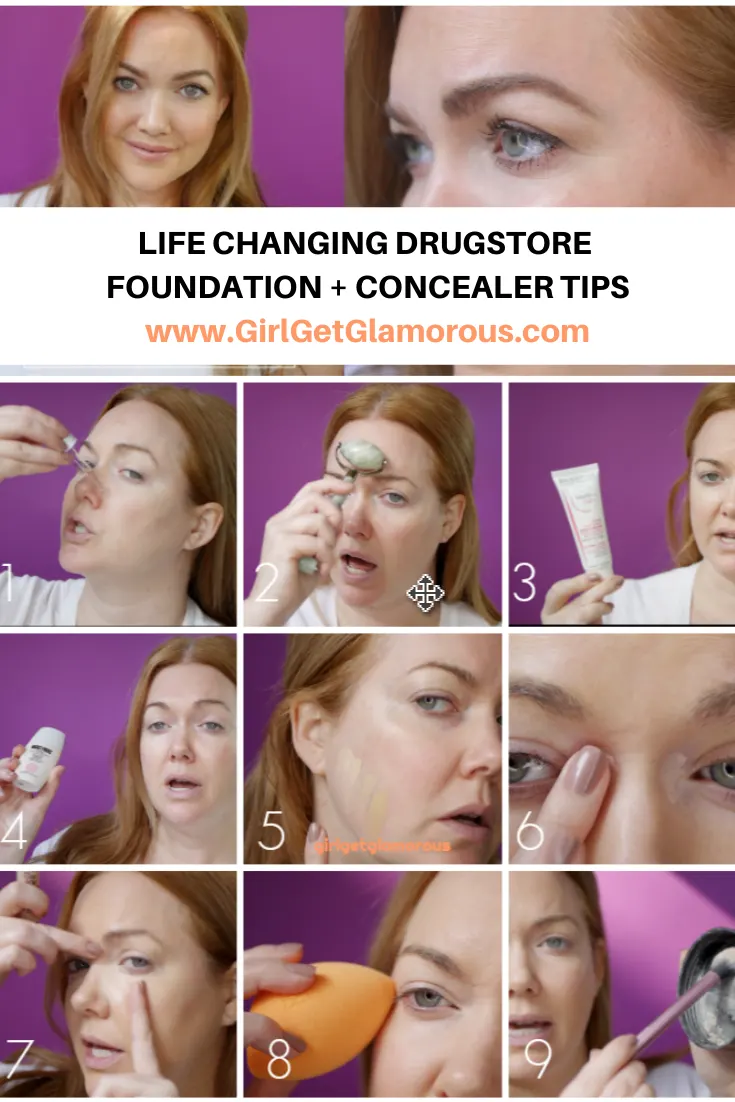
Skin prep is so important for creating a perfect base. The right combination can really make or break how your makeup looks and how long it lasts.
1 | Hyaluronic Acid Serum – This skincare ingredient can attract up to 1,000 times it’s own weight in water, which visibly plumps skin. This means that your foundation will not only start out looking fresh and dewy, but this serum keeps it looking fresh and hydrated throughout the day.
When I use this serum, my skin and foundation stay smooth, without dry patches popping up as the day wears on.
The Bioderma has a more smooth, primer-like feel and is very lightweight. The Ordinary has more of a traditional serum feel, but can be a little sticky initially if I apply too much, so make sure to start out with just a few drops! It’s a very effective plumping serum at a great price!
shop serums | The Ordinary . International Link . Bioderma . Bioderma (free) International shipping link

2 | Jade Rolling – this is the step I always seem to get the most questions about! People want to know if it actually works. In my experience, yes.
This is a quick massage for your face, that helps push excess fluid out of your skin. If you wake up a bit puffy in your cheeks of under your eyes, using a face roller will really help. It only takes about 60 seconds to roll over your face.
About 20 minutes after rolling , you’ll see your face start to de-puff. It’s especially nice to roll after applying a hyaluronic acid, for a 1+2 skincare combo! I have a full post how how I jade roll {here}.
shop face rollers | my exact jade roller . travel jade roller
3 | Eye Cream – smooth concealer starts with a great eye cream! The extra emollience from an eye cream, vs. face lotion only, makes a huge difference.
I very rarely say “this is the exact product you must use,” but I will say, the DHC eye cream is the only eye cream I’ve ever used that keeps both my concealer looking fresh and also doesn’t affect how my eyeshadow wears throughout the day. Full post on the dhc eye cream {here}.
shop eye cream | dhc skincare . dermstore . lookfantastic (International shipping) . amazon prime
4 | Face Cream – I feel like this step kind of goes without saying, but you never know! As I say in the video, I had a friend tell me that she put foundation on bare skin after she got out of the shower and she wanted to know why her foundation felt dry. I needed to sit down after hearing that, ha!
Adding a layer of hydration to your skin is key to it staying fresh looking and feeling throughout the day.
Both of my favorite face creams have a light texture and feel. I use the Jack Black during the day, because it has built in SPF 20 (no flashback issues, btw) and the Bioderma at night.
shop face cream | Bioderma (free shipping + international shipping) . Jack Black . Jack Black (international shipping)
1 | Primer – to prime, or not to prime. That is the question (I see a lot.)
I use the matte e.l.f. primer very sparingly only around my nose and eyebrows, where I tend to get shiny, during warmer weather.
The light diffusing primer, however, I could bathe in. Year round. It gives my skin a glow and evens out surface tones. In the video I use a primer that has now been discontinued and I’ve replaced it with the Milani Strobe primer which is an excellent product!
Why primer matters: adding a bit of illumination as a base allows you to wear less foundation and concealer. You’ll get more natural results even though you are using “more products.”
I also like to apply light diffusing on my neck and chest, so that it ties that area in with my face and makes the foundation look more natural.
Instead of having a super smooth and even looking face and then seeing surface tones and discoloration on my neck and chest (wear your sunblock there, ladies and gents).
shop primer | e.l.f. putty (e.l.f. cosmetics . ulta beauty) . milani
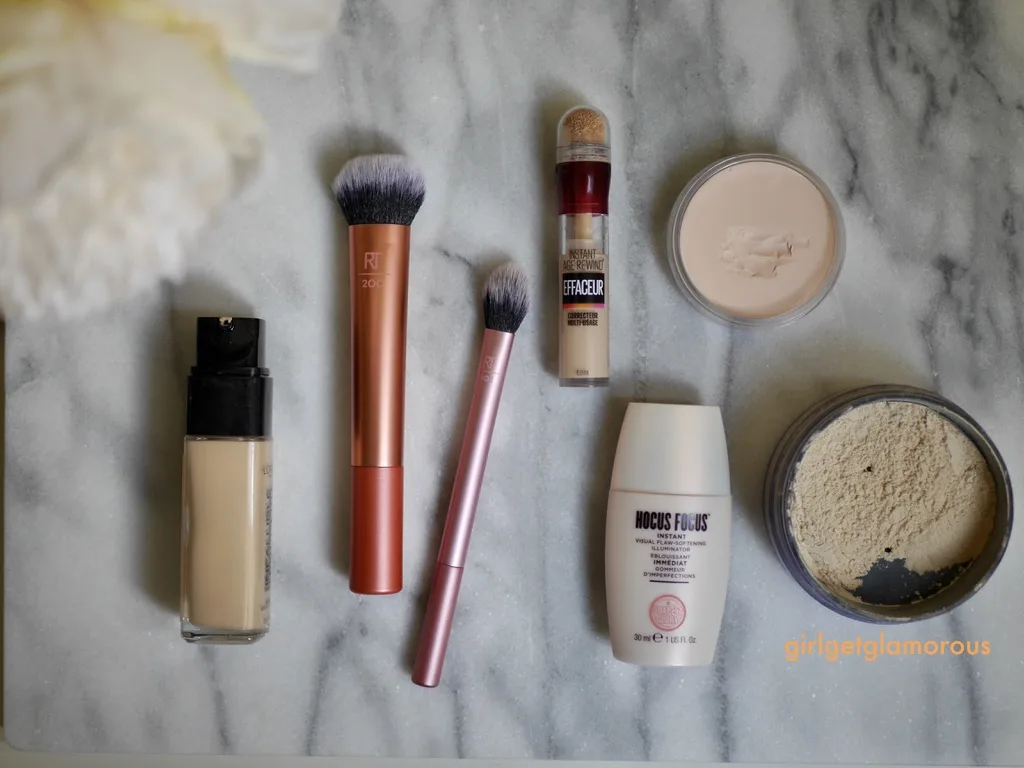
2 | Foundation – Let me tell you, I approached this foundation with a healthy dose of skepticism. I have rarely ever been able to find a drugstore foundation that didn’t make my skin itch and/or look super flat.
The new-ish L’oreal Infallible Fresh Wear foundation does not cause my skin to itch, stays in place 10+ hours, and has a satin finish that rivals high-end foundations. It can be worn sheer (one layer) or built up to medium/full coverage (2-3 layers, as seen in the video below).
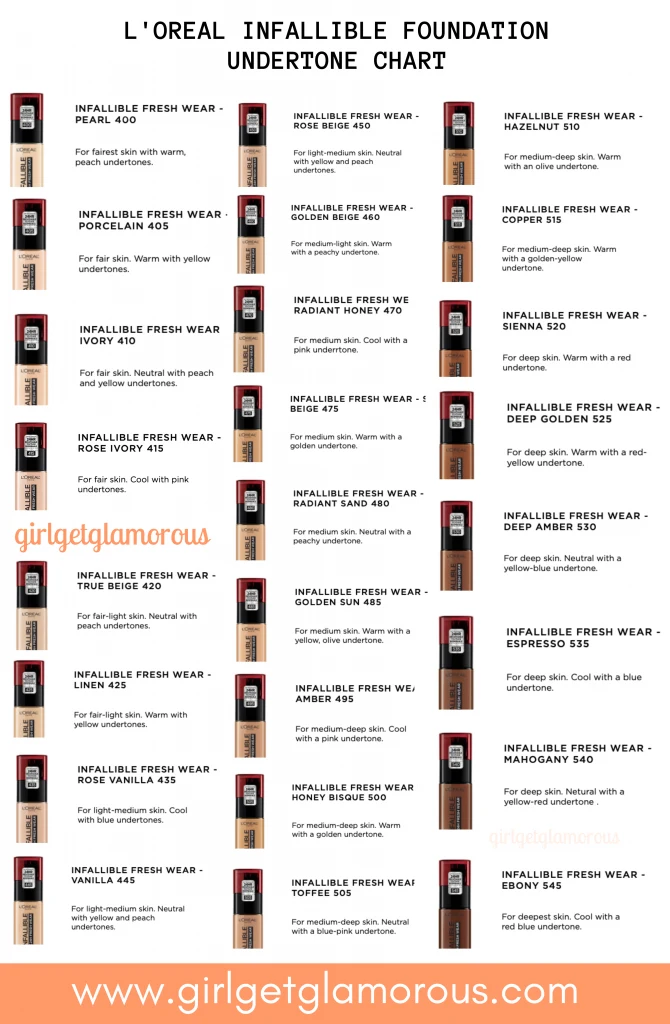
The only downside is that it was really hard to find my ideal shade (I’m wearing 445 in this photos and video – update: I wear shade 435 Rose Vanilla which actually has a more peachy undertone). I’m generally pretty good and fast at color matching, but without testers, a lot of the shades in my range looked exactly the same in the bottle. Thankfully, it’s a fairly affordable foundation, but yowzas. At least now, I love my color match.
Other than initial color matching, I truly love this foundation. It has a gorgeous finish and wears beautifully throughout the day! I find myself reaching for this foundation a lot.
Here is a chart I made to try and help undertone matching.
shop l’oreal infallible | ulta beauty . amazon prime
1 | Under Eye Brightener – I have heard from countless women that they have tried every concealer on the shelves. Nothing really worked to cover dark circles until they started color correcting before concealer.
Adding a little brightening and color correcting to dark circles makes all the difference in how my concealer looks.
A key thing with correcting products is to only apply them only where you have discoloration. For me, that’s the inner corner of my eyes and slightly underneath my eyes.
I love this Maybelline brightener for an affordable drugstore option, the only downside is that the sponge tip is huge, so the product gets way past the discolored areas.
I do wish Maybelline would do the traditional thin wand applicator with their Age Rewind formula, but until the Big Wigs at Maybelline start reading GirlGetGlamorous for my (in my opinion, excellent) opinions, in the meantime, I will continue to press my ring finger on the sponge top and then apply directly to my skin with the finger. I recommend watching the video for this step!
shop corrector | ulta beauty . amazon prime
2 | Concealer – When you were a kid, did you ever realize how much you’d love concealer as an adult? It’s such a game changing product.
The key with concealer on mature skin, beyond getting a great formula, is to only apply from the inner corner of your eye (most people skip this area) to the center of your pupil. At this point, you will blend outward, towards the outer edge of your eye, to get a brightening effect.
By not placing concealer directly on the outer edge of your eye, however, you avoid excess product sitting on top of and accentuating fine lines. It’s a really simple placement switch, but makes a big difference in the finished look of your concealer.
shop concealer | ulta beauty . amazon prime
1 | Setting Spray – if I had discovered setting spray in my early 20’s, a lot of my night-out photos would look very different, ha! Setting spray not only keeps makeup looking like it was just applied (no melting makeup photos), but can also reduce how much powder you need.
On mature skin, reducing the amount of powder is huge! I still like a little powder here and there to take down shine around my eyebrows and the side of my nose, but setting spray is the leg up we all needed in the world.
I love to use setting spray directly in my blender. I like my blender to be damp with water first, with all the excess water squished out into the sink and then an extra squeeze into towel, and then I let the blender sit out for 10-20 minutes.
Then, I do my two sprays of setting spray, squish that down into the sponge so that it’s not sitting on top, then ever-so-gently, bounce the sponge over the concealer for a flawless finish. I definitely recommend watching the video for this part, as the pressure is key, and it’s easier to show over the video, vs describe.
shop setting spray | covergirl . colourpop
2 | Powder – friend or foe? I know as I get older, powder can seem like more of an enemy than a friend, but it really doesn’t have to be that way!
I will say, the makeup technique of “baking”, where you apply large amounts of powder to set makeup, can be rough on mature or dry skin.
But a very tiny amount of powder, taken from the lid of the container, then lightly dusted over liquids, can help set the products beautifully, eliminate shine, and won’t make fine lines look deeper than they actually are.
The key with powders is to have the brush b a r e l y touch your skin. You’ll get the perfect amount of product deposited this way. Again, I think the video will be helpful to see this point.
shop powder | ulta beauty . amazon prime
1 | RT Foundation Brush – if you already wash your hands 1 billion times a day (hi, me!) or are time crunched when doing your makeup (hello again), a foundation brush will be your best friend.
This one gets the product dotted around your face quickly and buffs the product in beautifully.
I was honestly really blown away by the Real Techniques line. I bought the set listed below over the holidays and have been using all the brushes from it non-stop for the past three months.
shop foundation brush | ulta beauty
2 | RT Sponge – I’m pretty picky when it comes to sponges. I only use them to “finish” the look of my makeup, and this one does a great job! It doesn’t soak up too much product or make areas look patchy. You’ll see in the video, it really smoothes out the final look of my foundation.
shop sponges | ulta beauty . amazon prime
3 | RT Powder Setting Brush – the brush I didn’t know I needed, but now can not live without! I’ve only owned this setting brush since November and already it’s traveled with me to Amsterdam and the east coast twice.
If you get one new brush in 2020, make it this setting brush. It’s a must have.
The size is perfect for applying powder under the eyes and can also do double and triple duty as a blush brush and highlighting brush. It’s very soft and feels surprisingly well made, especially amazing considering the $4 price tag!
shop setting brush | ulta beauty . amazon prime
4 | Real Techniques Brush Set (contains 5 brushes, including all listed above) – do I need to say more about these brushes, or do we get it? Ha! I feel like we get it.
This set is an amazing deal, it includes all three tools from above, as well as a crease brush (that could also be used as a concealer brush) and a blush brush (that can also be used as a bronzer brush or all-over powder brush). Well, I didn’t need to say more, but I have said more.
shop brush value set| ulta beauty . amazon prime
READ MORE
SOCIAL LINKS
Thank you for reading and being a part of the blog!


LEAVE A COMMENT