
 You might also like
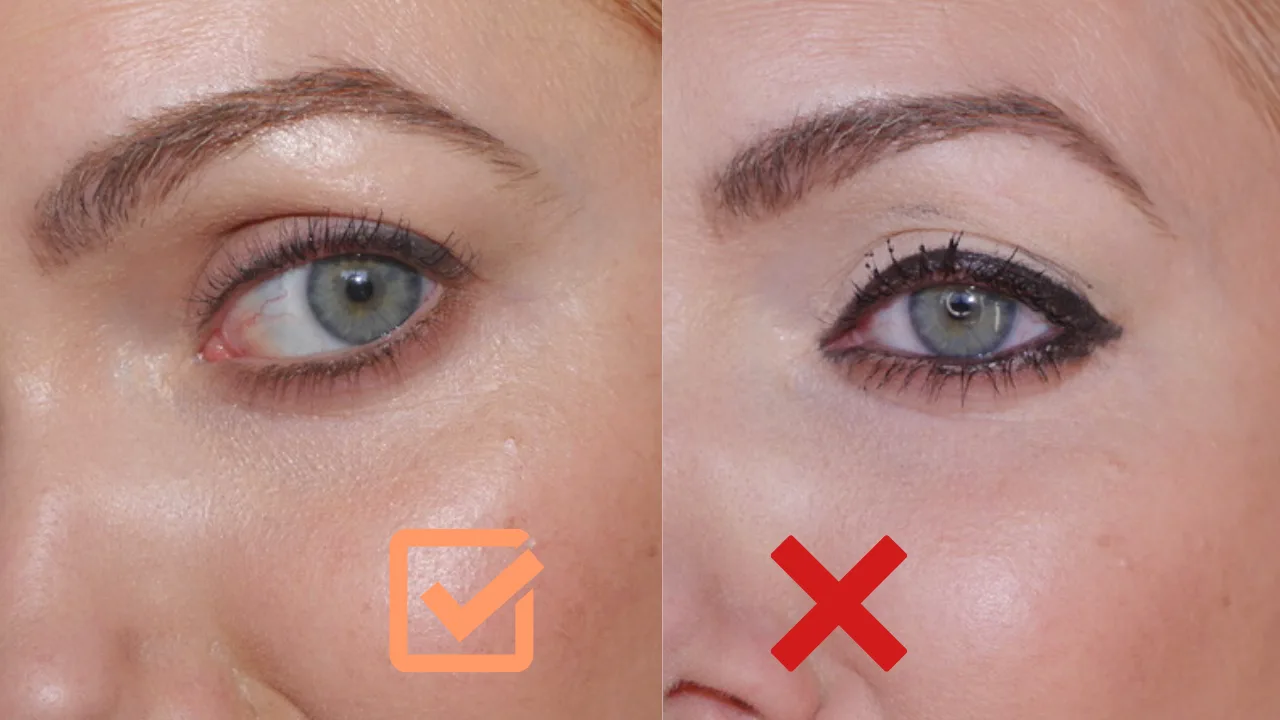 Makeup
Makeup
Makeup 


Welcome to the GirlGetGlamorous blog!
Subscribe for monthly emails of the latest
blog posts and videos, sent right to your inbox.
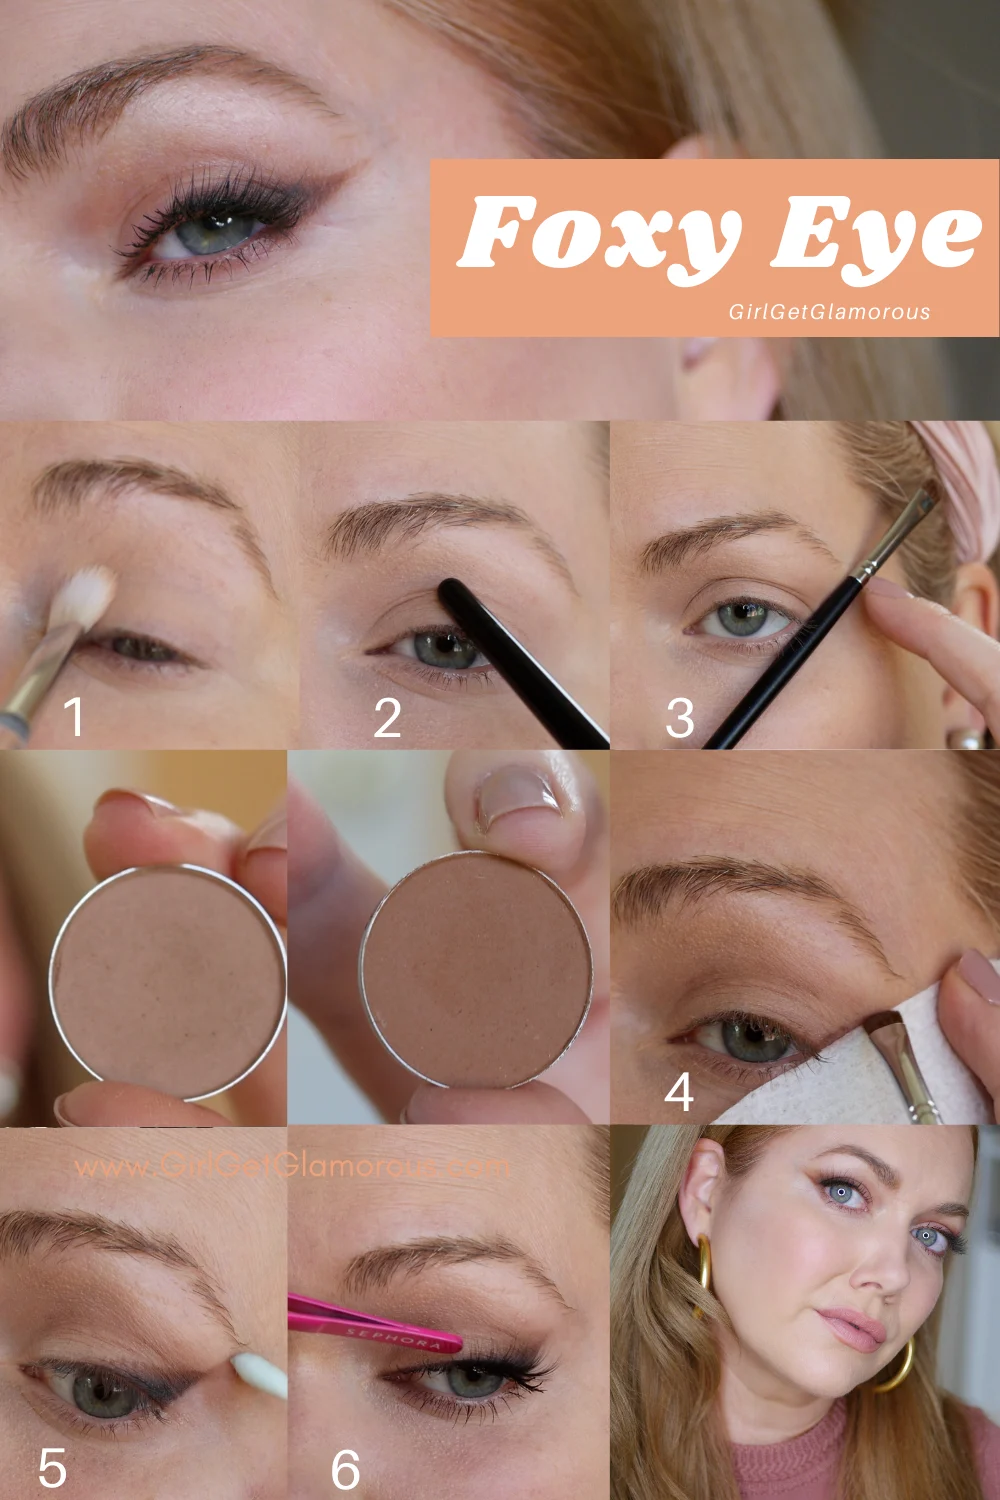
This Foxy Eye Makeup look is one of the most flattering eye looks I have ever seen! It has taken over the internet and I can see why: it looks beautiful on everyone. I can’t wait for you to try it!
After wearing this look for a few weeks, I wanted to share the tips and tricks that made it easier for me.
Because this look uses mostly soft finish powders, I think it’s an especially flattering look on mature skin and eyes.
The best part is that you probably have all these shades at home already, so pull out all your eyeshadows and brushes and let’s try this!
There are timestamps on youtube in the video description box, so that you can rewatch later and jump to certain parts as you try the look yourself.
I recommend watching the video in 1080 HD. Hit the button at the bottom of the video that looks like a little sun, it’s between the “CC” and the word “YouTube.” Then click “quality – 1080p60” to view the video in high definition.
If you could please take a second to give this video a thumbs up, I would really appreciate that, thank you!
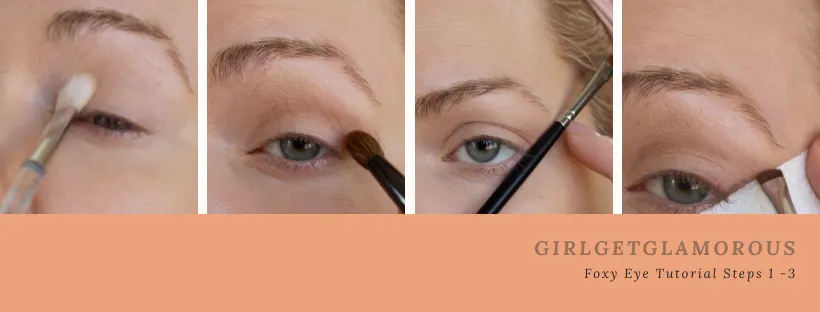
F O X Y E Y E T U T O R I A L
Step 1 | Prep your eye with an eyeshadow primer and then with a fluffy lid brush, dust over your whole lid up to brow with a shade that matches your skin tone.
primer | fluffy brush | skin tone eye shadow
Step 2 | Create the look of a large eye by adding depth at the crease. Start with a light taupe shade, applied with a fluffy crease brush and wind shield wiper motion.
Then add even more depth with a brown shadow with an orange undertone and a smaller, domed crease brush, applied with the same motion.
taupe shadow | fluffy brush | brown orange shadow | domed crease brush | magnetic case
Step 3 | Start building out the shape of the foxy liner by lining up a tissue paper under your lower lash line, following the direction of your lower lash line going up towards your eye brows.
TIP | The tissue paper helps get the shape correct and also creates a smooth line. This is one of my biggest tips with this look!
I can draw a cat eye or winged liner freehand, but when I tried the foxy liner freehand, it just didn’t look as good as it does when I use the tissue.
I like to use a smudge brush or precise pencil brush to start this shape and a deeper taupe eye shadow shade than my original shadows.
Once you have you base line for how far out and how “big” your want to your foxy liner to be, start to pull it back down to create a triangle shape. It will start to look like a shark’s fin or a shark tooth.
You are pulling the shadow back down and over the outer corner of the lid.
TIP | It helps to look down into the mirror as you create this elongated triangle shape.
If this part seems unclear, the video goes into more detail.
smudge brush | deep taupe shadow | refill shadow
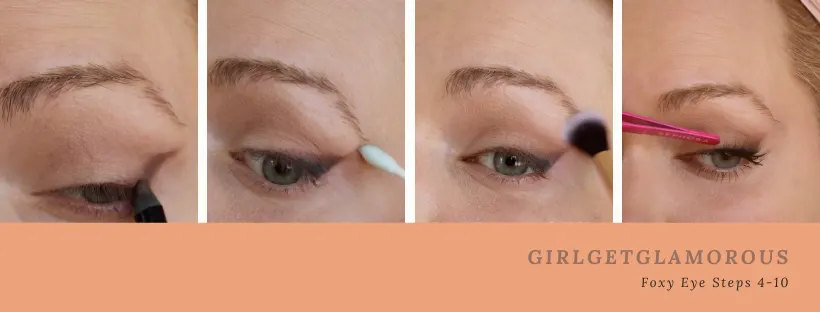
Step 4 | Taupe Liner. This part can be done before or after the foxy powder liner. I show it both ways in the video.
Using a gel liner, which is softer on my eyes, I draw the liner as close as possible to my lash line. I don’t go past where the blue portion of my eye begins. At the outer corner, I will flick the shape up to create a small “V.”
Step 5 | Using a charcoal shade and a flat liner brush, I go over the gel liner to set it in place and deepen the color at my lash line.
I line the tissue paper back up at the lower lash line and add this deeper color to only the bottom part of the foxy triangle. This adds a really nice depth to the look.
charcoal shadow | flat liner brush
Step 6 | If needed, add a little more of the orangey-brown eye shadow into your crease to balance the foxy triangle.
orange-brown shadow | domed crease brush
Step 7 | If your eyes are close set, you can skip this step, but if they are average or wide set, try this: using the deep taupe eyeshadow and your smudge or liner brush, press shadow into the upper lash line, from where the liner stopped, to the inner corner.
Going in a sideways “V” shape, press a little liner into the bottom inner corner as well, only about a 1/4 inch.
This elongates the shape of the eye to really give it the foxy eye shape.
deep taupe shadow | liner brush
Step 8 | This is another key step that has made a big difference for me. Grab a cotton swab and your face moisturizer. This will work even if your foundation and concealer are already on.
TIP | Saturate the swab with the moisturizer so that you don’t feel any cotton, only moisturizer. Then gently use it to clean up the bottom edge of your liner, going towards your brow bone.
If you need to clean up any shadow or neaten up the liner at the inner corner, you can use this q-tip trick as well.
pointed cotton swabs | my favorite moisturizer
Step 9 | This is SO IMPORTANT! Take a clean, fluffy brush. This brush will have no product on it, it’s just for blending. Start to blend in circles over the crease, up and out to the outer brow bone.
TIP | This last blend softens the whole look and gives such a *dreamy* finish.
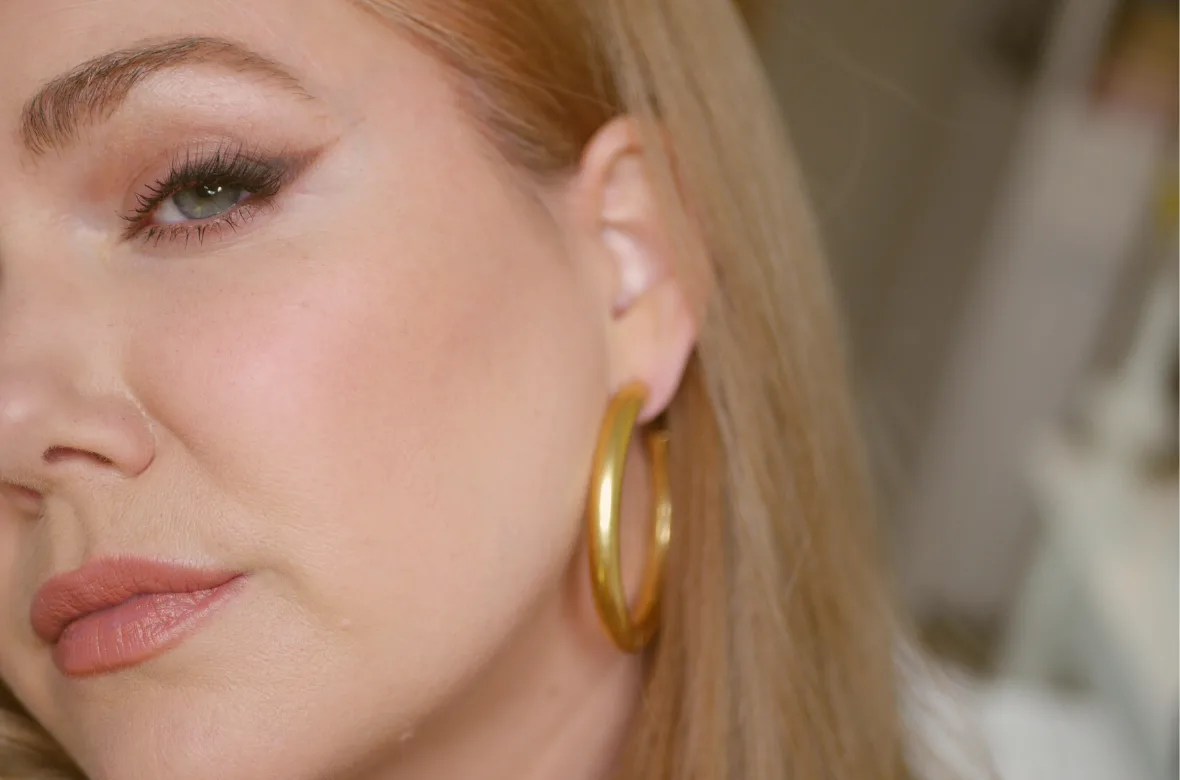
Step 10 | Mascara + Lashes. What I love about this look is how much you can personalize it with the shades you use, how dramatic or natural you make the shape, and by adding lashes or keeping it mascara only.
If you do choose false lashes, I prefer to trim mine shorter so that the bulk of the lash is concentrated back towards the foxy liner.
Make sure the longest part of the lashes is at your outer edge. It gives that extra lift!
my favorite lashes | lash glue | mascara | lash curler
__
T I M I N G | As I’ve been practicing this look, it gets faster every time. It definitely took some practice for me at first, to get the shape I wanted and the shades that worked best for me.
But with every try it got faster and now takes me less than 5 minutes total, even with lashes.
__
Let me know how it goes for you if you try this look! It took me about four tries before I was really happy with it and now it is my favorite, go-to eye makeup routine.
Shop The Look |

PIN NOW | READ LATER
____
Shop My Foxy Eye Favorites |
____
Similar Posts |
Social Links |
Facebook (I use this a lot for flash sale links) | Instagram @girlgetglamorous | Instagram hair extensions @girlgetglamorousHAIR | Pinterest (join over 1.6 million+ other monthly views!) | Join 60,000 + other readers and subscribe to the (free!) mailing list to get the latest blog posts straight to your inbox.
Thank you for reading and being a part of the blog!


LEAVE A COMMENT
I love your looks! They are so similar to my own as well. Which is a HUGE HELP! Of course, haha. I have seen more and more this trend of the “Foxy eye” becoming a bigger and more not just on social media but out and about I see it in other woman and young girls. Some look AWESOME and some could def use help or a “tutorial video” or reading something like this haha just saying. I have not tried the trend but am a huge fan of wearing all sorts of size and false lash tyoes even daytime appropriate false eyelashes and I live playing up my eyes according to the occasion and time of day and season, as well as my lips. I have not tried the “Foxy Eye” yet but am definitely looking into using what you recommend here and based on my personal skin colors and using false lashes (I have magnetic lashes like three different kits and liners and inwash and reuse those as much as I can get out of them lol. I love the magnetic lashes apposed to the glue on ones. My sensitive skin seems to take to the magnetic lashes better and the glue irritates my eyes and skin for whatever reason!)But anyways, great information gear I afesdy saved it and will be returning to practice my own “Foxy Eye” and I live the tissue idea! I use Q-Tios w micellar cleansing water on it but the moisturizer seems like a wicked good idea too and the blending w anbig fluffy (no product on it) brush to get a more natural look with blending. I also appreciate the smaller false eyelashes “tip” to keep the focus on the “v” of the Foxy Eye lol and not go to big and have it get lost. So lots of great tips and tricks and easy explained and great way of making it a non stressful and chill and always keep it fun when trying out new looks and “playing around with makeup”. So thank you! xoxo
Most sincerely,
“Meag”
I have small eyes and I was looking for the eye makeup tips and got helpful information here. I am going to be fine with the lashes I think. I just ordered the vegan eyelashes extension (https://www.lesamarie.com/collections/all) and I felt I will not be able to apply it, but this post has given me good information on that. Now I can use a little eye makeup as well. The post is very helpful. Thanks.