
 You might also like
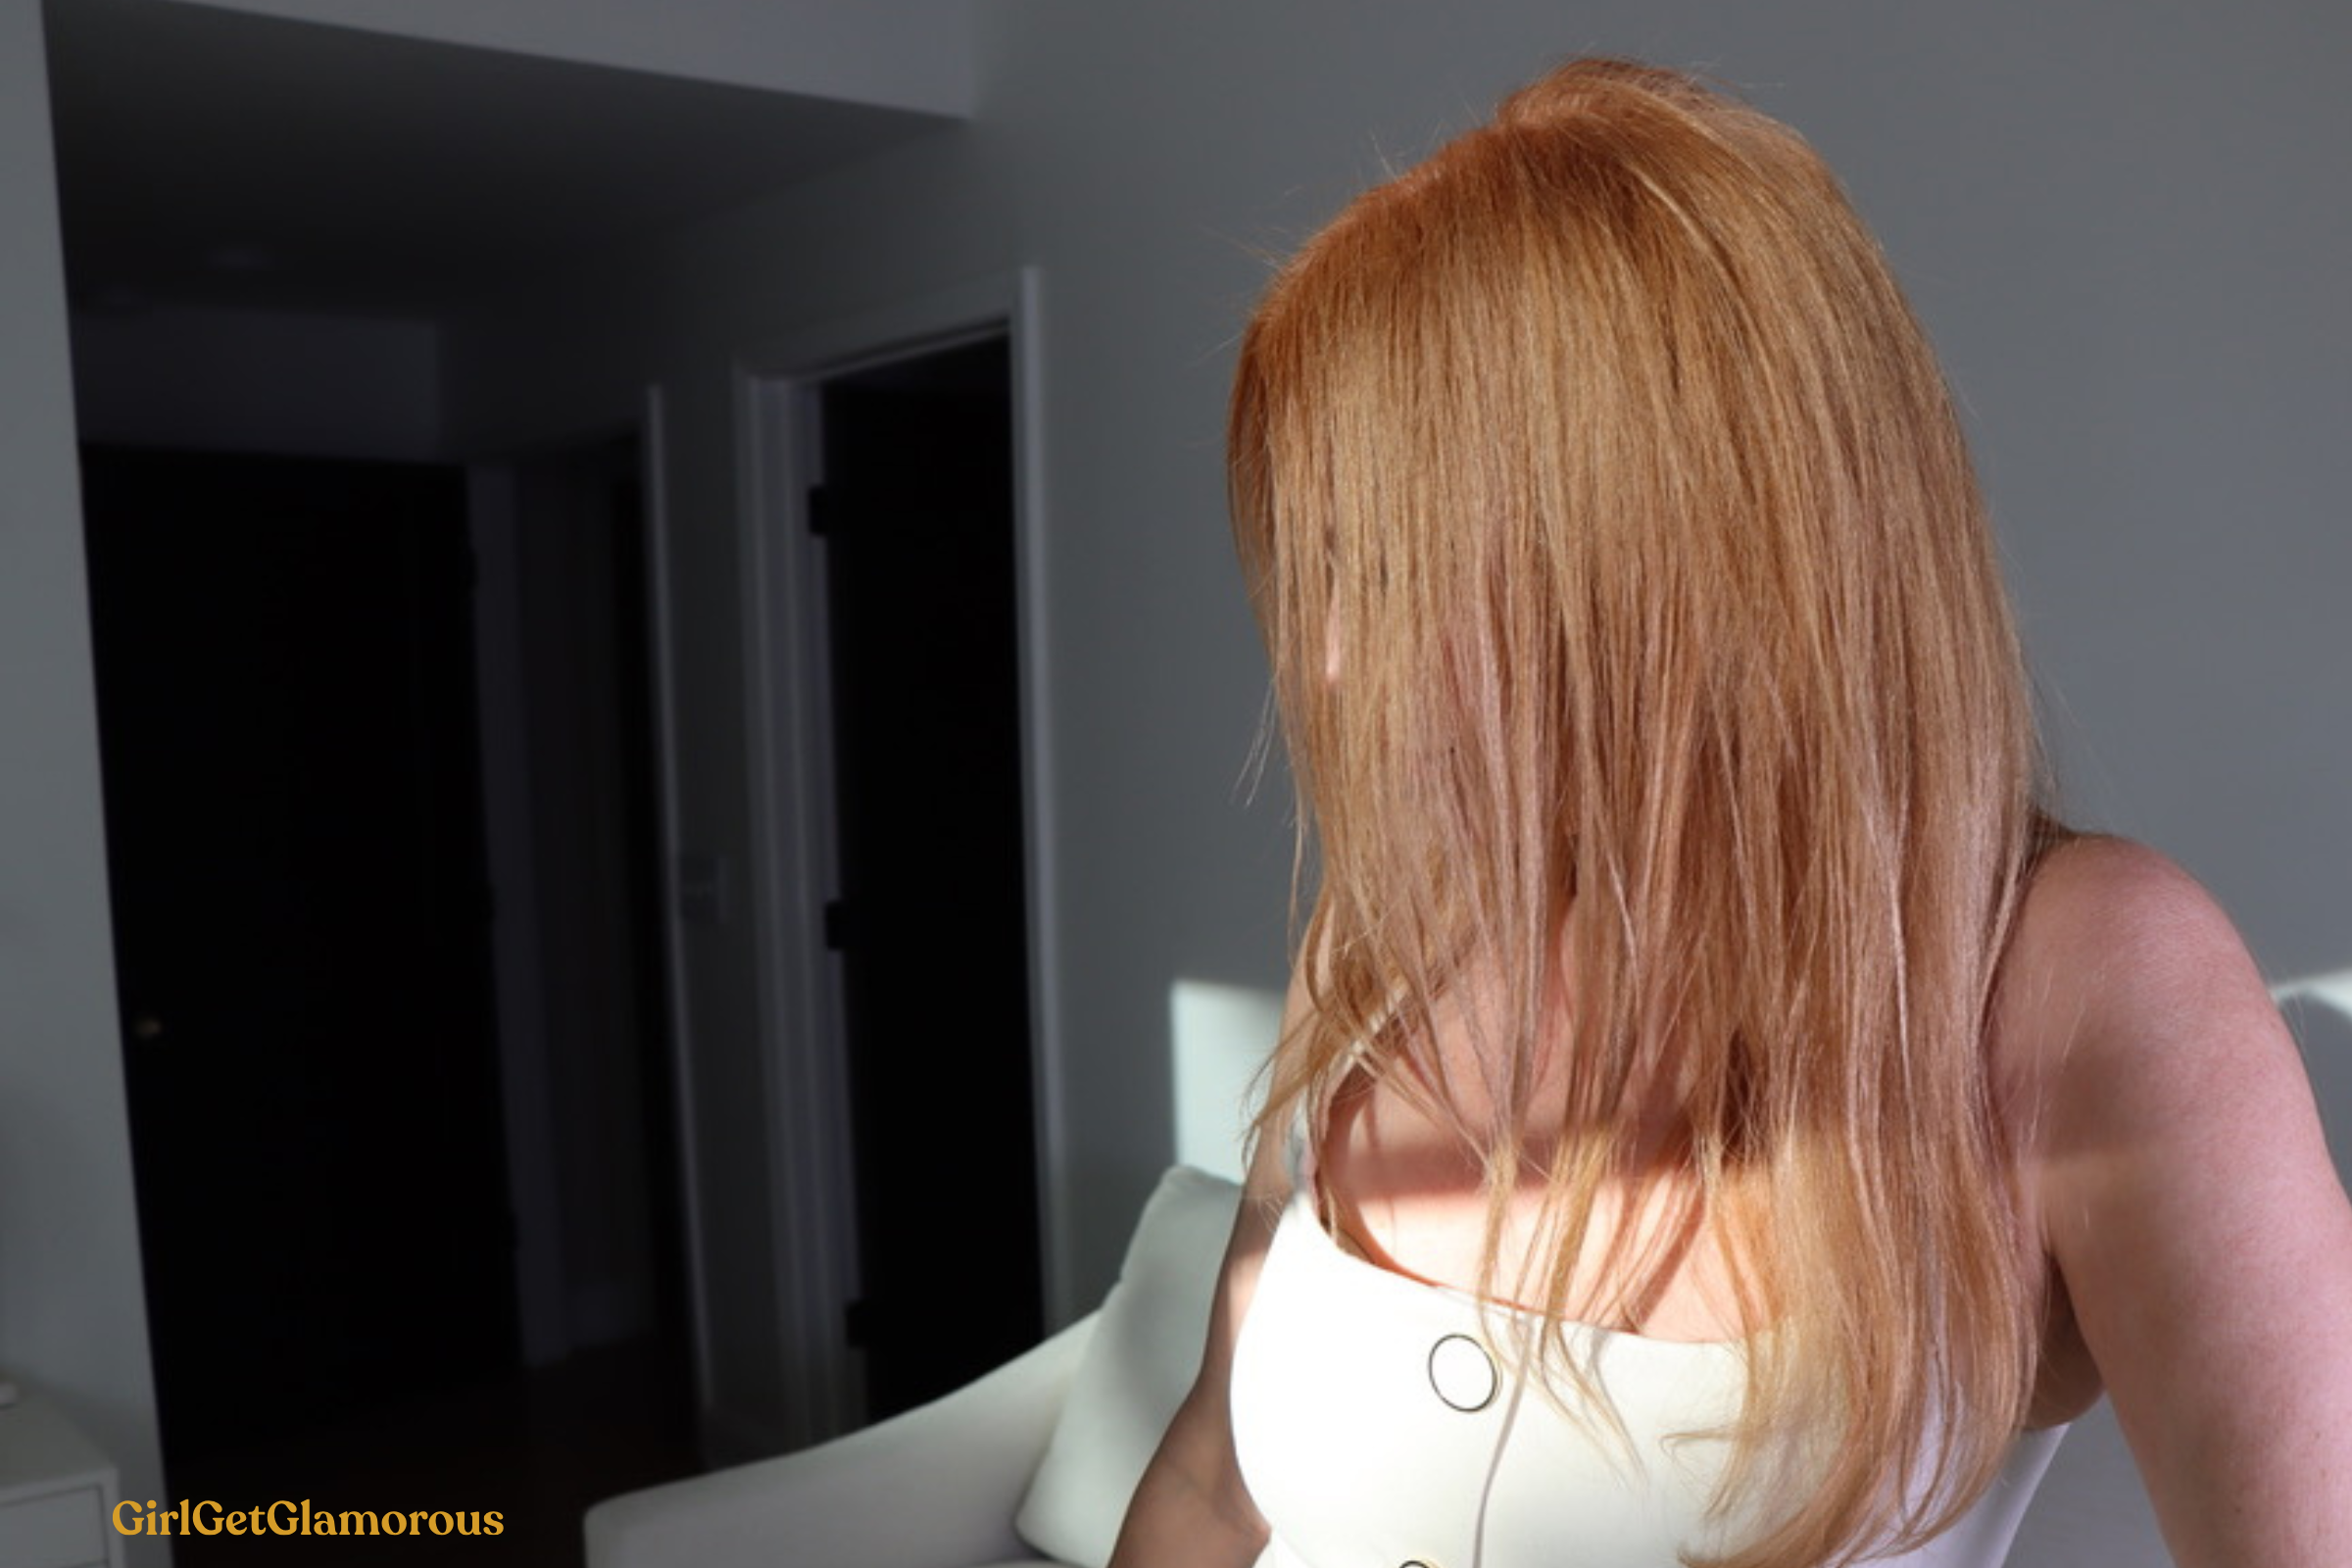 Hair
Hair
Hair
Hair 


Welcome to the GirlGetGlamorous blog!
Subscribe for monthly emails of the latest
blog posts and videos, sent right to your inbox.
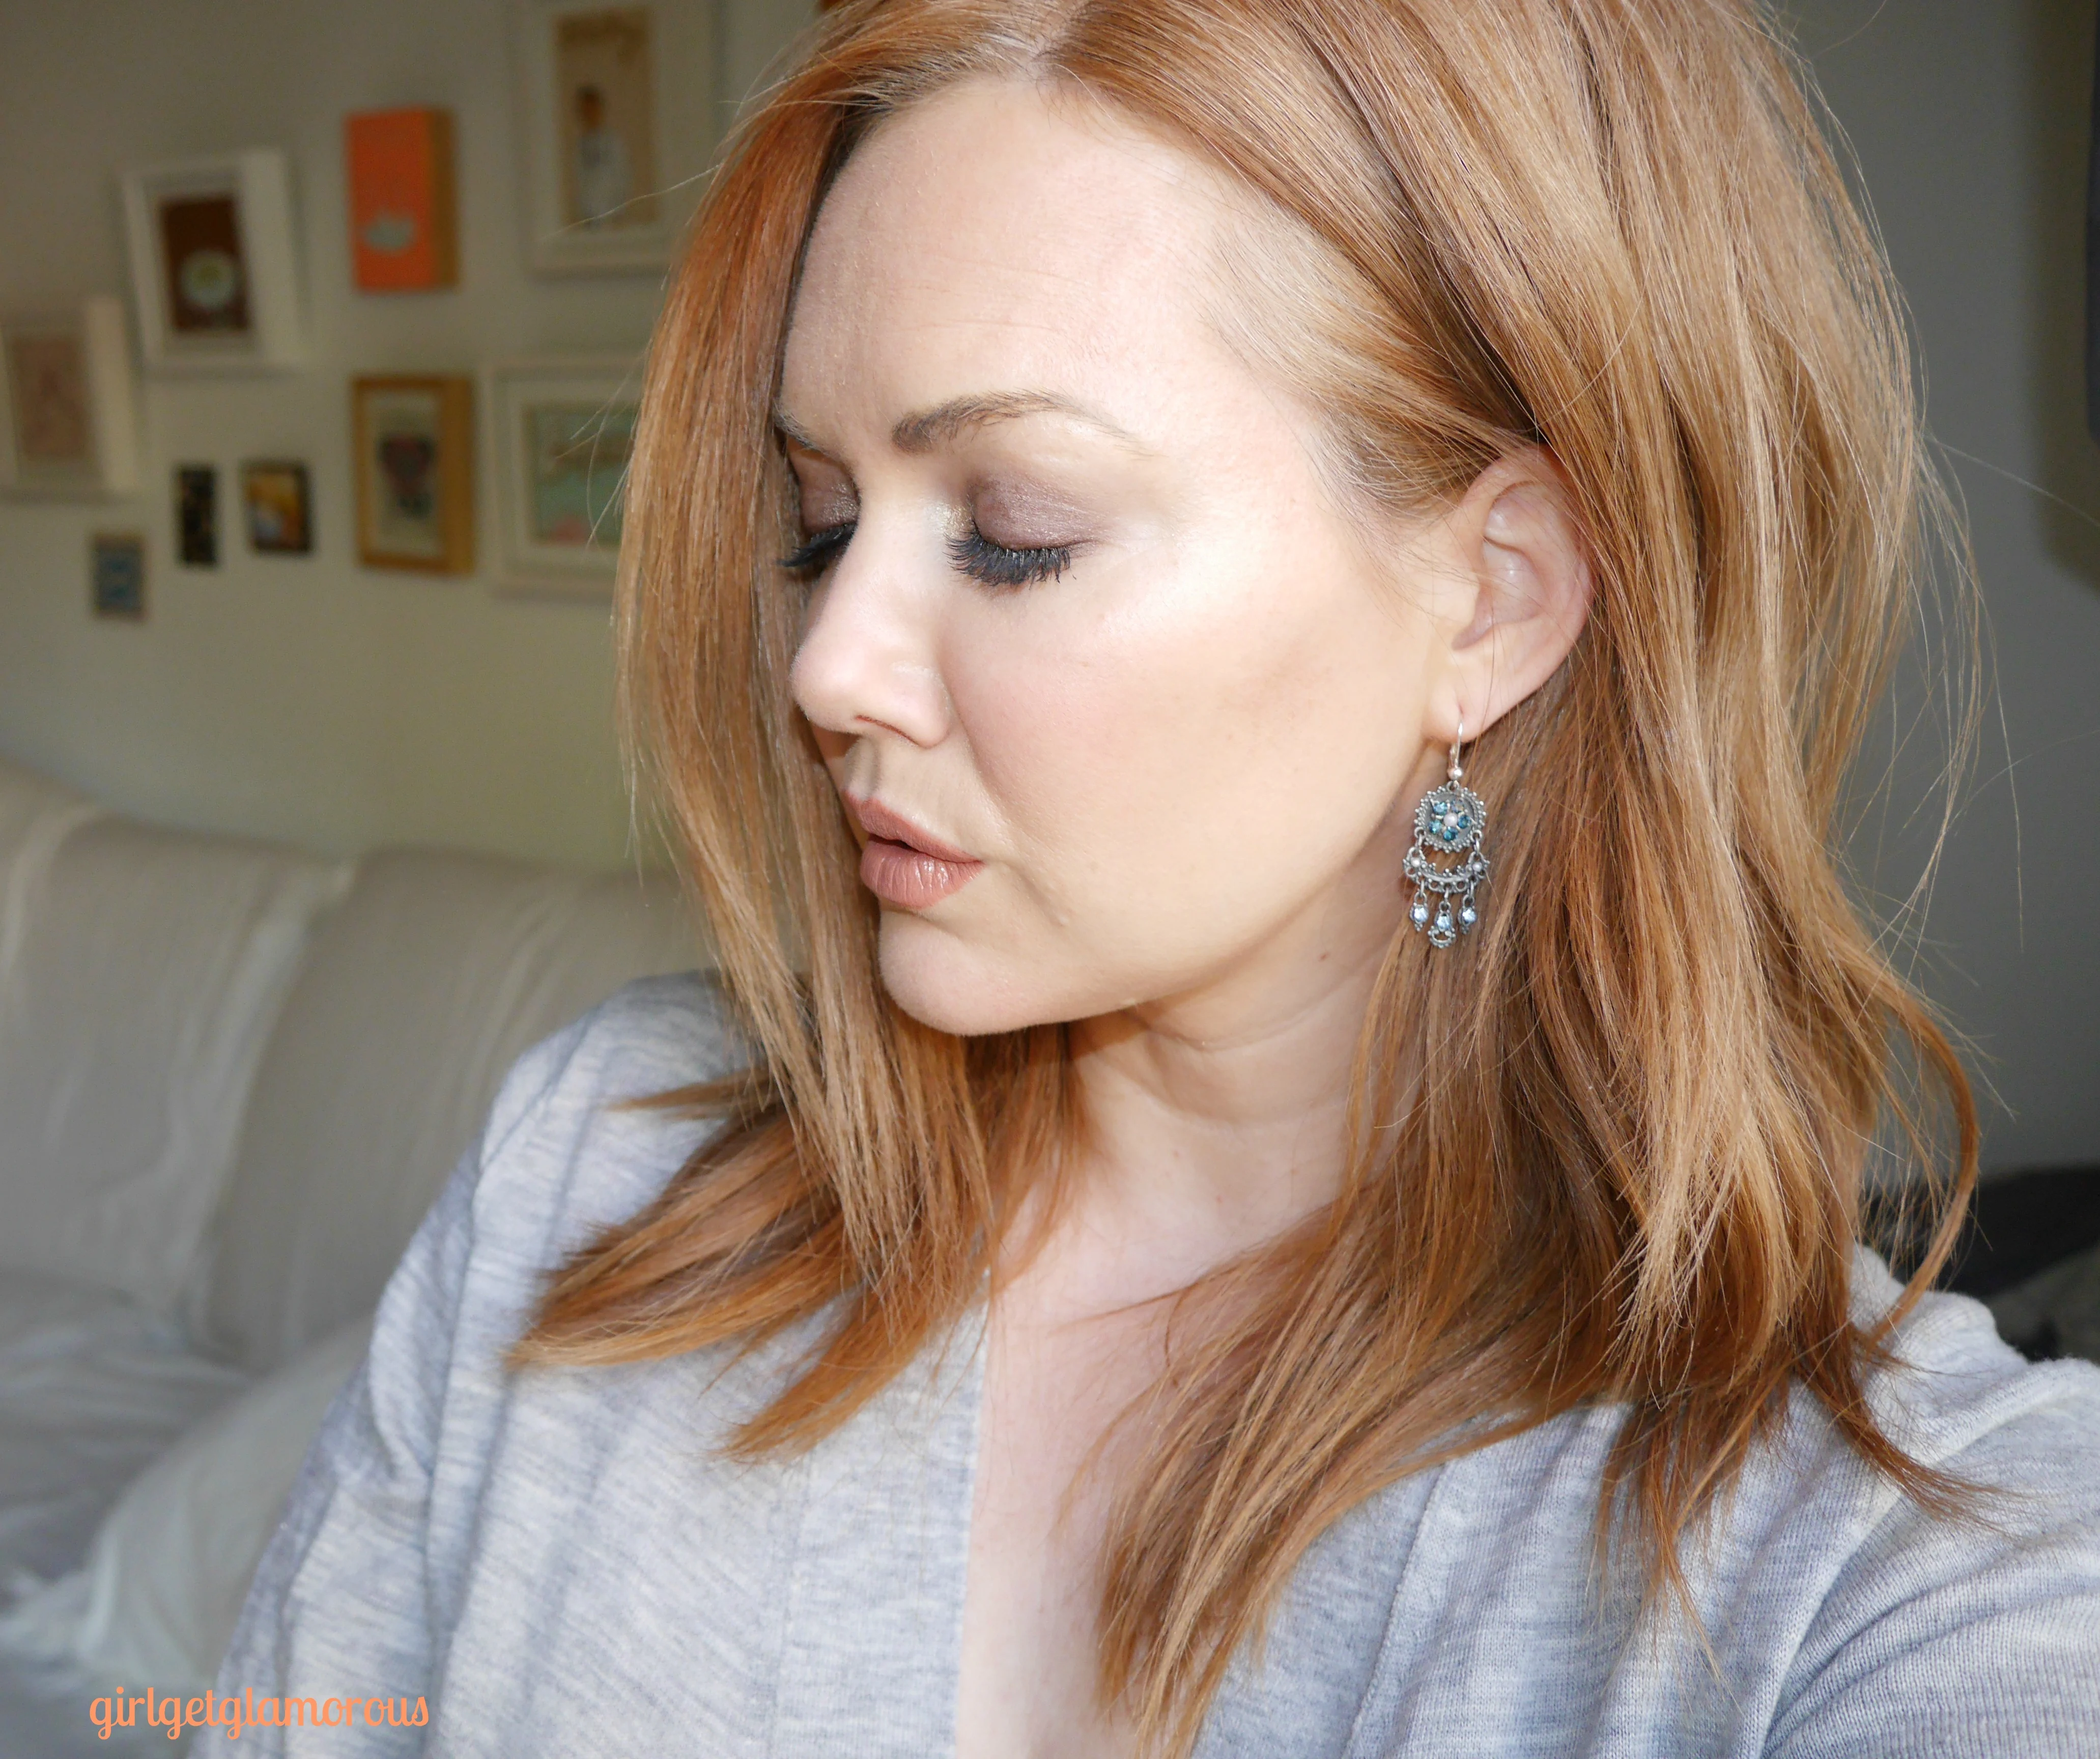
Hello, Redhead friends! I realized it was time to do an updated step-by-step post on how I do my hair color at home. I have switched from boxed color to a Wella Color Charm formula.
If you are new to the blog, hello and glad to have you here. I am referencing this post for L’oreal and this post for Wella. If you are a part of the blog normally, welcome back!
The new formula involves measuring and mixing your own developer and color, whereas store boxed color has pre-measured amounts of color and developer that comes right in the bottle. Because of this, the Wella formula can feel a little bit scarier the first time, but it will get easier each time!
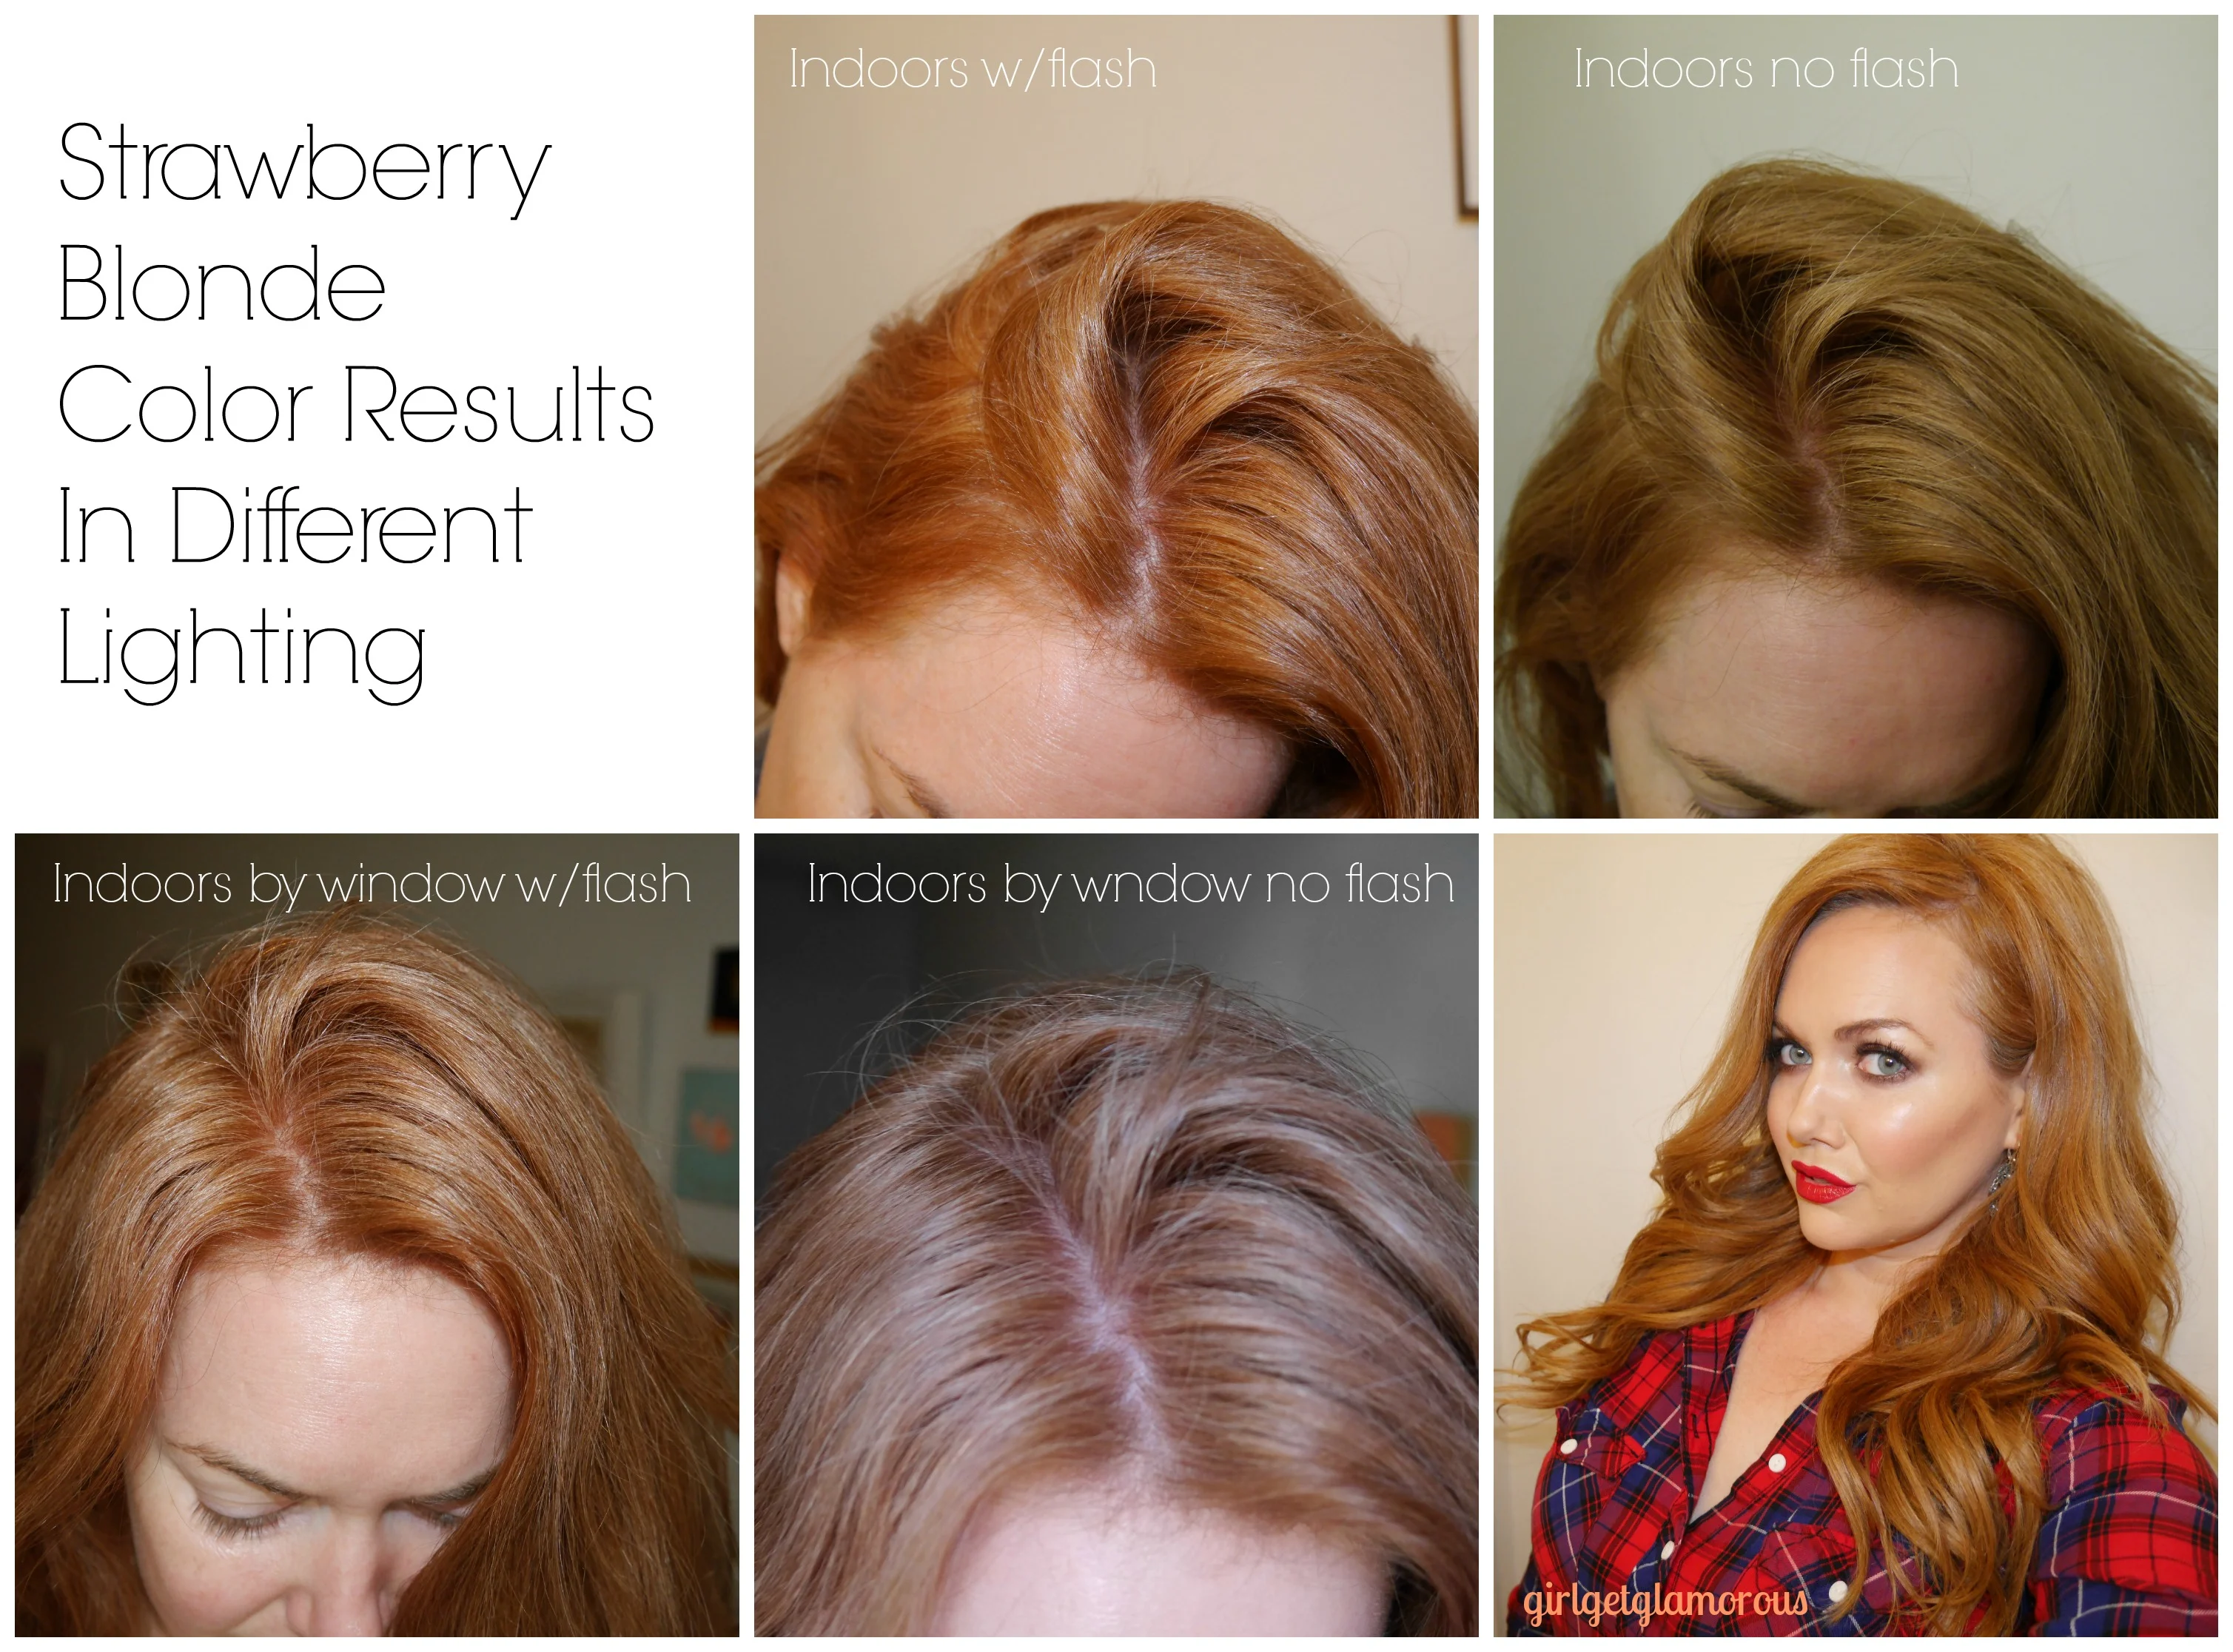
One question that I keep getting is “My hair color is ‘fill-in-the-blank’ Will I get the same results as you?”
So many factors go into how your color will turn out! Your natural hair color and any dye you have on your hair will change the results a bit.
If you start out as a deep brunette, you will probably get different (more subtle) results than me. My hair is 95% grey now so it’s very light.
Also, if you have any old color or highlights on your hair, you might get different results. With highlights and blonde hair, take caution and start out with less of the red dye in the mix.
While I wish I could tell everyone that they’ll get the exact color they want the first try, it’s more realistic that you’ll probably have to tweak and personalize your formula once or twice before you really feel like the color is a perfect fit.
I say all this, just know when you start out that it might take a few tries to get the color that looks perfect for you. But this formula is really easy to tweak, so let’s get to it!
HIT PLAY OR CLICK HERE TO WATCH ON YOUTUBE
SHOP THE HAIR COLOR FORMULA

These are my affiliate links. I do make a small commission when you use them to order, at no additional cost to you. I really appreciate when you use them when you purchase or repurchase as they help support the blog and allow me to create new posts for you!
SHOP THE POST
Step 1 | Oil – add a quarter size amount of oil to the bottom inch of your hair. This helps makes sure that your drier ends don’t pick up too much dye.
Step 2 | Gloves – put on plastic gloves (keep an extra set handy for later.) I like to leave the oil on my hands and put the gloves on so that my hands are soft after also.
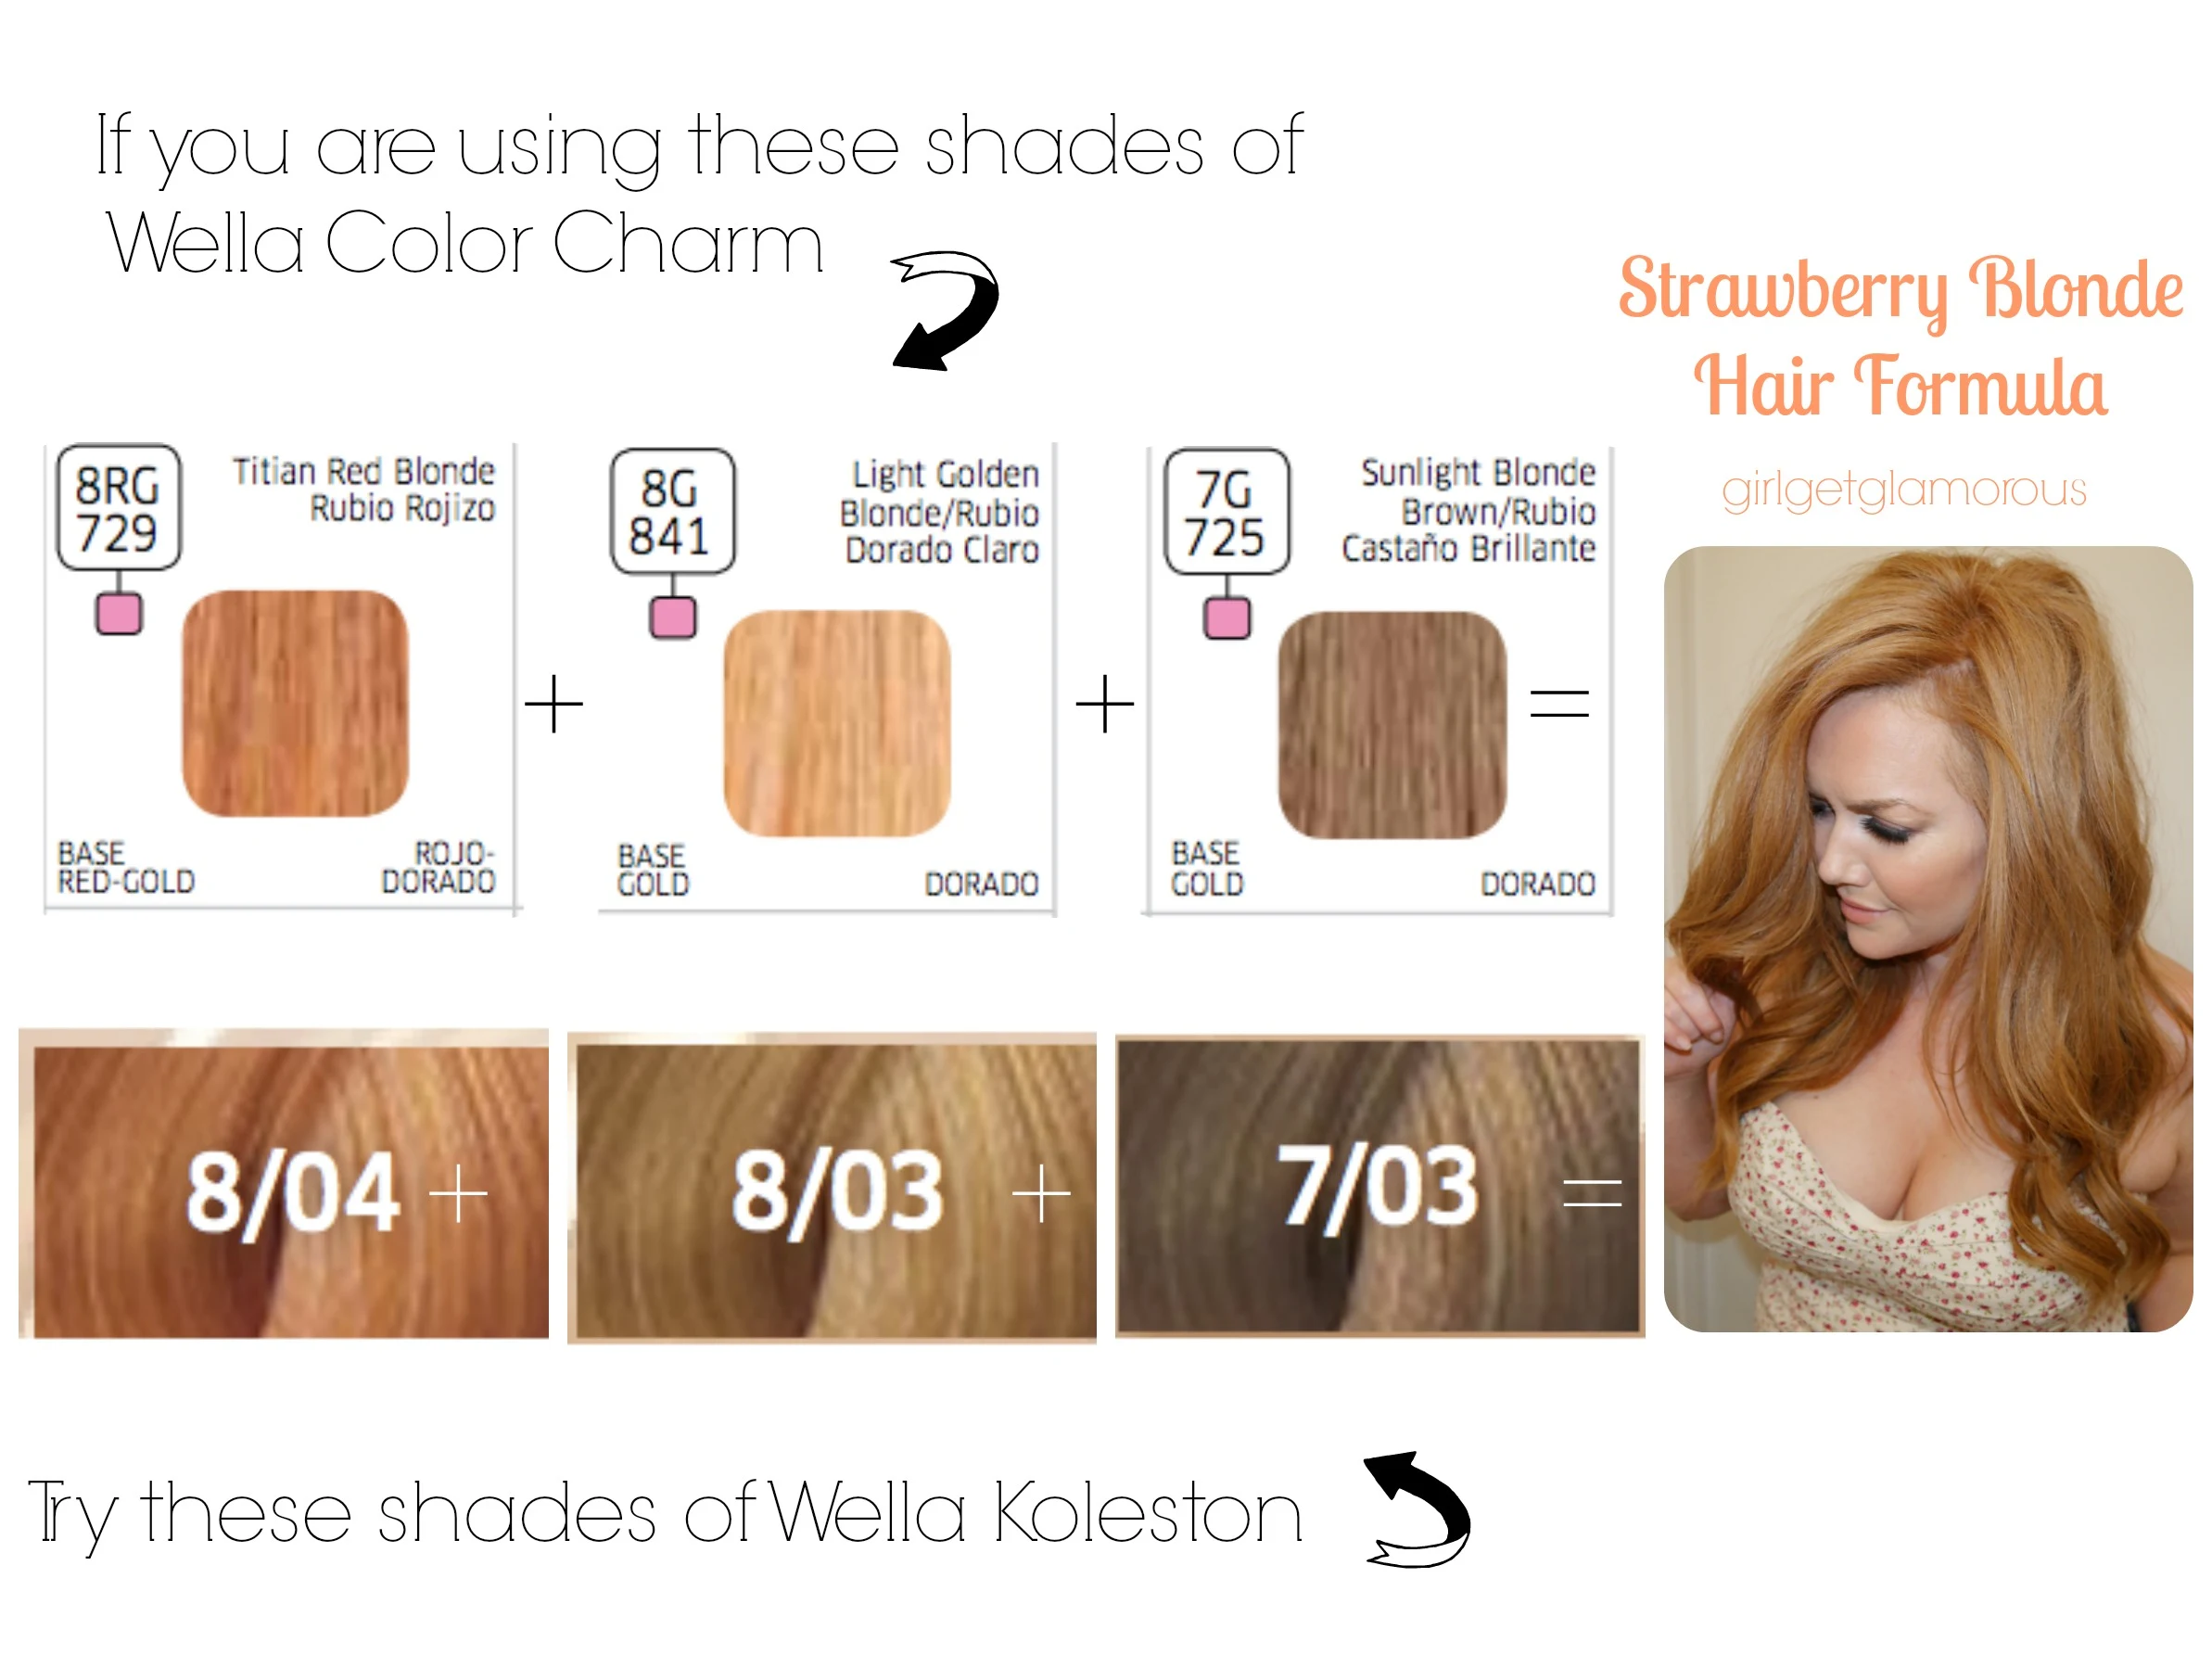
Step 3 | The Formula – I use Wella Color Charm gel colors. I find that their gel formula covers greys better than the Color Charm liquid color.
My formula consists of:
Step 4 | Mixing – In a large color mixing bottle, add your color, then the appropriate amount of developer.
With a gloved finger, cover the opening of the bottle and shake the ingredients together. They start out looking like candy corn, but then blend nicely.
Step 5 | Begin Coloring- I like to start coloring around my face and hairline. I take a hair color brush and spread the dye from the scalp up to the end of the regrowth. If it’s your first time coloring, go from your scalp to the ends of your hair.
Step 6 | With the tip of the coloring bottle, I part my hair down the middle and apply color in lines, going back and forth between the left and right side of my head. I use the brush to distribute each line of dye. I find that using the brush instead of my fingers to blend the dye helps cover my grey hair better.
Step 7 | The Back – This part can get tricky. With the tip of the coloring bottle, I divide the hair in thin horizontal layers and apply color. I find it hard to get the brush back there to distribute the color, so I use my fingers to blend the color all around by massaging it at the back of my head.
Step 8 | Timing – Move quickly applying the color if you can! I leave the color on my roots for 30 minutes, then apply the rest of the color to the ends of my hair for the last ten minutes (that’s when you’ll need that second pair of disposable gloves.)
If you DON’T have any grey hair, you’ll probably only need 20 minutes on your roots and 10 minutes for the ends, for 30 minutes total processing time. But if you DO have grey hair, you’ll want to do 30 minutes roots and 10 minutes ends, for 40 minutes of total processing time.
Step 9 | Shower – In the shower, rub the dye out of your hair from the roots to the ends. Once the majority of the dye is out, lift the hair in horizontal layers and really make sure all the dye rinses out.
Then, shampoo with a color safe shampoo once or twice until the water runs clear and then deep condition. I use medium temperature water the whole time.
Related Post | Best Shampoo for Color Treated Hair


I hate to say trouble shooting right after I finish saying how to get the color, but I also want this post to be as helpful as possible. Which requires me being realistic that there might be a few things that come up.
1 | If your color comes out a bit too red, read this post.
2 | Tweaking your formula. If you want your color to be more red, then add more of the Titian Red Blonde. If you want it to me more of a blonde Strawberry Blonde shade, then add less of the Titian shade.
3 | Blonde hair + Highlighted hair. Started with only 1/4 a tube or 1/2 a tube of the Titian mixed with a full tube of Golden Blonde to make sure that your hair doesn’t turn pink. Then, each time that you recolor your hair, add a bit more of the Titian shade to the mix.
I started my own line of clip in hair extensions. They are amazing. I know I am biased, but I made them the best. I have two shades for strawberry blondes that are so pretty.
You can check them out at www.girlgetglamorousHAIR.com and on instagram @girlgetglamorousHAIR or by clicking the button below.
READ MORE
SOCIAL LINKS
Thank you for reading and being a part of the blog! – Molly


LEAVE A COMMENT
Hello…I tried your formula and the color is perfect. Question…in your older master post it says you used 20 developer for roots and 10 for ends…but in this one you just used 20. What’s the difference?
Thank you so much for this tutorial! I got the perfect strawberry blonde. I used the exact products you listed, minus the 7G because I didn’t need it based on your guidance. I don’t have any greys. I have naturally warm dark blonde hair, and I had blonde highlights from a year ago tha. I have long, extremely thick and curly hair so I was really glad that your recipe made plenty of dye for my whole head. Since it was my first time colouring it, I started at the roots and coloured all the way down to the ends. Because my hair is so thick and wild, I found it too difficult to use the brush on my lengths (I did find it very helpful for the roots and the little hairs around my face) so I just made sure to really saturated them and worked the dye in with my gloved hands.
ordered all the items you listed and was prepping to do my hair soon. I noticed that these are all permanent color, is it okay to use over not gray hair? Ty for any assistance!
Hi Kate, yes absolutely! Permanent color can be used on grey or hair with pigment. Everyone will want to tweak the amounts of each color to their personal preference though. I hope it comes out great!
– Molly
I’ve been reading your blog all day and getting myself pumped up to do this tomorrow! “I think I can…I think I can…” This little engine is going for it! Wish me luck!! Girl Power!
I am going from a medium golden blond and I am going to try your strawberry blond formula. Do I still put it on the roots for 20 min and then the ends for 10 min or is that just for re-color? Should I just go roots to tip for 30?
Thank you. I accidently achieved strawberry blonde by using a hilift gold on dyed brown hair. I love it so much, was curious of what formula to create strawberry blonde when I need a root touch up. Thank you again.
I just tried this formula at home and it came out like a mousey blonde color. Hardly any red. The color I started out with was a highlighted strawberry blonde. More blonde than strawberry. How can I re-do it soon to get the red in there? Can I just go in with all titan red blonde or go in with half light golden and half Titan the next day?
Just followed your steps! Step by step, on my (dyed) platinum hair! And the color is absolutely beautiful! Thank you xxoo
Hi, I just wanted to thank you for posting this! It was so lovely of you and so helpful to those of us who have no clue how to do this at home. You’re hair is beautiful. 🙂
Thanks so much!
Best wishes,
Kim
What color/brand of brush to you wear with your bright red lips?
Thank you, thank you for posting step by step! So easy to follow. I am a natural redhead leaning towards strawberry blonde and now with gray roots. One never knows what is going to happen when you try something new. Especially coloring hair. I followed your formula down to the oz and minute and I am sooooooo happy with my hair. Gone are the days of paying $125 every 6-7 weeks! Thank you again!!!
My hair used to be strawberry blonde naturally n then I bleached it for years. When the time came I wanted to dye it back to its natural.. No hair dyes OTC seemed to stay n my hair more than a few washes n never was the right color. Then I found your post of what you used to get strawberry blonde hair from Sally’s. Lemme tell you.. It was a life saver! Not only is my hair back to its natural shade of strawberry blonde but it’s super soft n you can’t even tell I colored it! I can now let my roots grow in and my hair grow out.. Thank God! Ty for your post.. You will never know how much I appreciate it!
It worked! I used 1/2 tube of Titan with a full tube of the Golden Blonde and it came out exactly like yours. My hair was previously bleached ombre (with brown on top) so the timing of 20 minutes on top and 10 on the bottom was pretty perfect.
Thanks so much for your guide – I am very grateful 🙂
Hi there! I am a natural strawberry blonde looking to donate my long locks for a major change. I came across your 5 week picture from this post and love your shorter, layered haircut. Do you happen to have any other photos of this haircut? Maybe featured somewhere else on your blog?
Hi Kristine,
Wow, that’s so generous of you!! Yes, on my IG http://www.instagram.com/girlgetglamorous there are more photos of my haircut when I had it short. Also, my pinterest has some: http://www.pinterest.com/mollygardner1
xo Hope the haircut goes well! – Molly
Hi Molly,
Okay, I followed your instructions. I used the Wella Color Charm Gel 8G Light Golden Blonde, mixed that with the 20 developer, then I added 1/2 ounce of the 8RG Titan Red to that. I put it on my roots for about maybe 30 minutes, then I put the rest of the color all over the rest of my hair and left that on for about 15 minutes. It looked so beautiful for about a week. Then the color started fading mostly from the rest of my hair, not the roots. The roots still look good, but now the sides of my hair are starting to look lighter than the roots. I want it all to match. What should I do now to fix this? I colored it about two weeks ago. I’m ready to do anything to make it all match up. What should I do to correct this so the roots aren’t darker than the sides of my hair? Thank you!!!
Hi Carol!
So glad the color came out great! I have found that red fades the fastest out of any color I have had. Especially on the parts of teh hair that have been lighter before. My advice is to shampoo your hair as little as possible, then on other days touch up with dry shampoo as needed. On days you do wash your hair, I use a color-safe formula and really try to only get it “lathered” on your roots and try to not let the lather get on the rest of the hair. The conditioner you use will cleanse that part of your hair enough.
Unfortunately, any lighter spots will lose their red more quickly, but hopefully these tips will help keep the color more even overall, for longer. xo – Molly
I need to add, my original color was a light blonde before I colored it strawberry blonde. Thank you!
I tried your formula last week. I started with heavily highlighted and low lighted hair may natural is around a level 7 blonde/brown. My sister is a hairdresser, she mixed and applied the color for me. I wanted to make sure she could troubleshoot for me. My roots and low lights were fine but my highlights were too pink. In all it looked more rose gold then strawberry blonde Just way too much gold tones for me. We ended up going back and mixing the 8RG with 8N (light natural blond) because my sister thought the neutral blonde would be better for me. We ran that thru for 20 minutes with a level 10 instead of 20 developer because we were trying to add color not lift it. Also do as not to damage my hair. I ended up with a nice red darker then what I wanted more toward what the 8RG is alone, I’m going to let it go 3 – 4 weeks and then do the half tube of 8RG and full tube of 8 N and see if it is closer to yours now that I half a better base color to work with.
How do I keep the roots from being brighter red than the rest of my hair? I’m sure it’s because of gray but have no idea how to correct it.
Which formula are you using? The Wella or L’oreal? xo Molly
I’ve been using age beautiful but I’m thinking Wella next time
Your hair color is absolutely gorgeous!!!!! I wold love this shade on me. My hair right now is red….it’s called “hot red” by loreal. I purchase it at Sally’s. Def not your shade of red….it’s more dark brown/red. Too dark for my skin tone. Would your color combination work for me, with the color I have now? Or is there another step I’d need to do first? Thank you!!!!
Hi Angela, you might have to fade your color a bit first, before doing the Strawberry Blonde. I would use the tips in the “Help my hair came out too red” post and then once the color is faded start doing the Strawberry Blonde formula. You can use more of the Golden Blonde and less of the Titian Red Blonde until you get to your perfect shade. I hope this helps!
xo -Molly
Hi Molly,
I love your hair color and have been trying toget it for years …. my hair is a dark red blonde I bought everything you said ….but its liquid not creme an I only got 1.4fl oz of 8g is that enough…i have hair to my lowerback and its pretty thick… what would you suggest for the liquid formula for me?
Hi Nakeshia,
I’d check the box of the liquid, it will tell you how much developer to mix with the color. I always keep a few extra boxes of color on hand, so that if I need more while I’m coloring my hair, it’s available. So maybe pick up a few more to store and play it safe 🙂 Good luck!
Molly
Hi Molly, I used your current formula on my dark blonde and gray hair. For the first time in my life my hair has a color…it’s very exciting. Unfortunately it has faded fast and I’m almost a complete golden blonde (with some strawberry) again after four weeks. I think next time I will add more red as I only used 1/2 oz of the 8RG Titian Red Blonde since I was blonde with lighter blonde highlights. I added 1/2 oz of 7G Sunlit Blonde and it worked nicely so I didn’t end up too pink or peach. I also have been using a color shampoo called Watercolors, I used two shades and they both give a different look. They have Warm Spice which makes it more gold and Liquid Copper that adds red. These shampoos have definitely made my color last longer but they need to be reapplied every or every other shampoo. Thank you for your great blog, I don’t think I would have ever gone strawberry without your detailed instructions.
Any ideas/tips for when hair color comes out too brassy? Over the past 2 years something changed with my hair and now, no matter what color combo I try, it comes out BRASSY from roots to mid-shaft. It comes out looking like I have neon gold and orange highlights. It’s not normal brass, it’s harsh looking. The rest of my hair turns out perfect. Any tips on how to tone it or keep it from happening in the first place would be greatly appreciated.
I Followed the steps above (my hair was partially highlighted so I went east on the 8RG) and did a full lowlight on myself as I can’t apply color to my scalp because I am allergic … However the color is more pinkish/purple looking…. anything I can add to get more of the red/strawberry blonde color?
Thanks!
Thank you so much for doing this!!! I’m always playing with different red dyes and this post is really helpful!!
Thank you, Rachel! I’ so happy to hear that it’s helpful!!
Hi, Molly – I’m a natural strawberry blonde who is going grey. I’ve tried the Loreal Reddish Blonde and liked the color, but my hair seemed really dry and brittle after. I decided to try your Wella formula, but both Sally stores near me are out of Light Golden Blonde 8G. The closest I could find was Sand Blonde 9NG. Do you think it is an ok substitute? Please advise. Thank you so much.
Hi Jamie, I tend to stick with the blonde shades that have Gold undertones when I am mixing with Titian Red Blonde, as that has a gold undertone. I’ve mixed with Neutral undertones before and wasn’t happy with my results. It was too dark and slightly muddy for my preference. If you have trouble finding in store, Sally’s online is usually well stocked and you can buy a ton at once so you stay stocked up for a few rounds of color. 🙂
Hi, Molly – thanks so much. I took your advice and returned the shade for Light Golden Blonde. I’m really happy with the result! It’s very close to what used to be my natural hair color. I appreciate your feedback and these super helpful videos! I would never have had the nerve to try and mix my own color if I hadn’t seen your posts. 🙂
Jamie, I’m so happy to hear that!!! Yes, coloring at home and mixing your own formulas is definitely intimidating at first but I’m SO glad your color came out beautiful and close to your natural shade!
xo – Molly
Hey Molly! Just came across your blog and am LOVING all your posts – so happy to have stumbled on your site!! I am just about to order your Wella mix to follow this tutorial and was wondering if you had any tips for me as a natural born med red head who has been home processing her hair with highlights for the last 2 years….I quit highlighting just before xmas so now I have about 5-6 inches of my natural med red roots and below that a lot of brassy highlighted light strawberry blonde. I am hoping to start evening everything out into a gorgeous strawberry blonde such as yours!! Your colour is spot on! Any tips? Thanks again for all your wonderful tutorials and info!
Hi Keshia,
Thank you, so happy you found the site! The Wella mix is great, my favorite brand so far. I think this post might be helpful: http://girlgetglamorous.com/how-to-transition-blonde-to-strawberry-blonde-hair/ if you have any other questions, let me know!!
xo – Molly
Grrrrrlllll, do you have any experience with henna or any of the “natural” dies? I’ve gotten away from putting chemical beauty products on my skin and want to switch over for my hair. I don’t think henna is gonna do it? You rock… Peace… T-
Hi Teri! Henna scares the living daylights out of me, to be totally honest, ha! I remember girls doing it in high school and getting flaming red hair. L’Oreal INOA is ammonia free and I’ve heard of, but never tried, Naturtint from whole foods/amazon: http://rstyle.me/n/bnw26ibb7df Not sure of the results with that. I liked the color I go with L’oreal INOA, so that might be a good one to try to get less chemicals. Let me know how it goes!!
xo – Molly
Hi! I’m sorry to bother, but I’ve read all your posts about your journey with your hair and I’d like to ask you some advice. Two months ago I dyed my own hair, I did an ombre form the ears down to the ends. I used some blue powder bleach and some 30 vol developer, then I used a toner to get rid of the yellow (I have light brown mousy hair with red undertones). Now, I’d like to dye my hair the same color as yours. I already bought the dye (a beautiful copper/strawberry shade) and I’m ready to do it, but I don’t know how… Should I use a 30 vol developer mixed with the dye all over my hair or should I use two different developers (the 30 vol for my natural color and 10 or 20 vol for the bleached ends)? How is the best way to do it? Thank you for your answer! :)
Hi Beatrice! Thank you for asking! However, I’m not a hair stylist, I just share my own experiences here. So I wish I had a clear answer for you, but I don’t want to tell you the wrong thing, as I’d just be guessing 🙂
It does sound like you are on the right track, I use level 20 developer on my roots, I would do that and maybe not even put color over the bleached ends, just let the color rinse over the ends in the shower. They’ll come out a bit softer, but it could be a pretty strawberry blonde ombre! Please let me know how it comes out and tag me on instagram if you are on that app so I can see @girlgetglamorous. Good luck, Doll! Sending you good color vibes!! xo – Molly
Thank you so so much for your advice, it has been helpful! I’ll try with the 20 vol given that my hair is a level 5/6 and the dye is a 7.
Sorry if I bothered you and again, thanks! You are very nice and your blog is awesome! 🙂 <3
It’s never a bother, I really love helping people from my experiences, I’m just scared to tell someone the wrong thing and have them hate their results!! I hope it comes out great 🙂 And thank you, glad to have you as part of the blog!
Hiiiii!!
So, I know that maybe I’m a little bit annoying but you seem more expert than me and I trust your advice… I tried to dye my hair yesterday and it came out darker than I wanted (here’s the picture of my hair today: http://imgur.com/3SJeZfO)… Given that the color I’m trying to achieve is this (http://imgur.com/k6hqufO), do you think that if I mix the dye that I used (a 7.03) with some light blonde dye (a level 9) it will come out lighter?
Sorry if I’m bothering you again! And thank you for your time 🙂
Which brand did you use, Doll? I only use Wella Color Charm now.
I wouldn’t color your hair again, red fades really quickly. Just try to lighten with some of the tips from this post 🙂 :http://girlgetglamorous.com/help-my-hair-came-out-too-red/
The blog won’t let me answer to your reply, so… First, thank you for your answer! You’re really nice to help me!
I use an Italian brand called Parisienne Evelon (I’m from Italy). For now I’ll let my hair rest, until the next dye (2 months or so), so the red has time to fade (maybe I’ll try the products that you recommend in your post)…
I’m trying to understand if, the next time I’ll do it, I should mix this red dye with a light blonde, to achieve a lighter copper color. I asked to the firm if I can mix two of their shades and I’m waiting for their answer… I don’t think that my hair will come out a strange color, but I’m a newbie at dyeing my own hair, so I’m a little bit nervous and I prefer to ask advice! 🙂 Again thank you for your time!
You can def mix two shades together from the same line and actually should, because you’ll probably get more natural results. I would try to stick within a shade or two of each color though (not too light mixed with too dark). If you need help at the store, ask for a Level 8 reddish blonde and a level 8 golden blonde that both have gold undertones. They should be able to help you get the right shades! 🙂
Thank you so much for advice! 🙂 Looking on their site, I found a level 8.3 (light golden blonde) and a level 8.4 (light copper blonde) that might go well! Should I try mixing these two colors the next time? Half 8.3 and half 8.4? With the 20 vol or the 30 vol, given that my hair is a little bit darker now? 🙂
Pleaseeee, answer me!! I really, really need your help!! 🙂
You absolutely have the best beauty blog out there, Molly.
Hey girl! I always read (and admittedly re-read!) your hair posts! It’s seriously gorgeous, pretty sure what dreams are MADE of! Also, I just noticed the hair extensions update! So exciting, totally going to check those out 🙂
Kaila,
Ha, thank you so much! When I started blogging, I seriously wondered if a single soul would read it, so thats awesome! And thank you, the hair extensions have really been a dream come true for me 🙂
xo – Molly
Hi! I am sure you have written about this somewhere so i apologize for a redundant question but what color is the titan red blonde on its own. I am looking for a more red than strawberry blonde shade but that still looks natural. Would the titan red blonde on its own achieve a deeper red head color? Currently i go to the salon and get my hair colored every 2 months and i love the color but I would like to be able to do it all myself especially the roots every 4 weeks. I currently use the Loreal red penney shade to color my roots and it seems to blend perfect with my salon color but I would like to mix my own color so i can mix up a very small amount for my roots. Love the blog I thought I was alone in my journey for red hair until now!! Also my roots are just a med brown and take red color very well if that helps. Thanks so much for the help!!
I just found your blog about a week ago. Where have you been all my life?? My hair pulls red easily, so I used to purposely leave golden blonde box hair dyes on my head for way longer than the recommended time to get a light strawberry blonde, because every time I tried a hair dye with “red” in the name, it would be purpled toned (a la Sharon Osbourne) or I’d get Ronald McDonald flaming red. Luckily, I have pretty strong hair, but you can imagine doing that every 6 weeks is still not very good for your scalp or hair… Anyway, I love reading the blog – it’s fun and practical and unpretentious. You’re also so responsive, knowledgeable, and helpful in your comments. Oh, and you have the sweetest name (my 4 month old is named Molly; I think it’s timeless 😉
Rochelle,
Thank you! You are so sweet, I appreciate your comments. I’m so glad the blog is helpful and I am happy to have you as part of it. I feel you on retouching your roots and having to leave it on longer (me for my greys). My scalp hates me sometimes! Congrats in the new baby and you have great taste in names 😉 xo Molly
Thank you for this update post! I will keep it in my favorites. 🙂
Thank you! I hope it works for you too!! xo
I tried your method, and the color is not bad, but I’m not living it. It’s too gold for me. Do you think next time I could use a neutral blonde to mix with the red to tame it a bit? Thanks for the tutorial!
Just wanted to say “Thank you!”
I found you on Pinterest, I watched your channel on you tube, and now I have read your blog.
You gave me the inspiration and confidence to dye my hair strawberry blonde….something I’ve been thinking about for a long time.
It was a process but my hair came out fabulously!!
Thank you, thank you!
[…] PART 2: I have updated and now have a DIY guide for the Wella Color Charm formula as well. Read it {here.} […]