
 You might also like
 Makeup
Makeup
Makeup 


Welcome to the GirlGetGlamorous blog!
Subscribe for monthly emails of the latest
blog posts and videos, sent right to your inbox.
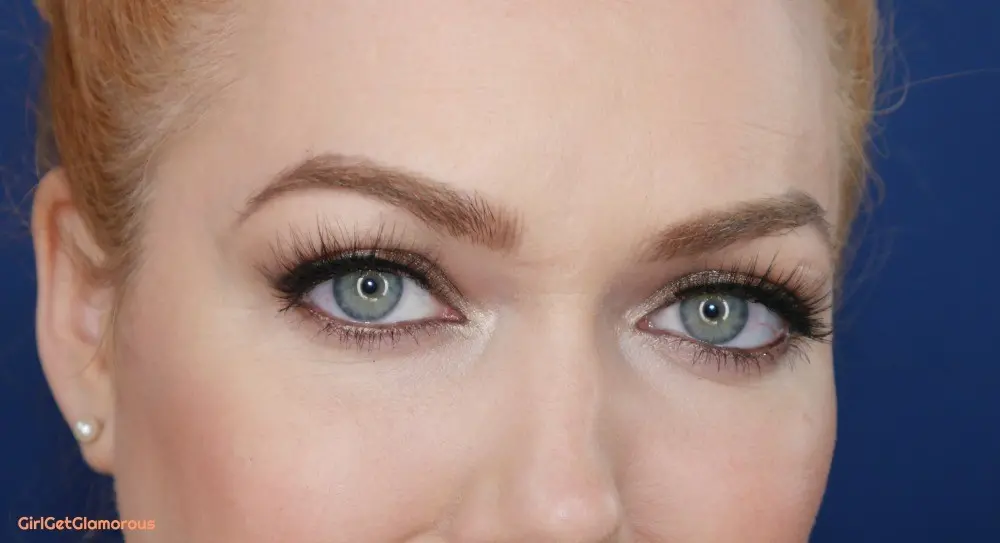
My eye brow routine and favorite products for strawberry blondes has probably been one of my most requested videos and posts this year! It took me so long to put this together because I felt like I hadn’t found that perfect combination of shades yet to match my darker brown brows to my colored light red hair.
I have tried at least 50 different brow products and countless combinations of them. Every brow look was coming out either too red and fake looking, super muddy, or really dark. I just never felt like I had the right combination to share until this now.
This tutorial is best for people who color their hair, like me, and are trying to match their natural brows to their new hair color. If you are a natural redhead, you can skip using the darker color and begin step 1 with the caramel shades.
My Go-To Brow Routine for Strawberry Blonde Hair
1 | Shape
This step is so important! This is where I went wrong for so long by trying to use Taupe or Blonde shades as my outline shade. Once I found the pencil shade that matches my natural dark brown brow hair exactly, it’s been smooth sailing. Getting a perfect match makes all the difference.
Creating the outline and shape of your brows allows you to make them even and fill in bald patches. I over tweezed and had those super thin 90’s brows that were really popular. My bald patches are finally growing back thanks to serums, but I definitely still have some sparse areas.
My brows are completely different shapes and sizes, so creating an outline helps even them out and give a nice sense of proportion to my face.
Important Details |
2 | Red Tones
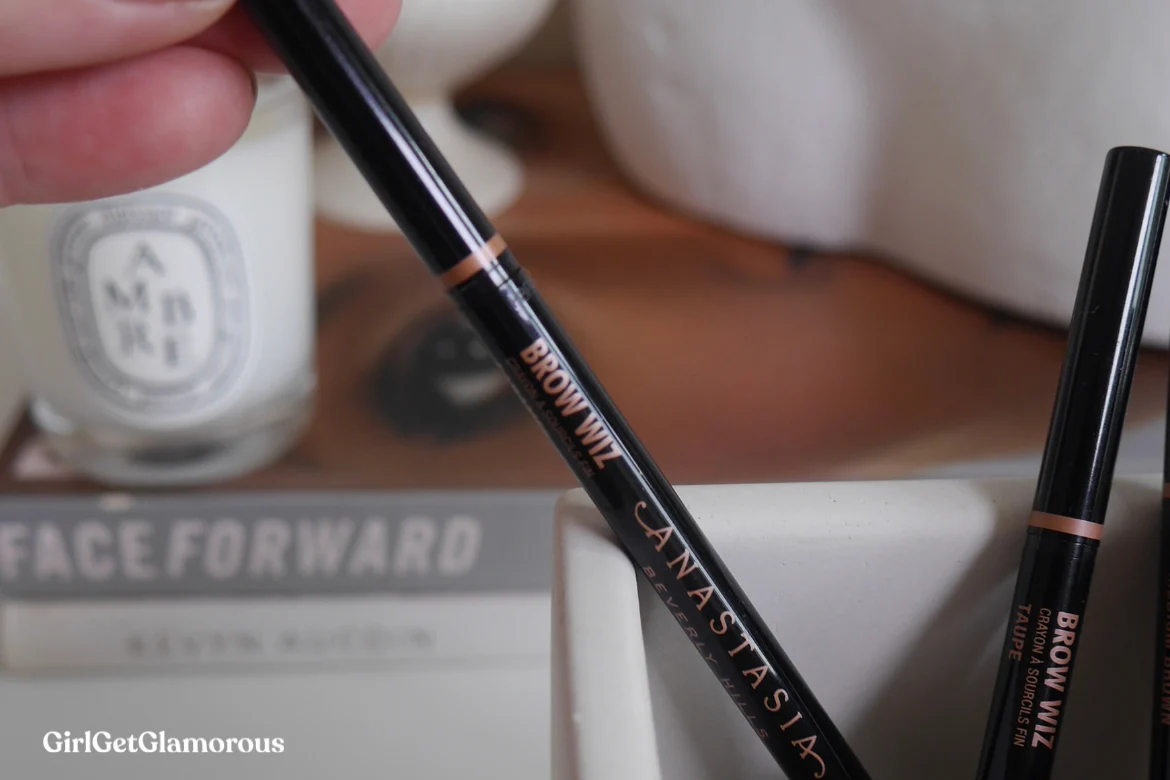
Now that my brows have structure, I start to add in the reddish tones. I like the Anastasia Beverly Hills products because they have the most real-looking red shades. Nothing is too warm or overly red. I will take either the brow wiz, pencil, or occasionally dip brow (but it’s easy to go overboard with dip brow!) and start to add some brow-like strokes at the arch and then beginning of my brows.
I still keep the pressure light with the Caramel shades, to keep the overall effect soft vs bold. Side note, using this soft pressure also means you use less product, so your brow wiz’s will last longer!
3 | Set
Brow gel helps keep the brows in place and makes the pencil products last longer.
Again, I like Anastasia’s tones the most for brow gel, as the caramel shade is a perfect balance of reds and browns. Also, the formula has a satin finish, which is important, as the satin mimics the look of a natural glossy brow hair. You don’t want to get a formula that is too glass-like, glittery, or matte.
Anastasia Beverly Hills really nails the shades and product finish, which is why I end up using so many of her products. Btw, this post isn’t sponsored (I wish it was!), I just truly think ABH has the most natural looking brow shades and textures.
4 | Create Hair
I like to create a few vertical hairs at the beginning of my brows. I’ve found that this gives them a softer and lighter look. It also helps even them out and make them look more similar.
I use the tiniest amount of dip brow to make these “hairs.” I scoop a small bit onto the lid of the brow container. The amount is important to keep the brow stroke looking natural.
From there, I get enough to make a thin line and test it on the lid to make sure I don’t have too much product on the brush. It’s important to use a brow brush that is super thin, but still has a nice amount of pressure. The thin tip is important so that you can create a brush stroke that looks like real hair.
Starting at the base of the front of each brow, I draw a thin line from bottom to top. I create anywhere from 2-4 brow hairs on each side.
I do the dip brow after the gel, because I found that any blending (from the gel brush) made the dip brow look muddy and I prefer the lines to stay crisp.
5 | Clean Up
This step is really important. Clean up the edge of your brows with either an eyeshadow or concealer one shade lighter than your skin. This makes your brows look really polished and helps keep the brow products in place all day.
Take either a bit of powder shadow or a concealer that sets to dry finish on a concealer brush. Make sure you have only a tiny amount of product on the brush. Using the thin side of the brush, draw a line directly below and then above the arch of your brow and then blend away from the brow.
________
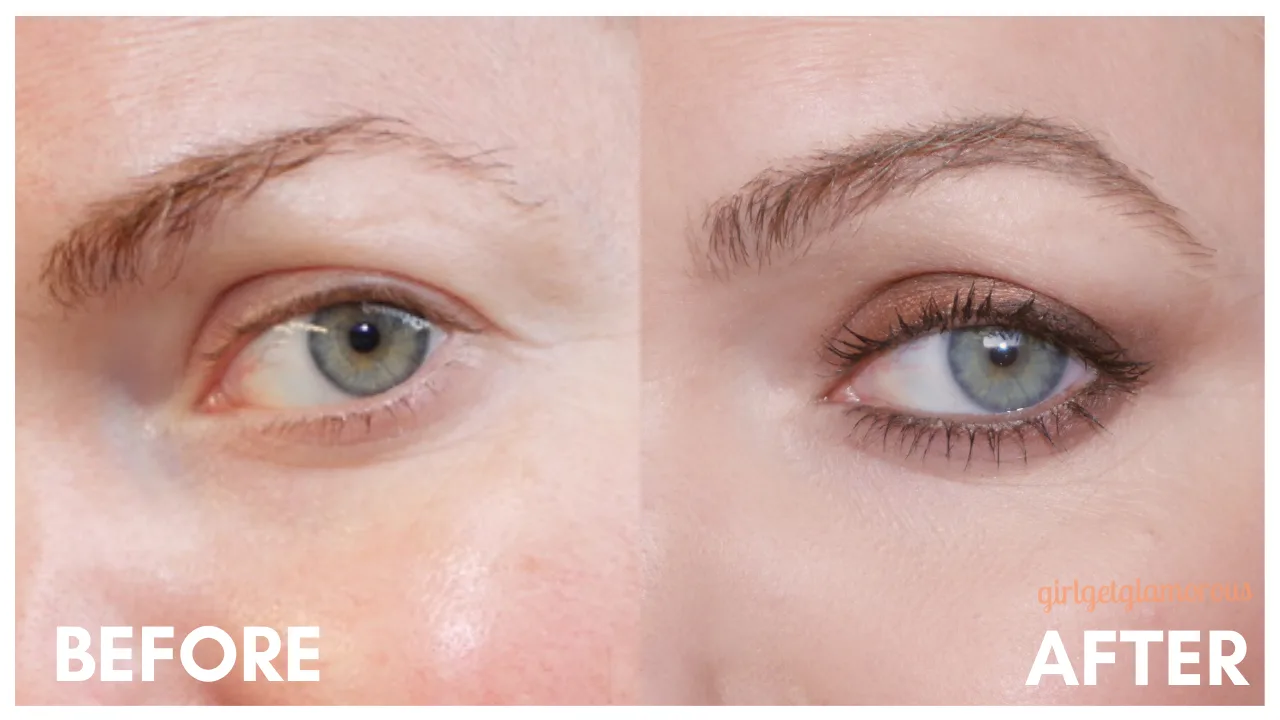
And … that is my whole brow routine. I know it’s a ton of products, but because I only use a little of each, they last me forever.
In the video it takes me a bit longer, as I’m talking through each step. In day-to-day, this brow routine takes me five to six minutes total. I’ve done it in one to two minutes in a complete rush.
Even if I’m only wearing a little foundation, concealer and bronzer that day, I always make sure to have my brows done, as it makes such a huge difference in pulling my look together.
________
Shop The Post
lashes | “Double Tapped” from www.girlgetglamorousHAIR.com
Thin Brow Brushes | Dose of Colors (goes in and out of stock) | It Cosmetics | abh brow brush #14 |
amazon . ulta . sephora . cult beauty (worldwide shipping)
Brow Wiz | shades used: ebony + caramel
ulta . sephora . nordstrom . dilliard’s . beauty bay (worldwide shipping)
Brow Gel | shade used: caramel
ulta . sephora . nordstrom . dilliard’s . beauty bay (worldwide shipping)
Dip Brow | shade used: ash brown
ulta . sephora . nordstrom . dilliard’s . beauty bay (worldwide shipping)
skin tone eye shadow | mac blanc type is a good pick for fair skin
________

________
Similar Posts |
________
Social Links: Facebook (I use this a lot for flash sale links) | Instagram @girlgetglamorous | Instagram hair extensions@girlgetglamorousHAIR | Pinterest (join over 1.3 million other monthly viewers) | Subscribe (free!) for the latest posts straight to your inbox
Thank you for reading and being a part of the blog!


LEAVE A COMMENT