
 You might also like
 Product Reviews
Product Reviews
Product Reviews 


Welcome to the GirlGetGlamorous blog!
Subscribe for monthly emails of the latest
blog posts and videos, sent right to your inbox.
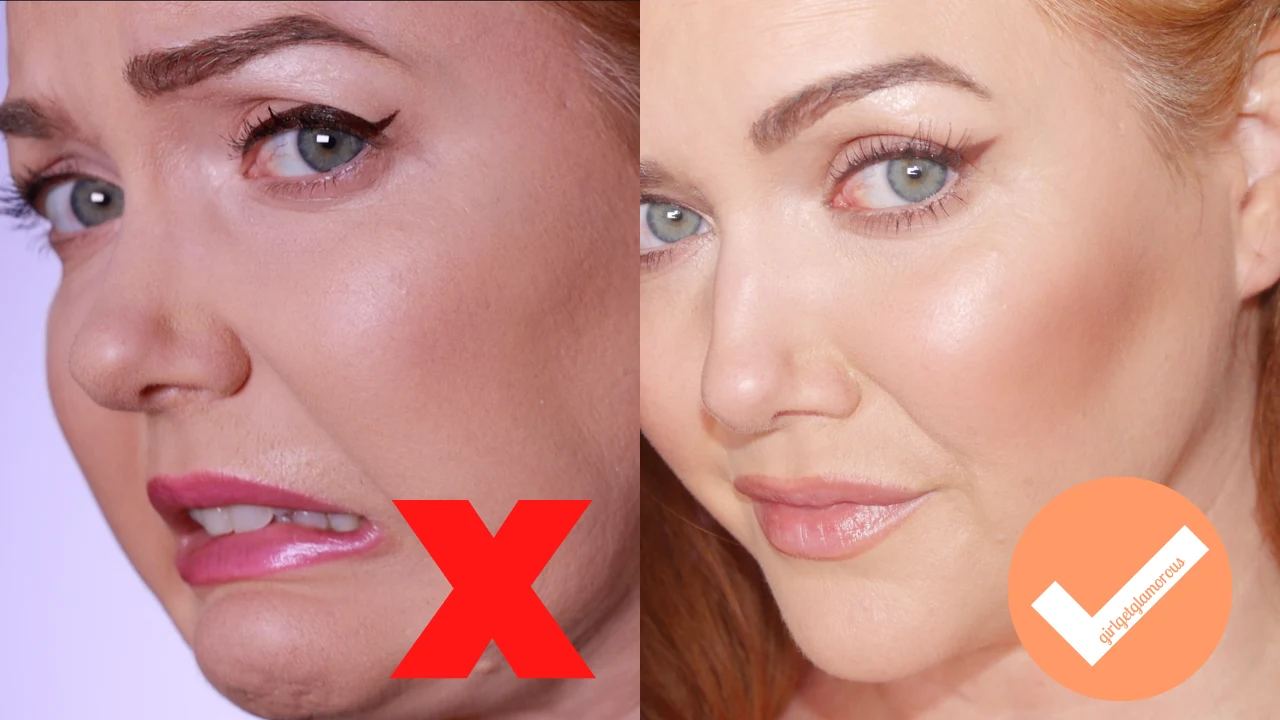
I hope this tutorial is helpful! I have tried just about every technique for winged liner on my hooded and downturned eyes and this is the technique that works for me for perfectly every single time.
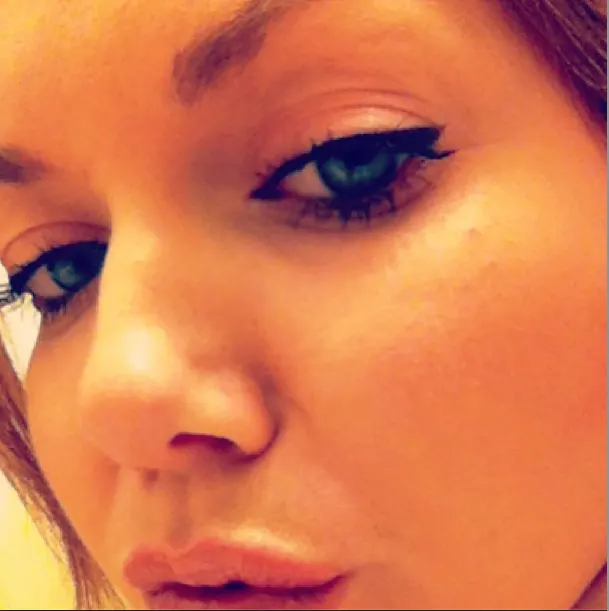
It gives me even and lifted eyes and liner and is super flattering on my maturing eyes and skin.
Please feel free to ask any questions or just let me know what you think either here on the blog or on my YouTube channel.
| or click here to watch on YouTube |
TIP 1 | Use your bottom lash line to guide the direction of your liner. Aim for a 45 degree angle for winged liner.
TIP 2 | For shaky hands (me after coffee), an angled brush and gel liner is easier to control and get crisp lines vs. a liquid liner.
TIP 3 | For beginners, it’s even easier to try this using powder eyeshadow and an angled brush to practice drawing the shape. I also love using powder for liner on mature skin, because it give a soft focus effect and is very forgiving on skin.
Powder eyeshadow is easier to clean up and redraw, so it’s ideal for practicing. Once you have the shape down, you can go over the shadow with your gel or liquid if you prefer a more intense look.
If you love the look of eyeshadow as your winged liner and want to keep using this method (it’s my preference!), then just make sure to set it with setting spray for longevity.
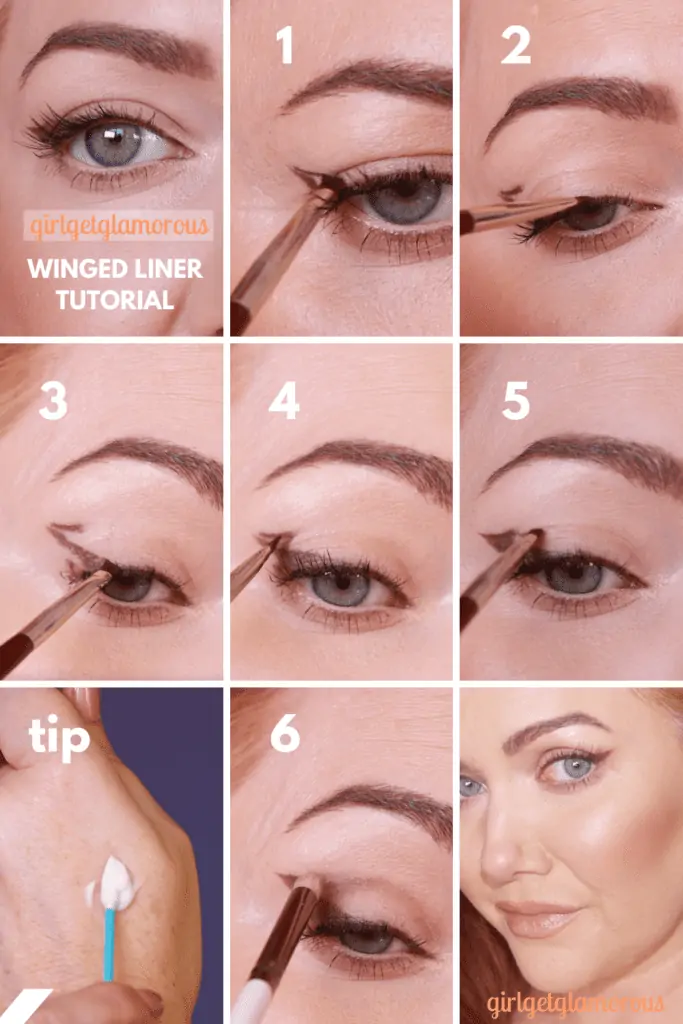
STEP 1 | WING OUTLINE
For this first step, I look straight ahead into the mirror. I draw an outline of winged liner exactly how I want it to look, going over the hooded portion of my eye.
Using my lower lash line to figure out the direction of my wing, I first mark the bottom line of the triangle with my brush, drawing right over the hooded skin. Then, I draw another line above that to meet my crease as the top part of my wing.
This will look like the top portion of a triangle when you are done.
The top line of the wing meeting the crease is so important! This is what lifts the look of the eye and eliminates the droop.
Again, I recommend drawing the wing outline while looking straight forward into the mirror and drawing over the skin. It feels really weird to draw over the hooded skin at first, but I did get used to it.
STEP 2 | LINING LASHES
I like to start by lining 3/4 of my upper lash line, getting the liner as close as I can to my lashes. I stop at the outside of my iris (blue portion of my eye).
I try to keep this line as thin as possible, so that it doesn’t take up too much lid space.
STEP 3 | CONNECTING LINER + WING
After I outline the wing shape, I tilt my head back, looking down into my mirror and drawn a line to connect the lower part of the wing outline to my eye liner on the lid.
Then, I draw another line from the top of the triangle, down to the outer edge of my eye. At this point you’ll have a winged liner along the bottom and another triangle attached to the top of that.
STEP 4 | FILL IN
From here, I will fill in the outline with my head tilted back, then look straight forward again and make sure the liner is cohesive going down from the hooded portion of my eye all the way to my inner corner of my eye.
STEP 5 | CREASE WORK
Soften the geometric shape of the liner with either a bit of matching eyeshadow at the inside of the liner on your lid, where it “V’s”. This will create a smokier looking liner.
Or, for a “cleaner” winged look, take eyeshadow and connect the top edge of the triangle blending in to your crease.
STEP 6 | BLEND + CLEAN UP
Grab a clean eye brush with no product on it, I use a small pencil brush, and start to blend that shadow at the crease only. I avoid blending the winged part because I want that to stay crisp, but I do like the shadow in my crease to be softly blended.
You can also use a q-tip, saturated with lotion or concealer, to clean up the edge of the liner to make it super sharp. I prefer using these pointed cotton swabs, but you can still do this with a regular q-tip!
Super important, as your finishing step, set your liner and eyes with setting spray. This is a must for longevity, especially with powder eyeshadow used at liner!
A FEW (MORE) TIPS
For more intense liner | Go back over the shadow or pencil liner outline with a liquid or gel liner to intensify the color, for deep and defined liner.
For softened liner (great for mature skin) | If you used gel liner, go back over the edges of the gel liner with powder eyeshadow in the same shade as your liner, to give a soft-focus effect.
READ MORE
SOCIAL LINKS
Thank you for reading and being a part of the blog! – Molly


LEAVE A COMMENT