
 You might also like
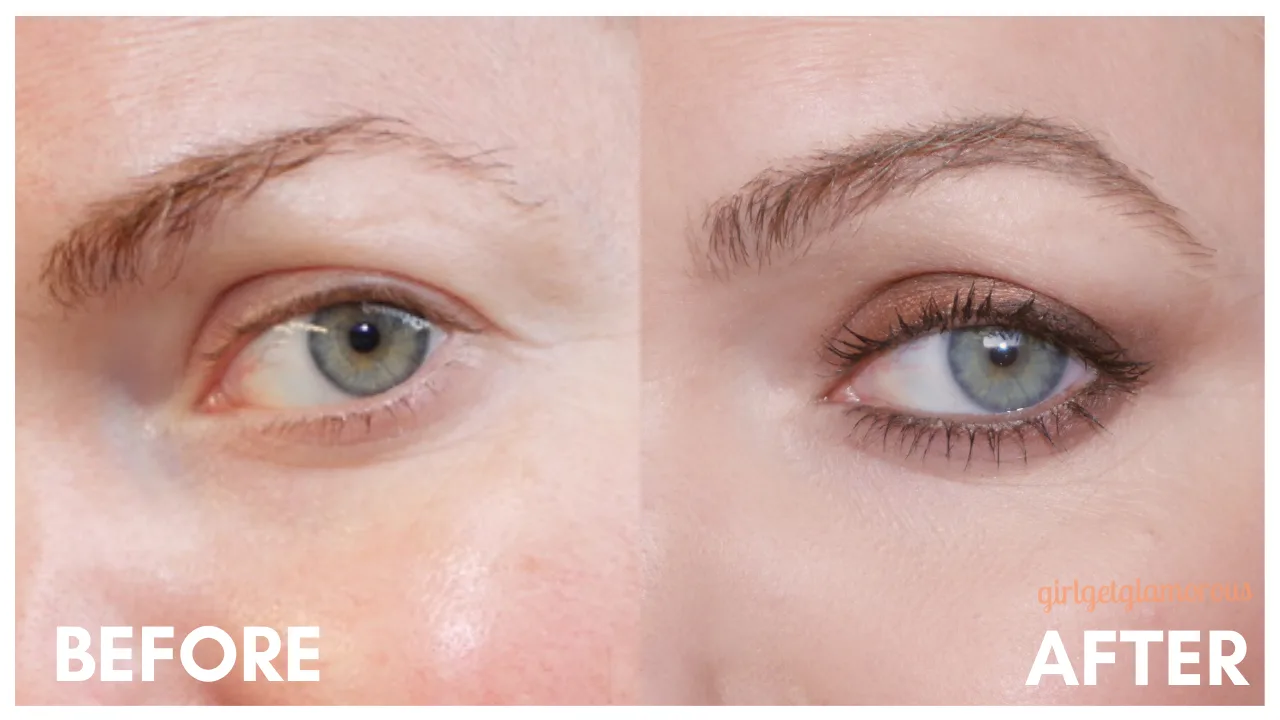 Makeup
Makeup
Makeup 


Welcome to the GirlGetGlamorous blog!
Subscribe for monthly emails of the latest
blog posts and videos, sent right to your inbox.

Eyebrow grooming and shaping is the key to getting perfect looking eyebrows. This is an essential step before you fill in your brows with any makeup products!
At-home brow shaping is 1: super convenient and 2: very affordable. Here are the three tips that I’ve learned that have made DIY brow grooming easy for me to maintain on my own.

By total chance, one day I found my old Sally Hansen mustache bleach in a bathroom drawer. No gatekeeping here.
On a whim, I decided to bleach my eyebrows. My results were so much better than when I did darker brow tinting!

Four minutes later, the bleach warmed up the color of my cooler, darker brows to perfectly coordinate with my warmer Strawberry Blonde hair. I’d only ever tinted my brows darker before, so this lighter and warmer option was a game changer.
The next time I filled in my eyebrows, the brow pencil looked so much softer and more natural blending with my new, lighter brows.
I have to keep bleaching my brows to only once a month, as I have sensitive eyes and skin, but the bleaching does make such a nice difference that I keep it in my grooming routine.
The next grooming tip that made a big difference for me was dermaplaning.
Dermaplaning involves using a small, thin, single-blade razor that is specifically designed for the face and eyebrows. It removes the peach fuzz hair from around your brows. This creates a really clean and defined shape to fill in with brow product.
It’s important to note, if you decide to bleach your brows AFTER dermaplaning, I recommend waiting at least a full 24 hours.
I do still tweeze any brow hairs that are really outside of the arch, but use dermaplaning for the rest of my brow hair clean up, to really perfect the shape of the brow. Dermaplaning is fast and painless, so it’s become my go-to method for getting the shape of my brows perfect.

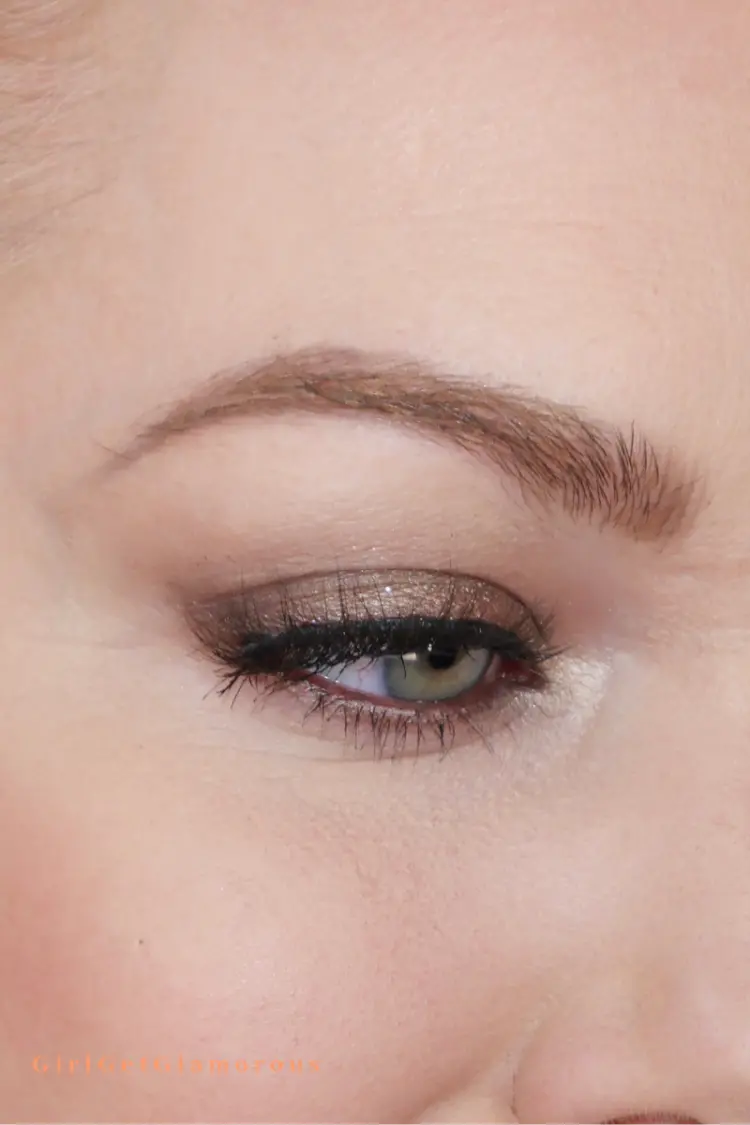
HOW TO DERMAPLANE
Step 1 | I hold my skin with one hand, pulling slightly up so the skin is tight.
Step 2 | Then I direct the razor down towards the top of my brows, being careful to only shave off peach fuzz and not any brow hairs. I’ll also go under my brow arch and between my brows to also clean up those areas.
Step 3 | I prefer my brows to be straight across the bottom, I think it looks more polished, so I do derma plane off the bottom front slightly to line that area up with the rest of the bottom line of my eyebrow.

The final grooming step is trimming any long brow hairs. This polishes the final look once brows are set in place with gel. It keeps the hairs from going over the edges and makes for a clean brow shape.

Step 1 | Brush brow hairs up with a spoolie.
Step 2 | With extra small brow scissors, trim only the hairs that appear over the edge of the rest of the brow.
Then brush the hairs down and trim any stray longer hairs that are longer. This helps keep your brow shape “cleaner” looking.


LEAVE A COMMENT