
 You might also like
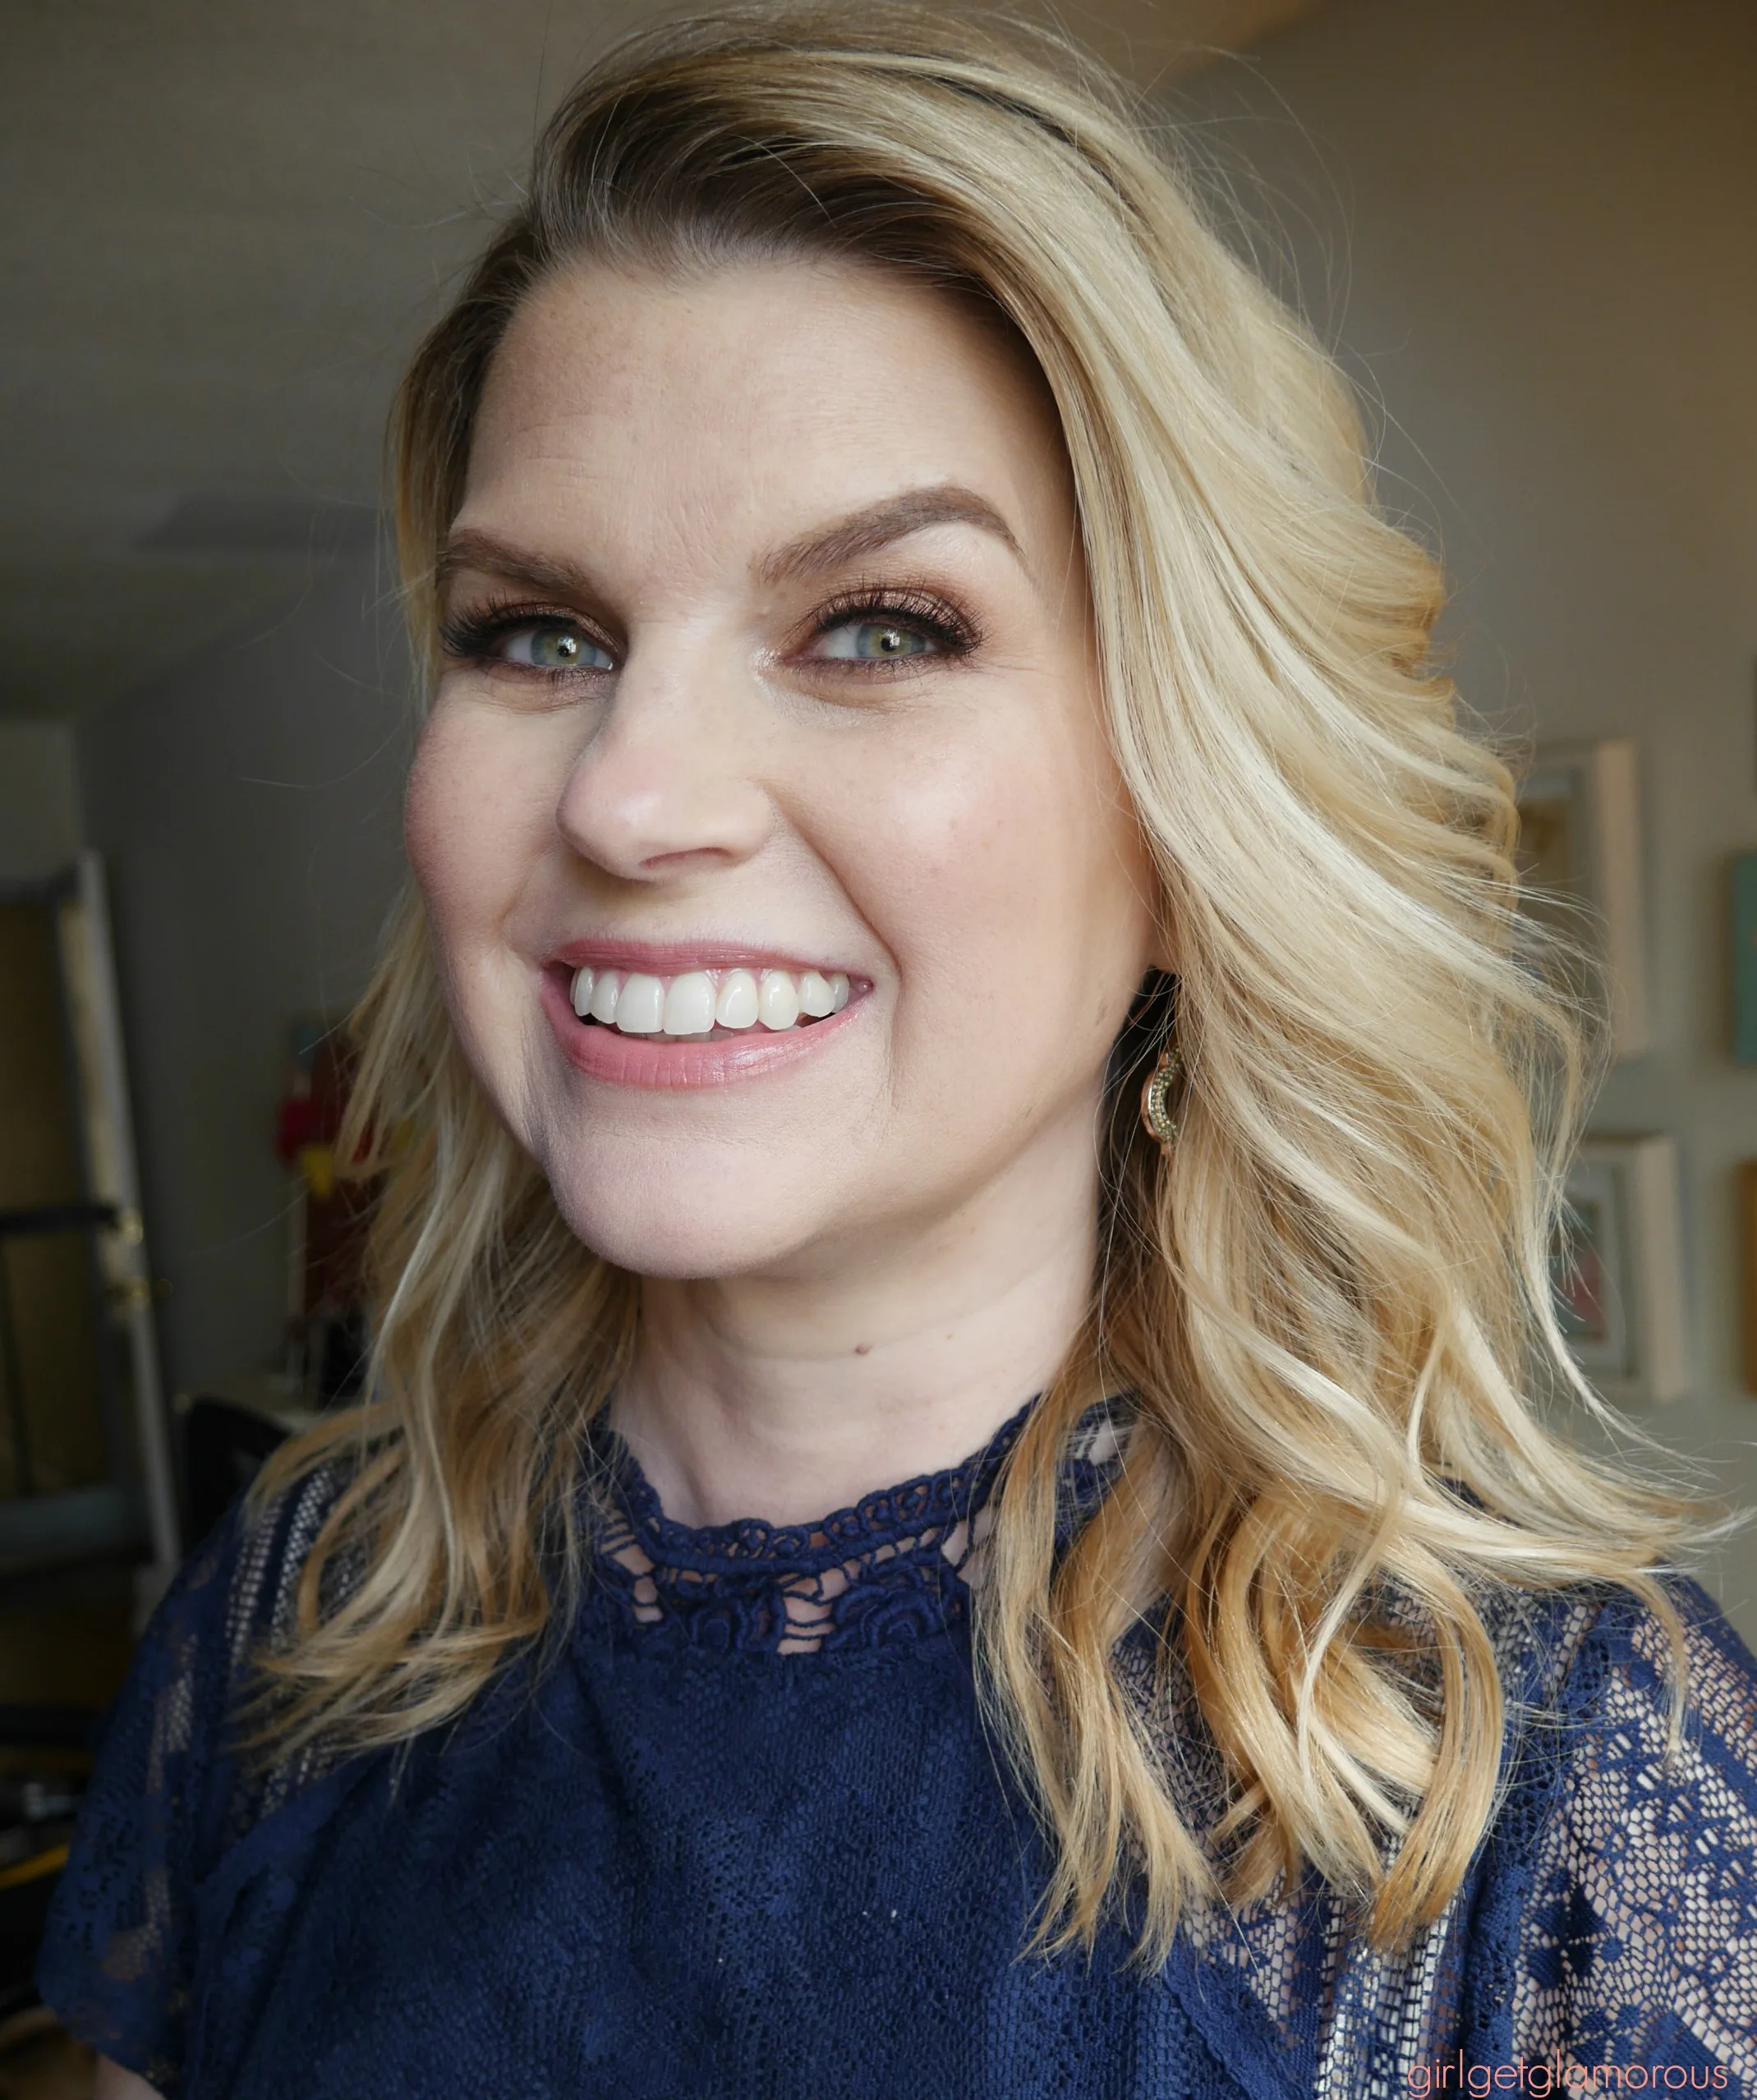 Hair & Makeup
Hair & Makeup
Hair & Makeup 


Welcome to the GirlGetGlamorous blog!
Subscribe for monthly emails of the latest
blog posts and videos, sent right to your inbox.
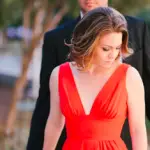
A few weeks ago, I had the immense luck to get to glam out my dear friend Candace. For Her. Engagement. Photos. AGGGGGGHHHHHHHHHHHHHHHHHHHHHHHHHHHHHHHHHHHHHHHHHHHHHHHHHHHHHHHHHHHHH. Breathe. Molly, breathe.
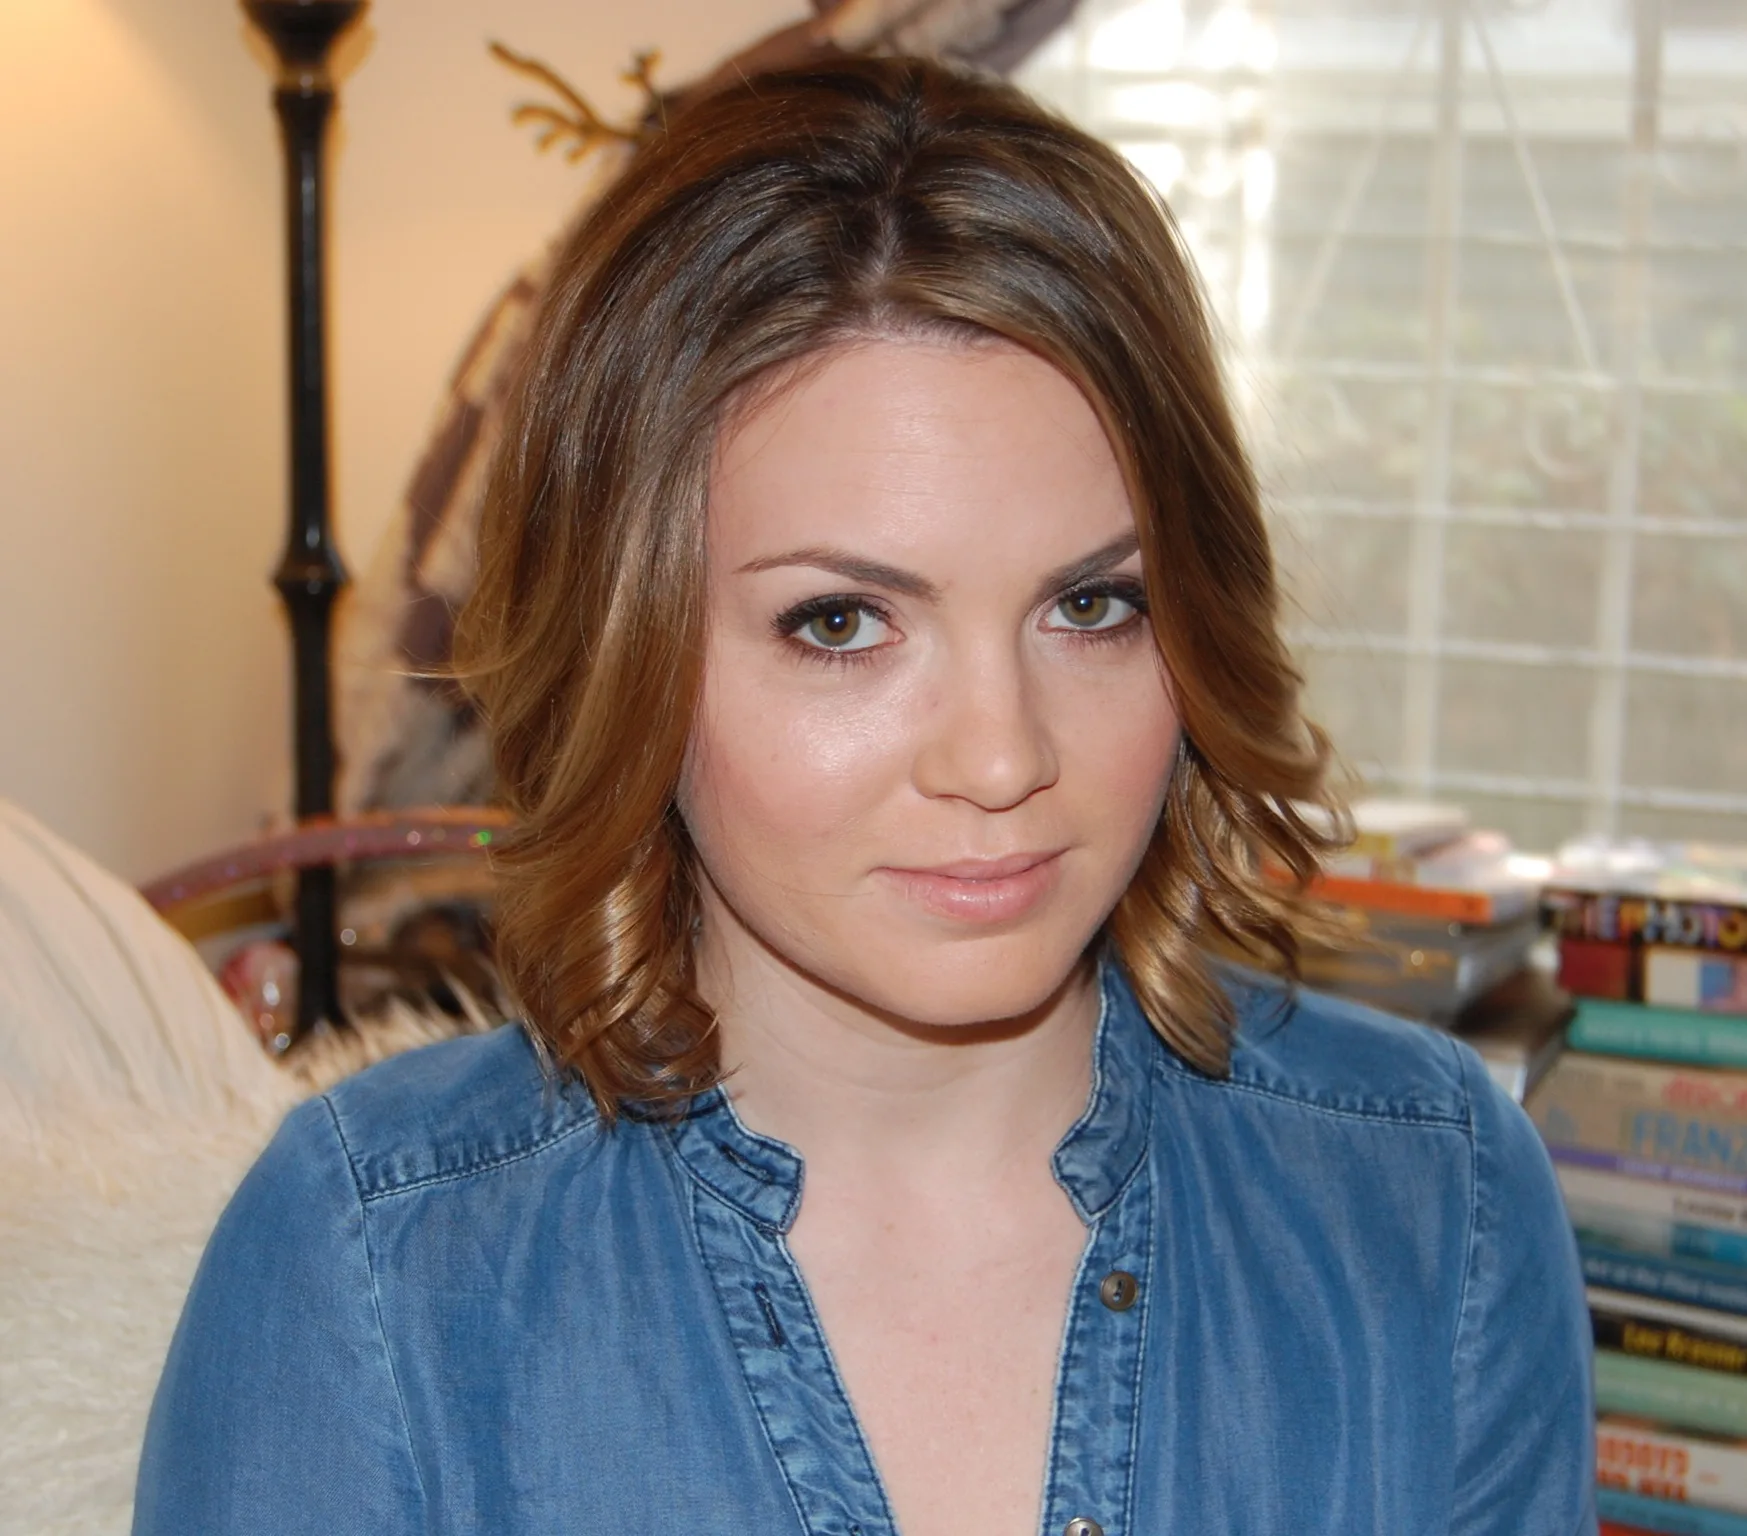
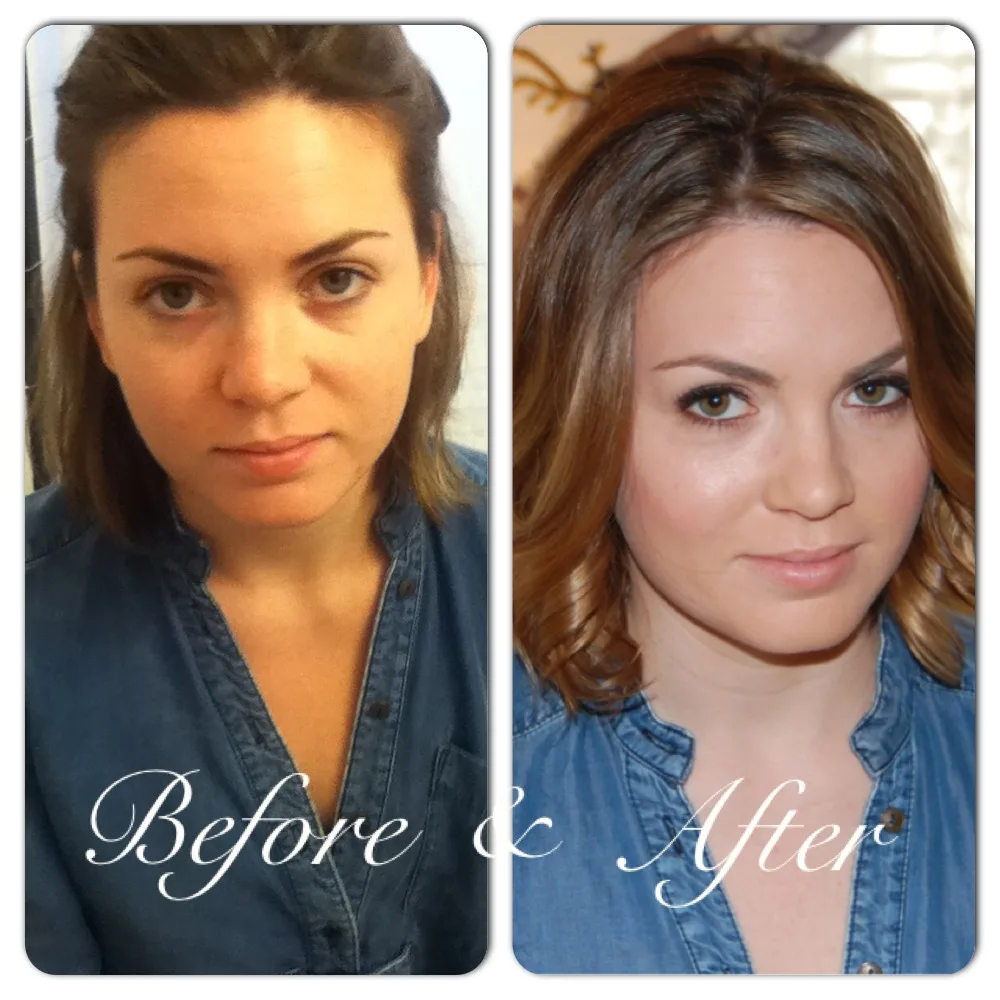
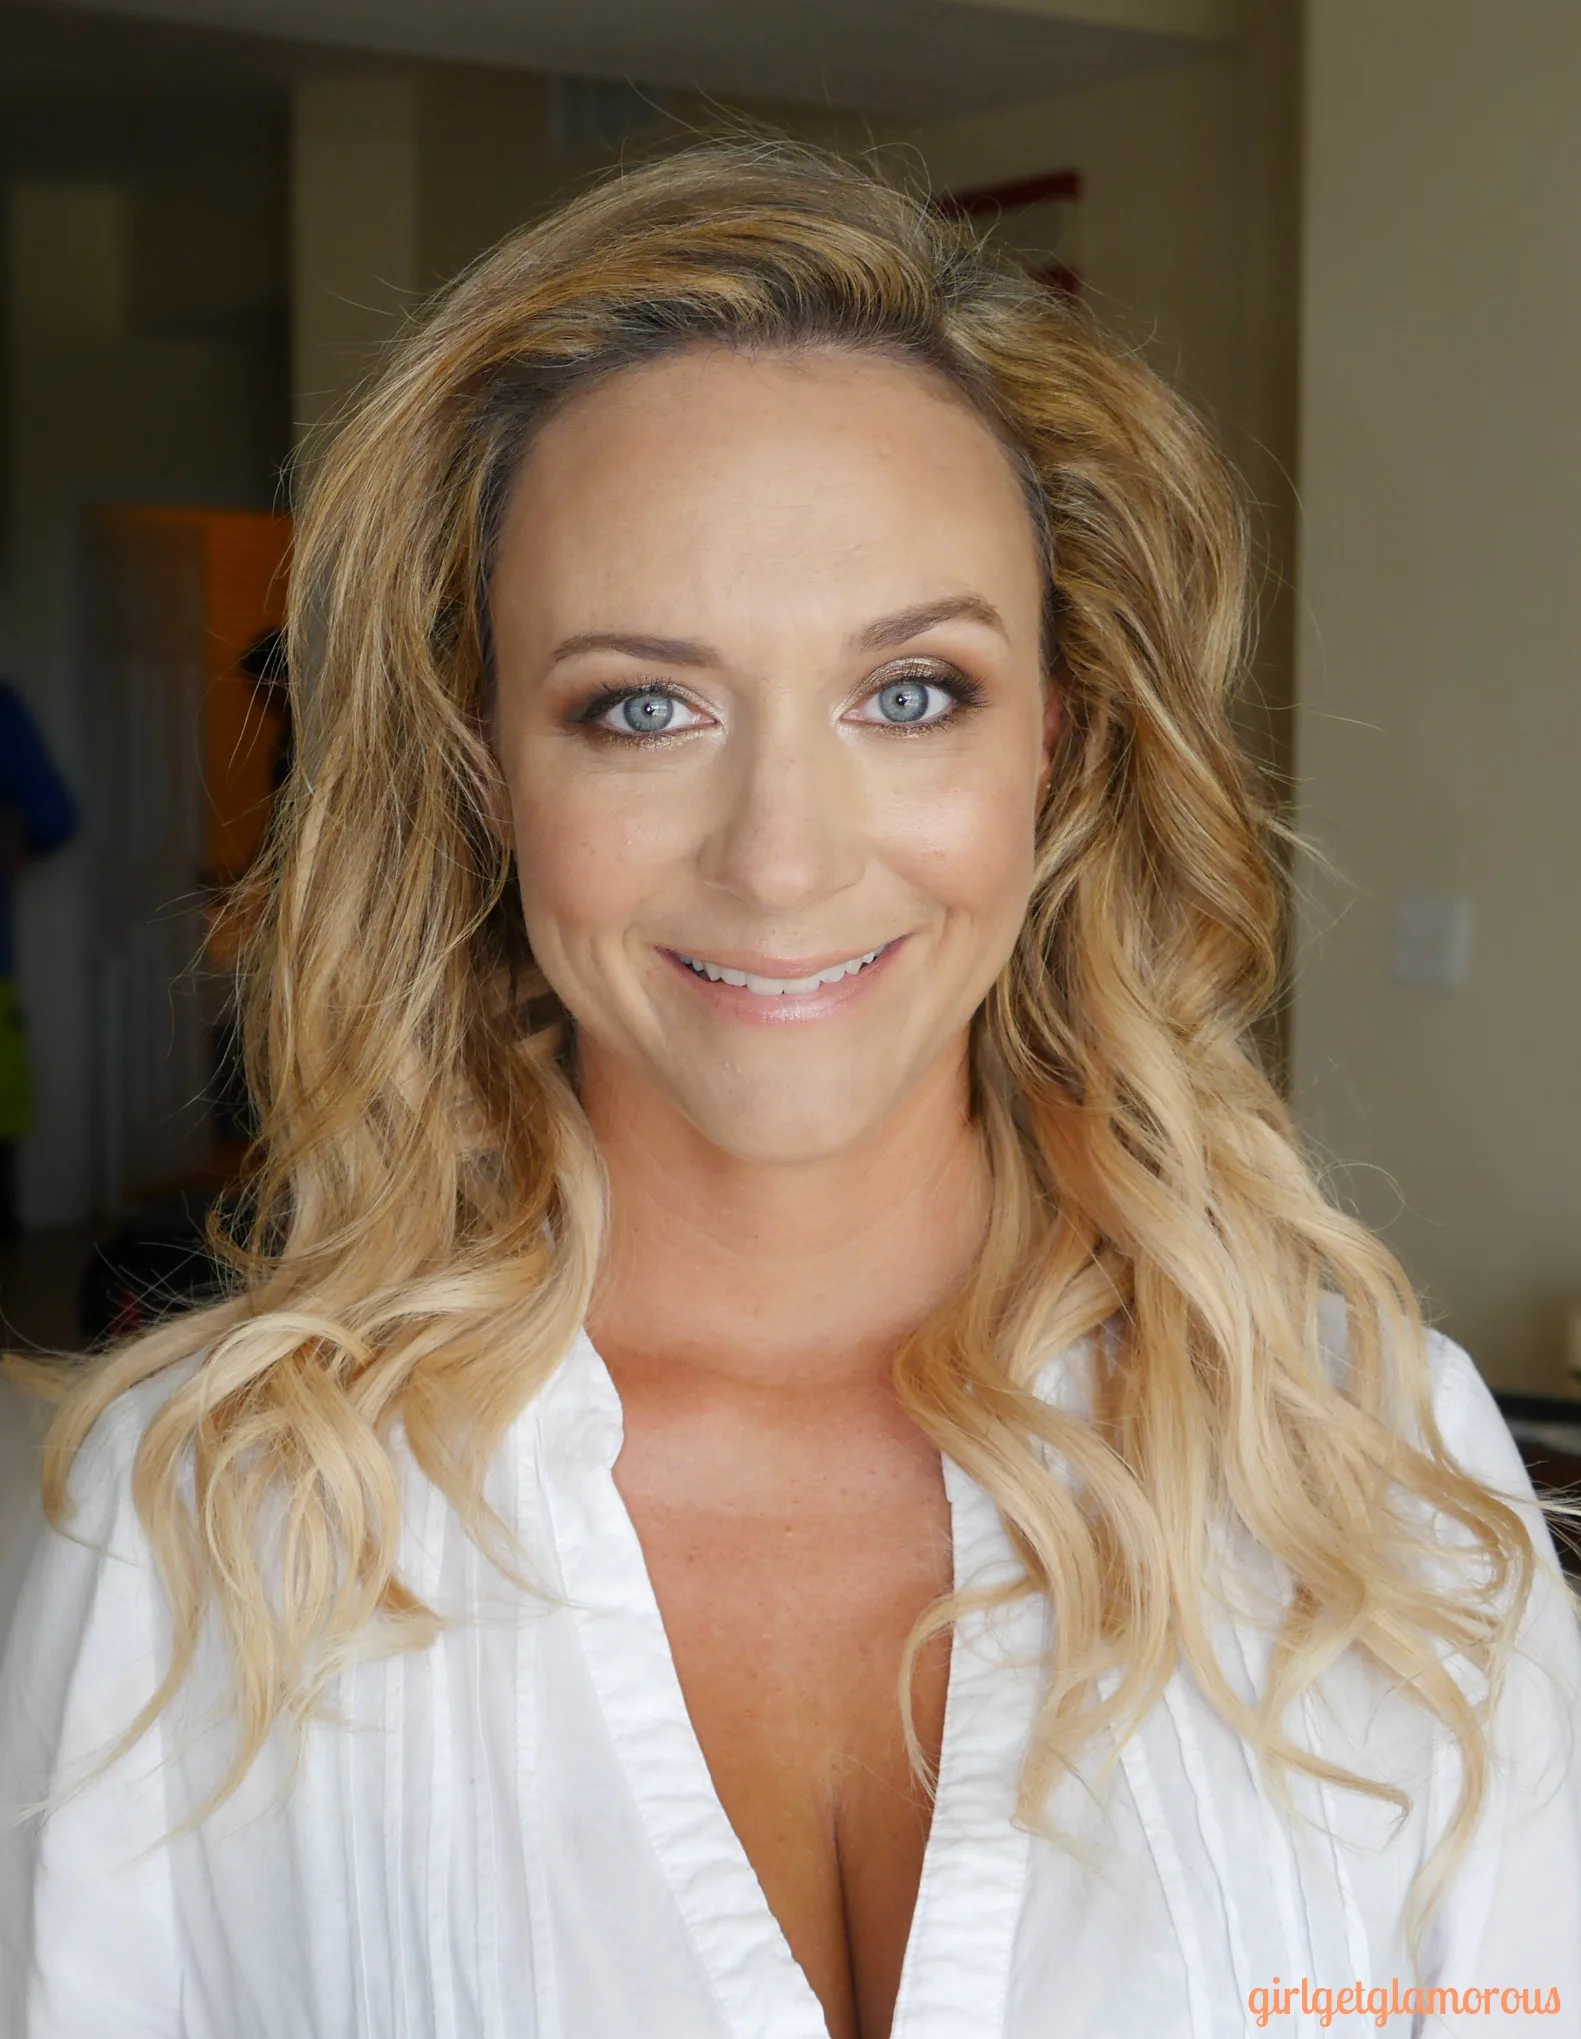
When Candace asked me to do her hair and makeup, I was so honored. It’s one thing if you think you can do Glam aiiight, but it’s a whole other thing when somebody else asks you to do theirs. So I felt honored, then, very, very scared. I’ve done makeup for my friends before, but for their bachelorette parties or auditions. Not engagement photos, which people tend to hold onto and display in their homes, oh I don’t know FOREVER. I spent a week practicing lighter makeup, as Candace and I discussed a more natural look, with a slightly heavier eye.
Candace is a gorgeous lady, so it wasn’t hard work.
MAKEUP:
Skin prep:
1: I applied a creamy moisturizer, Mario Badescu Kera Moisturizer.
2: After letting that sink in, I used a small amount of Cargo HD makeup primer in her T-zone.
Foundation:
3: Used Cargo Foundation, applying it and blending it out with my fingers. Then gave her skin an “airbrushed” look by buffing it with my Cargo Magic Brush. Buffing it helps to eliminate any foundation edges or streaks.
4. Dotting on with my finger, then blending with a damp beauty blender, I applied IT cosmetics concealer in Neutral Medium underneath and in the inner corners of her eyes and any remaining spots or blemishes.
Highlight & Contour: full post on that HERE
5. Applied Benefit Highbeam to the tops of her cheekbones, nose, and above lip.
6. Using my Smashbox contour palette, I lightly contoured her cheekbones and forehead.
Blush:
7. Went light with the blush, because I knew we were doing a heavier eye. Used Benefit Bella Bamba powder blush.
Eyes: Full details HERE
8. Liner: tiny cat eyeliner with Physician’s Formula eyeliner pen on the top, and Marc Jacobs Highliner Gel eyeliner on the inner lids halfway. The inner half of the eyelids was lined with Benefit Eye Bright.
9. I used Benefit “Stay Don’t Stray” eye primer, then shadows from my Stila In The Light palette, my favorite palette of all time. I used Bare all over the lid, Kitten at the inner corners, Bliss at the crease, and Sandstone over the liner, smoked up. Blended like crazy.
Lashes:
10. Applied Ardell false lashes in #110, for a natural look, but a little extra oomph. This style of lashes or the #124 style are good for anyone – Brides, headshots, etc. – who want to make their eyes pop, but don’t want to look like they are wearing false lashes.
11. Used Maybelline Falsies Big Eyes Mascara in Blackest Black.
Eyebrows:
12. Lightly went over Candace’s brows with my Billion Dollar Brow Universal Brow pencil, then combed through.
Lips:
13. Candace wanted a no lipstick, super natural look on her lips. So I lined them in E.L.F. Mineral Lip Liner in brown, then filled them in with only Vaseline in the Cocoa Butter scent. If this sounds scary and lip – linery to you, don’t worry. When you add the Vaseline, it blends the lipliner, so you don’t see it. But your lips still look beautifully defined and fuller in photos.
HAIR:
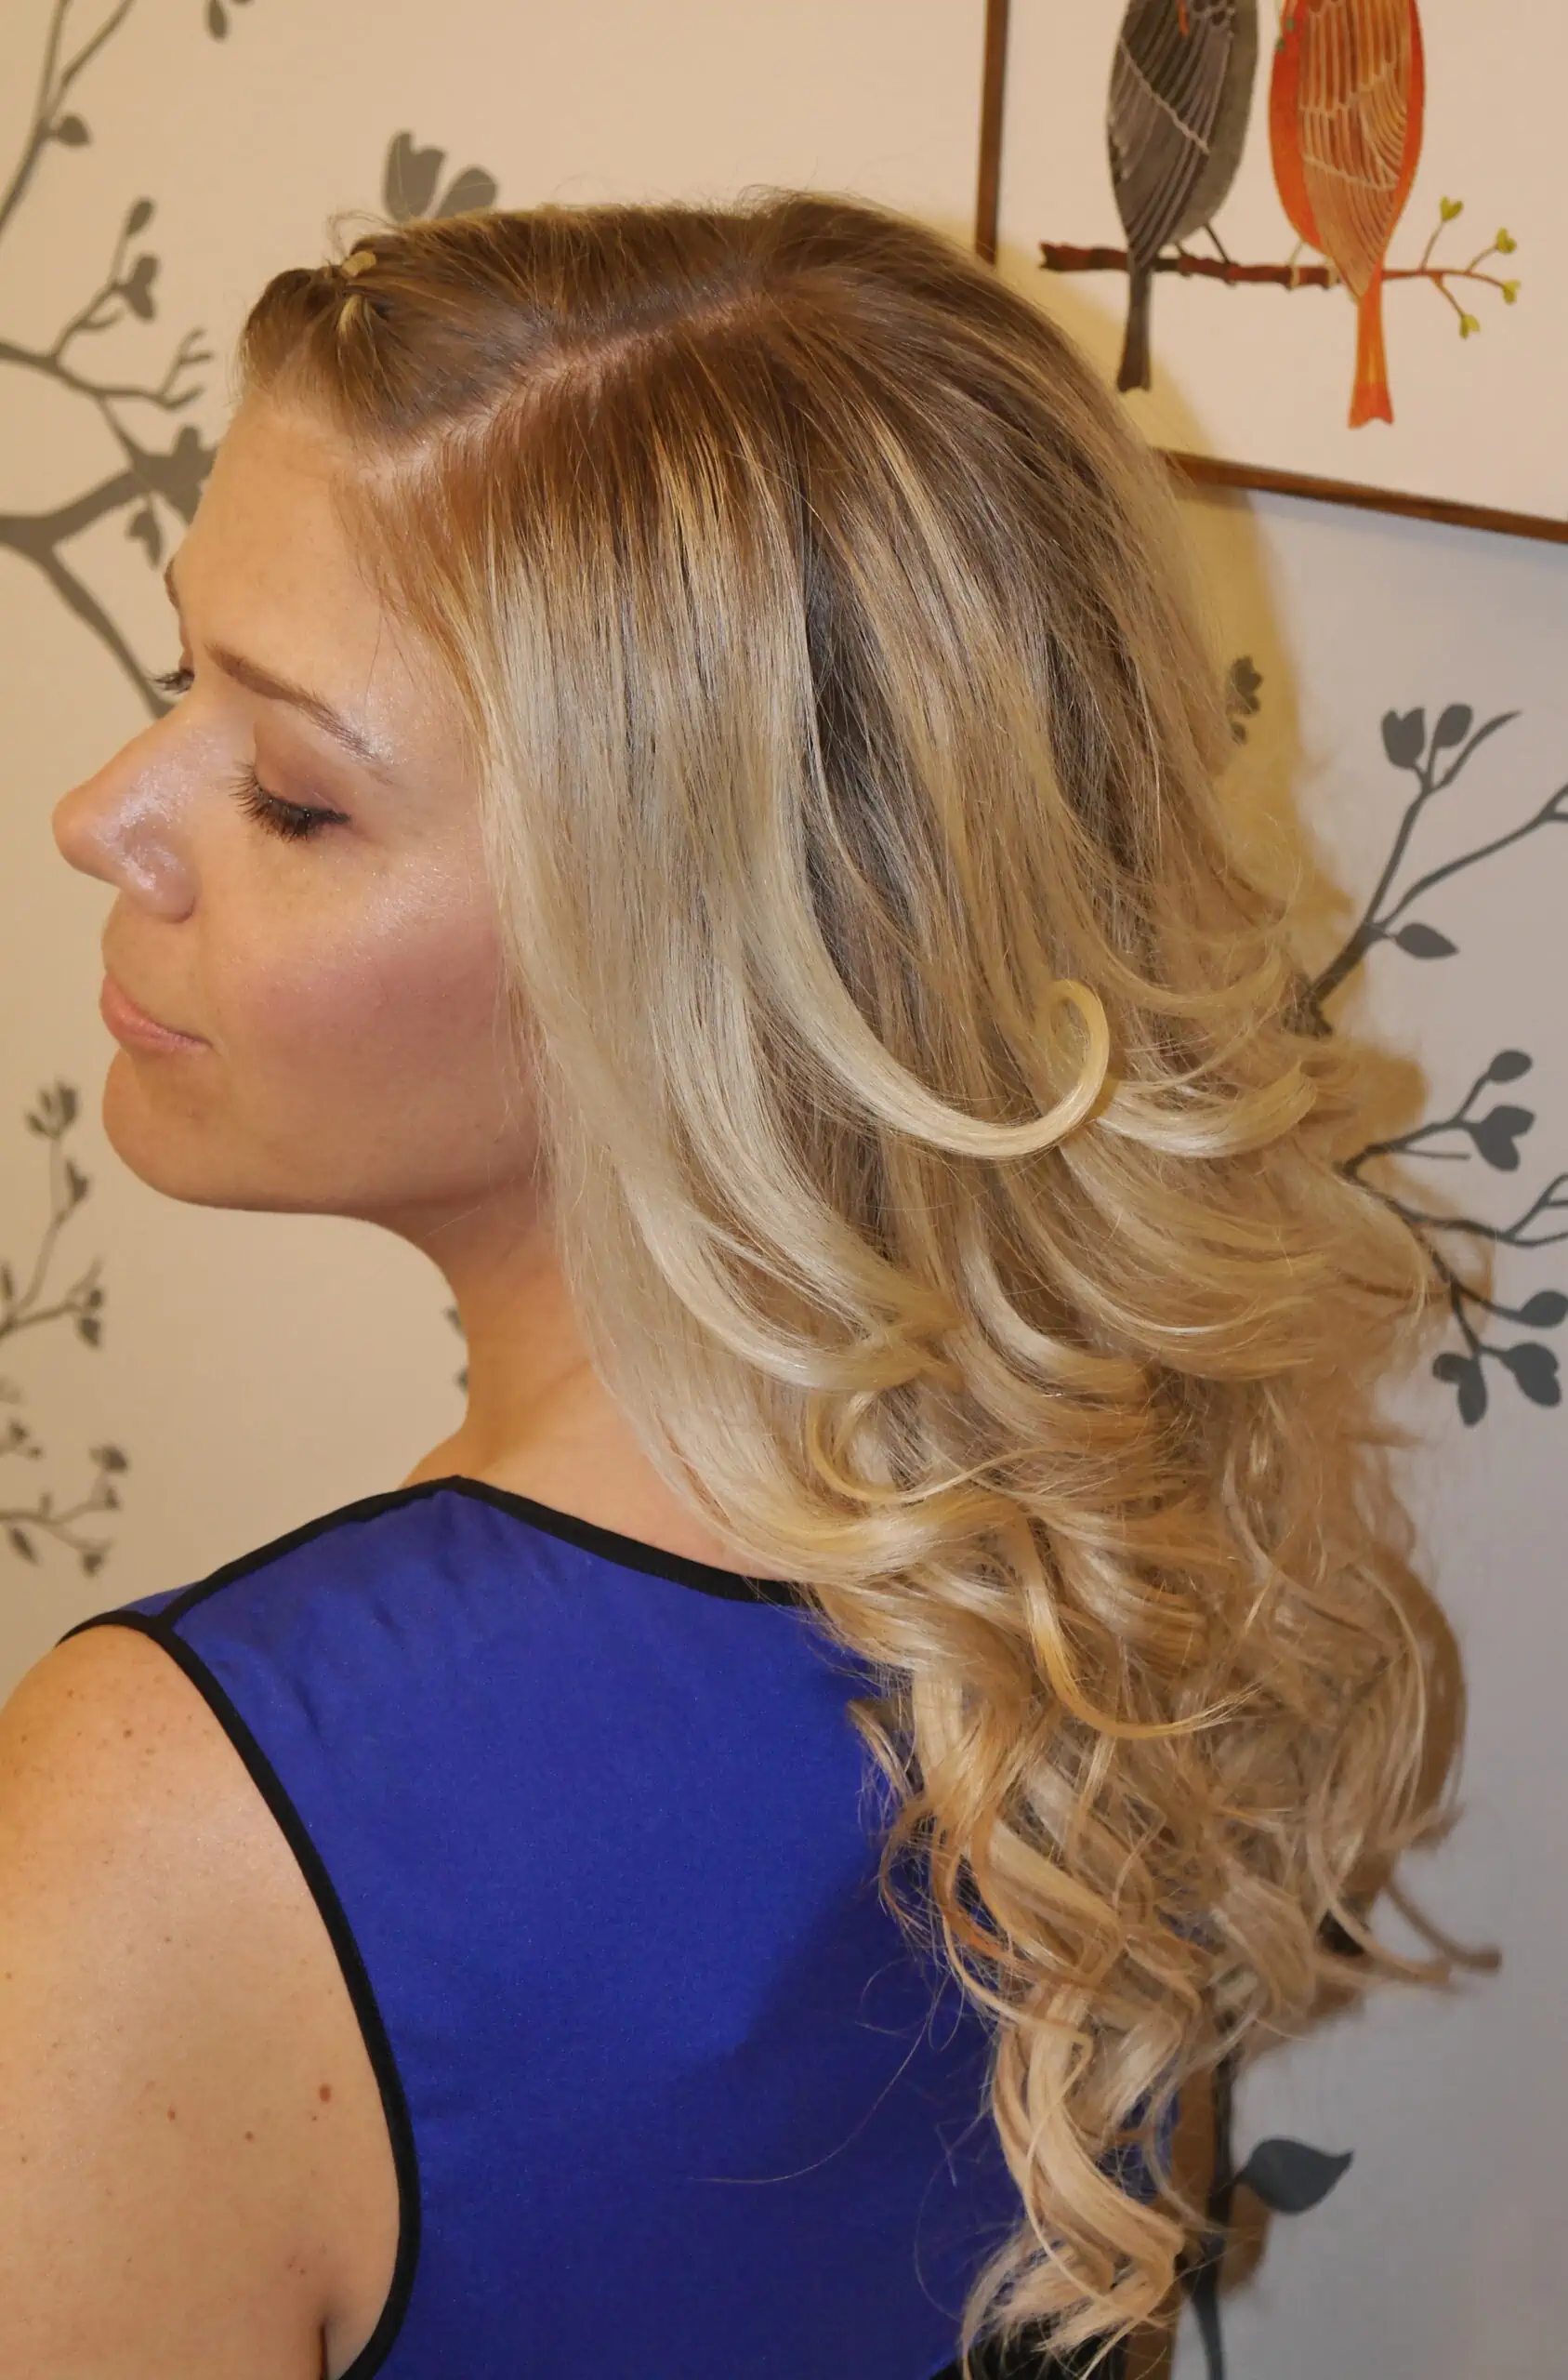
Candace came to me with dry hair, with no products in it. I sprayed her hair with Got2B Guardian Angel Heat Protection Spray Balm to protect it from the curling iron. She wanted loose, but defined curls.
I divided her hair into four sections, then from there took smaller 1″ sections and wrapped them away from her face with my Hot Tools 1″ curling iron. I did not clip the curls up, because we wanted them to fall quickly and be a bit looser.
After her hair was curled, I sprayed it really lightly with L’Oreal Elnette hairspray, concentrating on the roots. From there I teased the back, sprayed again, and finished the ends with a drop of hair oil for shine.
And there she was, all done and ready for pics!
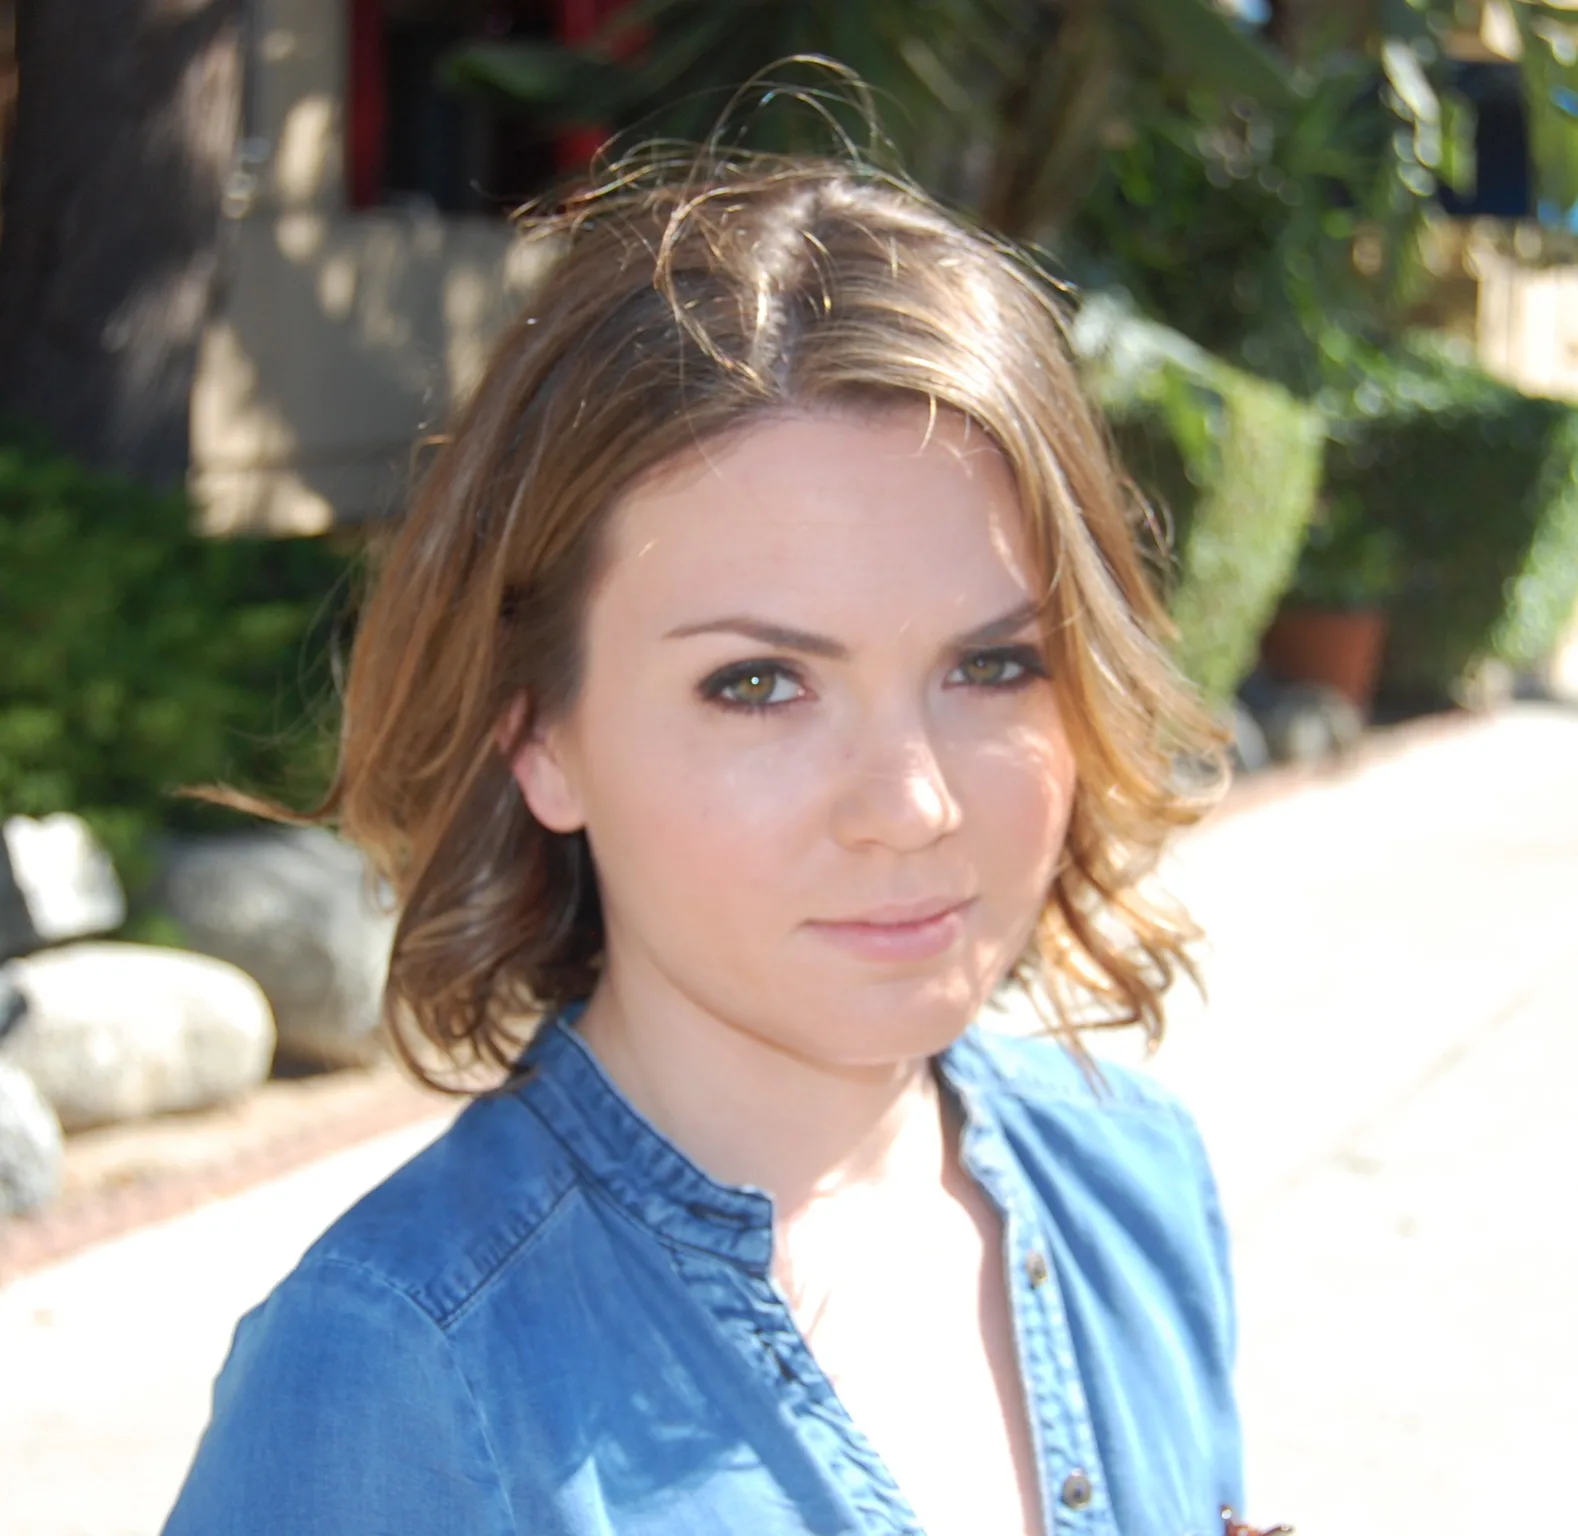
I made Candace pose for about 15 billion photos, so here are some of my fav’s. Click on any photo below to launch the gallery:


**UPDATE**
Photos from www.katielopezphotography.com!!!!


I loved how Candace’s hair and makeup turned out, but even more importantly, she loved it. Comment below! And be sure to check out Candace’s fashion and lifestyle blog, it’s how I get dressed everyday. www.fromCtoC.com
Thank you for reading!!
Stay Glam!


LEAVE A COMMENT
[…] and my bestie, Candace at http://www.fromCtoC.com have teamed up for a giveaway that I’m VERY excited […]
Love, love, love! Beautiful.