The crew.
Simply put, these five tricks and techniques have totally changed my makeup for the better. I wish I had known them FOREVER.
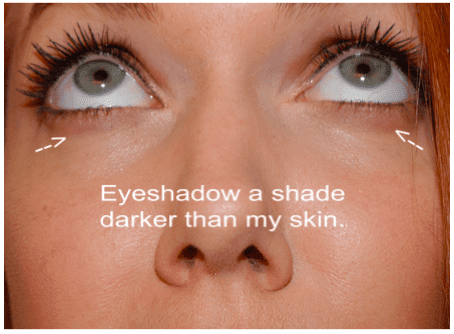
I had done shadow under my eyes when I did a smokey eye, but putting a light shade under my eyes for daily light makeup changed everything. It helps your eyes pop without wearing liner.
Put eye shadow one shade darker than your skin under your eyes.
I use MAC Wedge and a pointed pencil brush, getting the shadow as close to my lashes as possible. I place the shadow directly in the center under my eye, then blend toward the outer corner, then blend toward the inner corner.
Also, if you do still want to wear liner, adding this shadow softens the look of eyeliner next to your skin.
For a subtle smokey eye, don’t do a dark shadow all over your lid, just darken the outer corners of your eyes. I used to do really deep shades all over and it would end up overwhelming my eyes.
Now, I place a slightly lighter shade all over my lid, then using that same pointed pencil brush, I place a deeper shadow (I use Nars Sophia but this palette also looks beautiful for a smokey eye) into the corner of my eye in a “V” shape and blend.
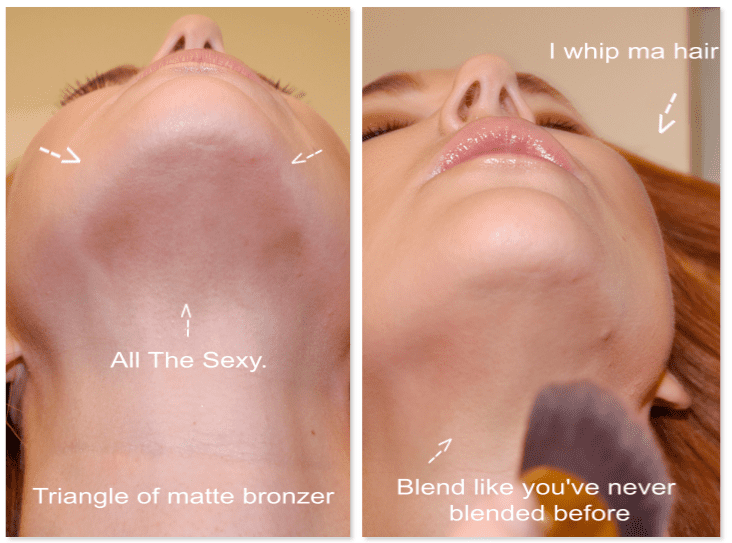
As I have gotten into my 30’s, I have noticed my jawline softening a bit. A well blended line of dark contour under the jawline and in a triangle directly under my chin gives the illusion of a structured jawline.
It always feels and looks like I’m placing too wide of an area of contour at first, but once blended really looks natural.
I do prefer cream products and use this Fenty contour stick in the shade Amber and my fingers or a blending brush to blend the product in.
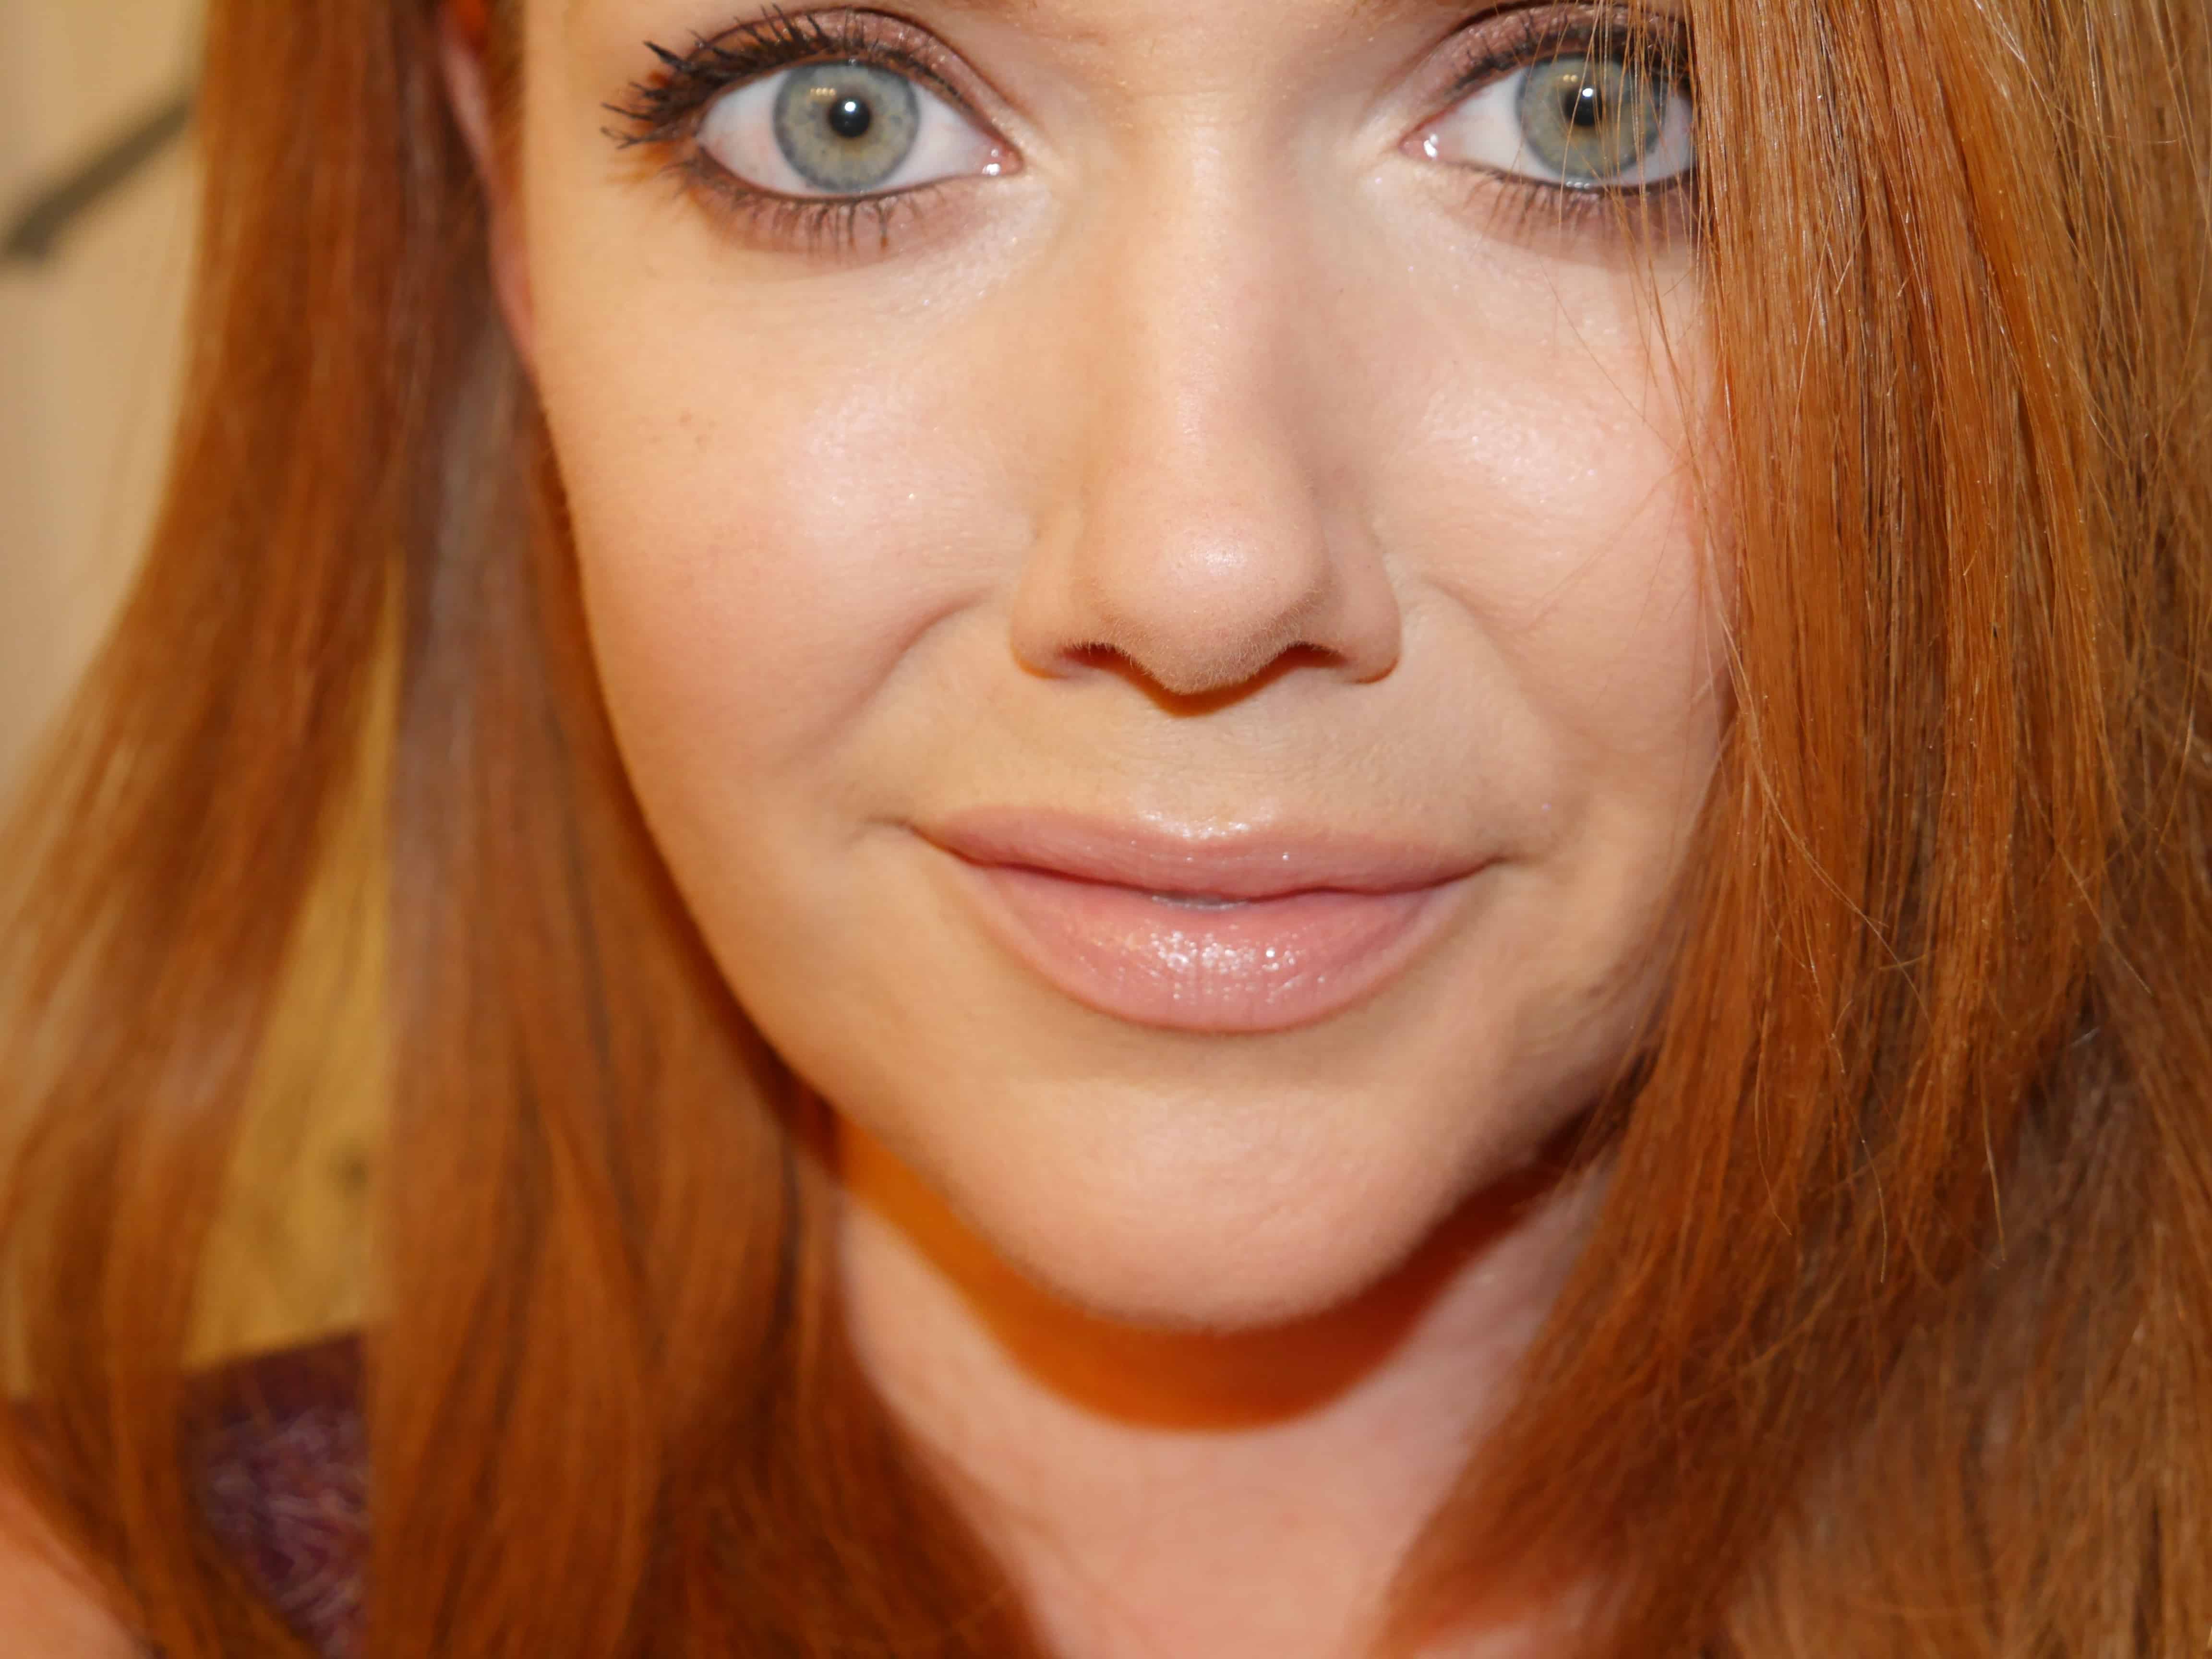
I used to use more pink toned nude lip liner shades. Then I tried MAC lip liner in the shade Whirl, which has more taupe in the shade. It made such a big difference, I couldn’t believe it!
Now, I sharpen the pencil before every use, to get a really crisp line, then line following my natural lip contour. Then I go back over and slightly outside that line, to overdraw my lips without it looking obvious.
The taupe in the shade helps create more of a natural shadow effect, so I can slightly over line my lips and still have it look natural. It’s so interesting how a little color shift can make a big difference!
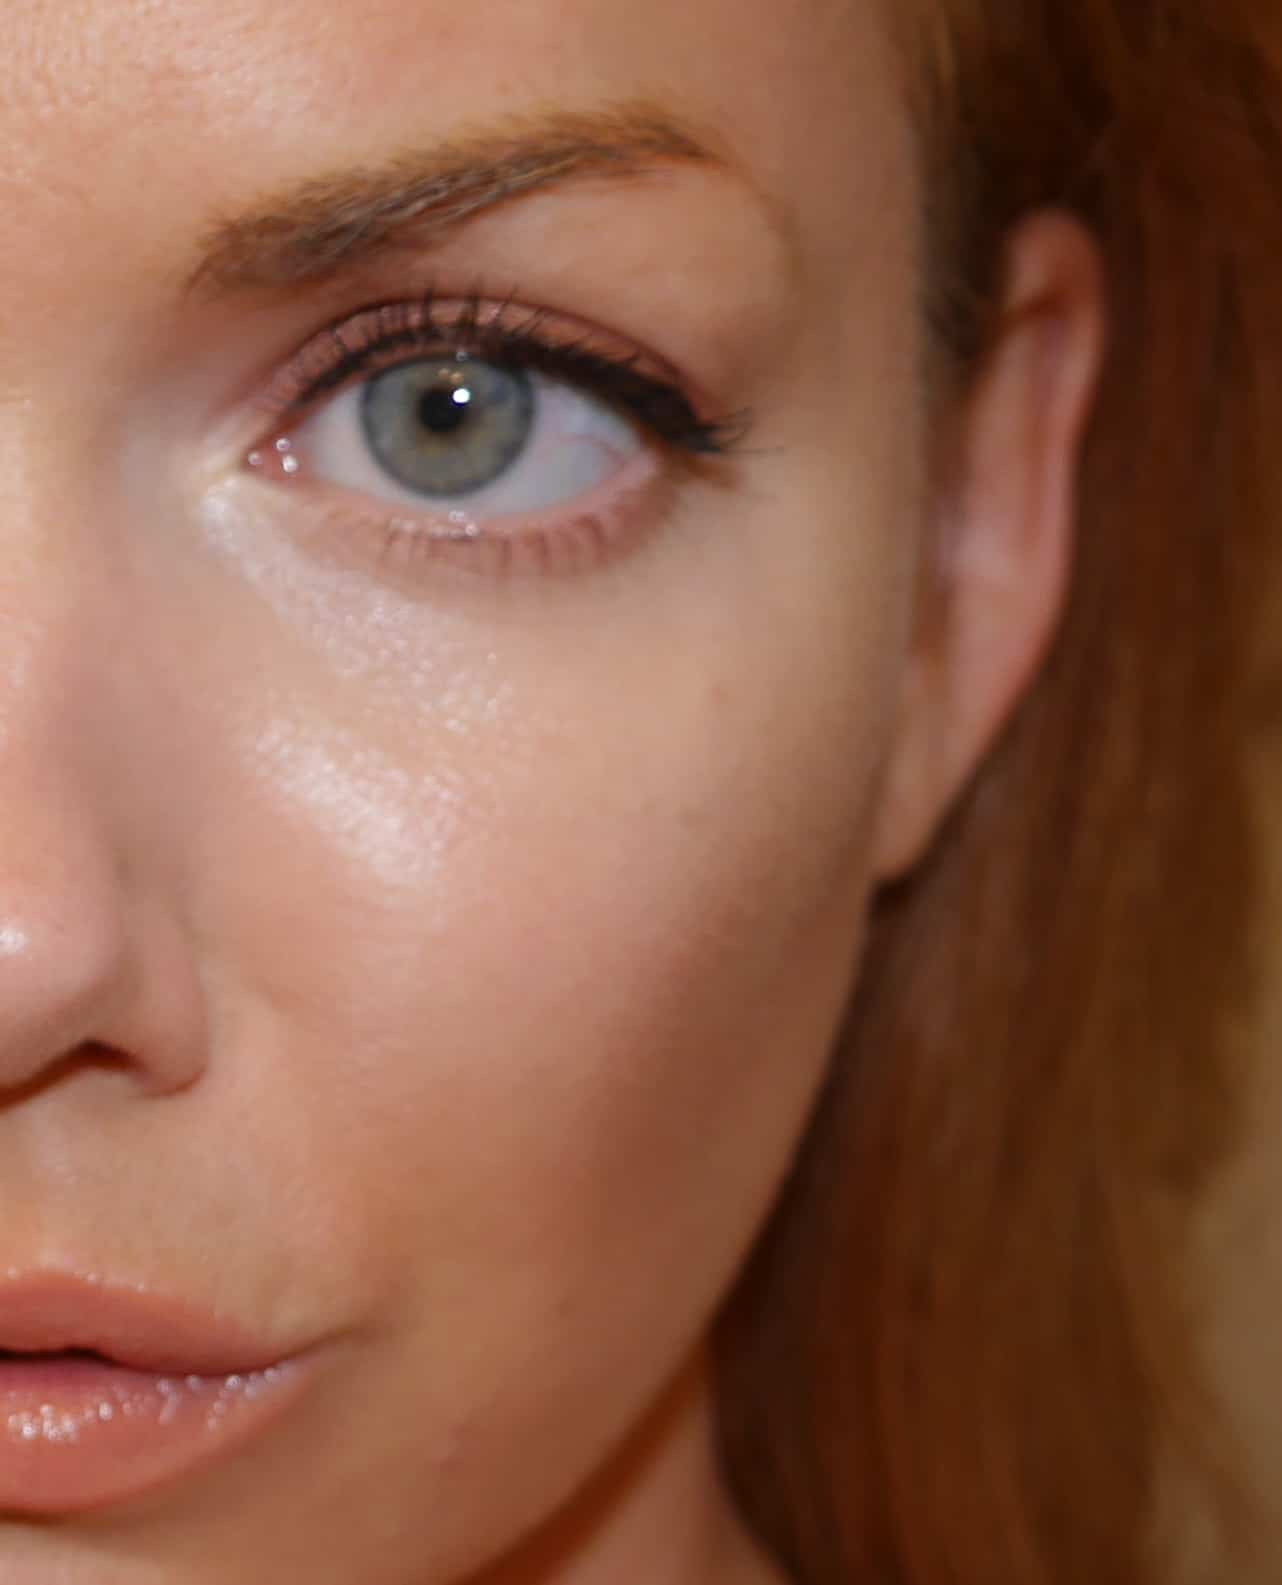
Concealer on the spot right between the apples of your cheeks and your nose, will instantly brighten the look of your face and make you look so fresh.
I used to layer on concealer under my eyes in a half moon shape. It always looked a little *off* but I thought “that’s how you apply concealer, right?”
Now, I take my concealer from the inner corner of my eye down and whisk it sideways out and across to the apple of my cheeks. Totally brightens up your whole face. I blend it with a damp beauty blender. It has been such a game changer for me!
RELATED POST | Full Concealer Routine
READ MORE
SOCIAL LINKS
Thank you for reading and being a part of the blog! – Molly
Here is my updated Strawberry Blonde at-home hair color formula for gorgeous light reddish blonde…
Ilia has just released their newest complexion product, the Skin Rewind foundation stick. Ilia Beauty…
In today's post, I have swatches and a review of one of the best selling…
This post and video are part of my new Makeup 101 series on the blog…
Jones Road Beauty is one of the most requested brands I've been asked to review…
After four years of wearing Honeylove shapewear, I've really been able to see which pieces…
View Comments
Hmm. Can you post a pic of exactly how to do that with the undereye concealer? My undereye circles and bags are OUTTA control, but I have high cheekbones, so I can't imagine putting concealer up to the apples of my cheeks. I think it would look super weird. But I'm always looking for new tricks to look like I've had hotel-quality sleep. :) Halp?
Yes, for sure! I'll do a step-by-step post on it! :)
Awesome! :)
I just posted some close up pics today and did a whole new post on the concealer trick. I hope it helps, but let me know if you want me to explain anything more! :)
Have you tried anything by Just For Redheads? I've used their mascaras (IT ROCKS!) and their brow pencil. This stuff is high quality and not TOO expensive!
I haven't tried any of their products, but I'd love to! What do you like from their line?
Some pretty awesome tricks you have posted. I like the double chin one fo sho! Lol. I loved your post and just love reading your blog. I am a redhead and your blog has been incredibly helpful. The strawberry blonde journey especially!
Haha, the double chin one is also a personal fav, lol! Thank you, you are so kind to say that so glad you are finding the blog helpful. I think I'm going to start posting a few more redhead makeup tutorials...
Why do you need corrector and concealer?
Corrector evens out areas that are a different color than the rest of the face (blue under eye circles, etc) to create an even color with the rest of your skin before foundation and concealer.