
 You might also like
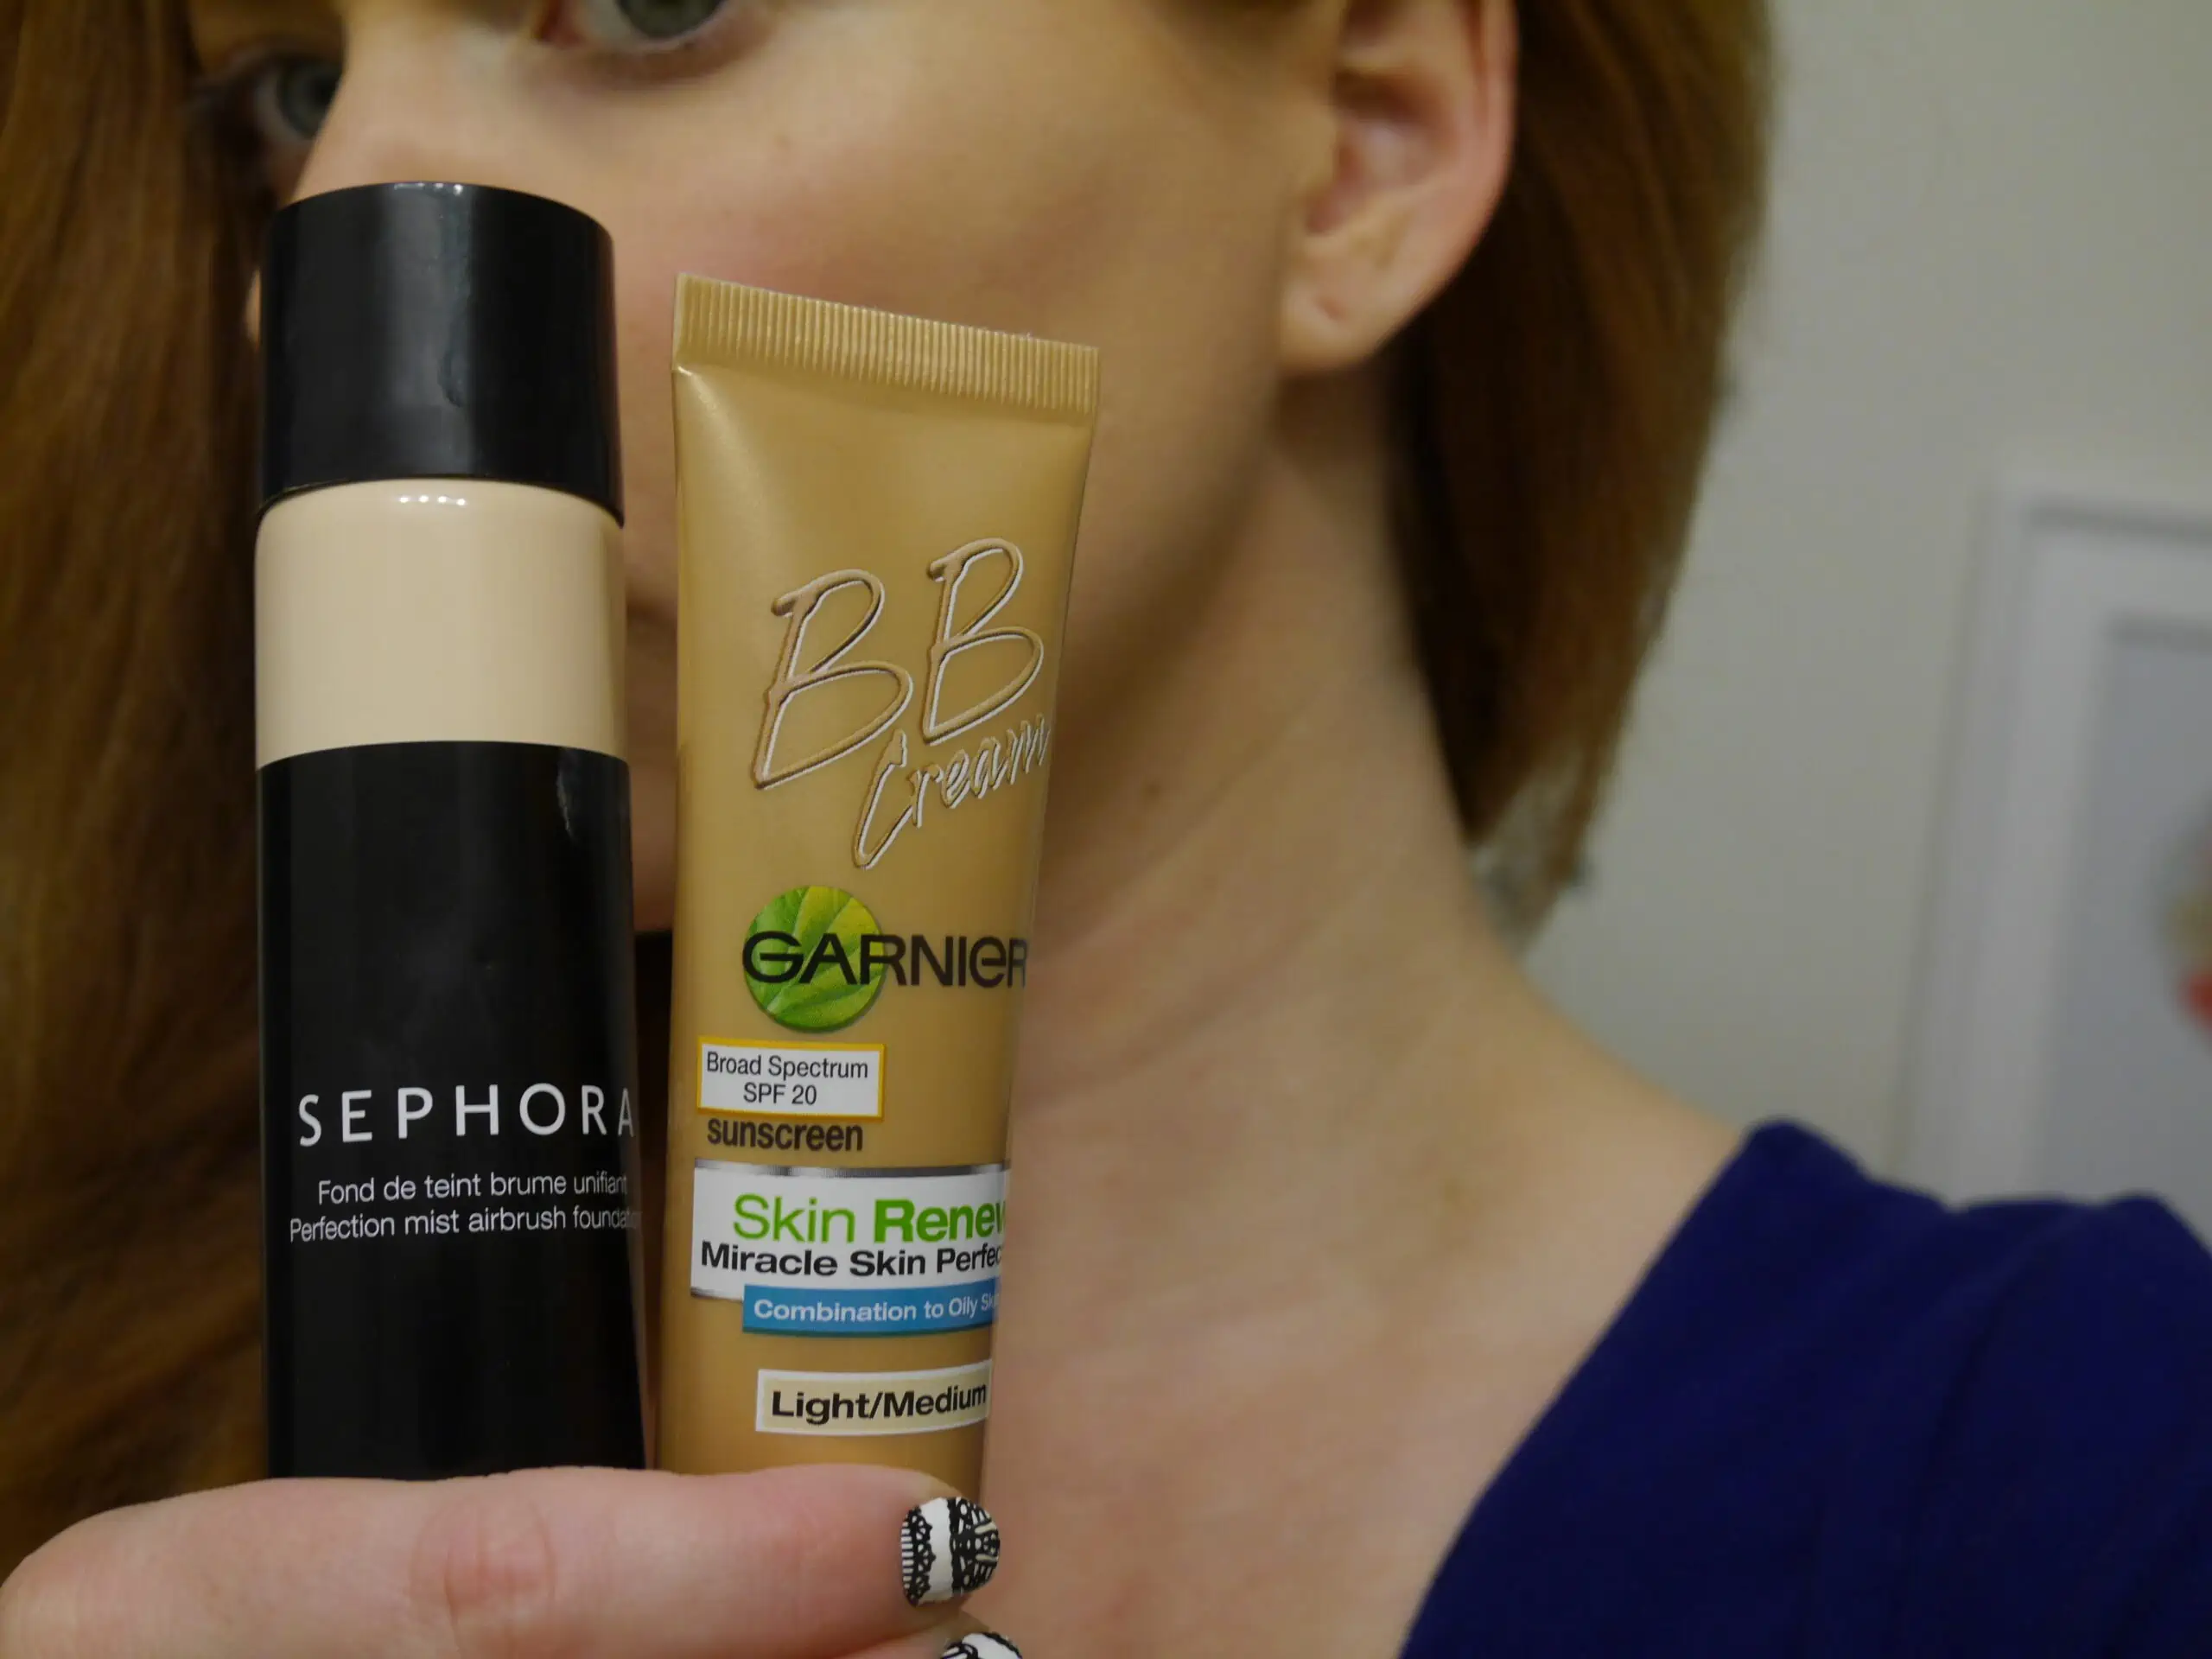 Makeup
Makeup
Makeup 


Welcome to the GirlGetGlamorous blog!
Subscribe for once weekly emails of the latest
blog posts and videos, sent right to your inbox.
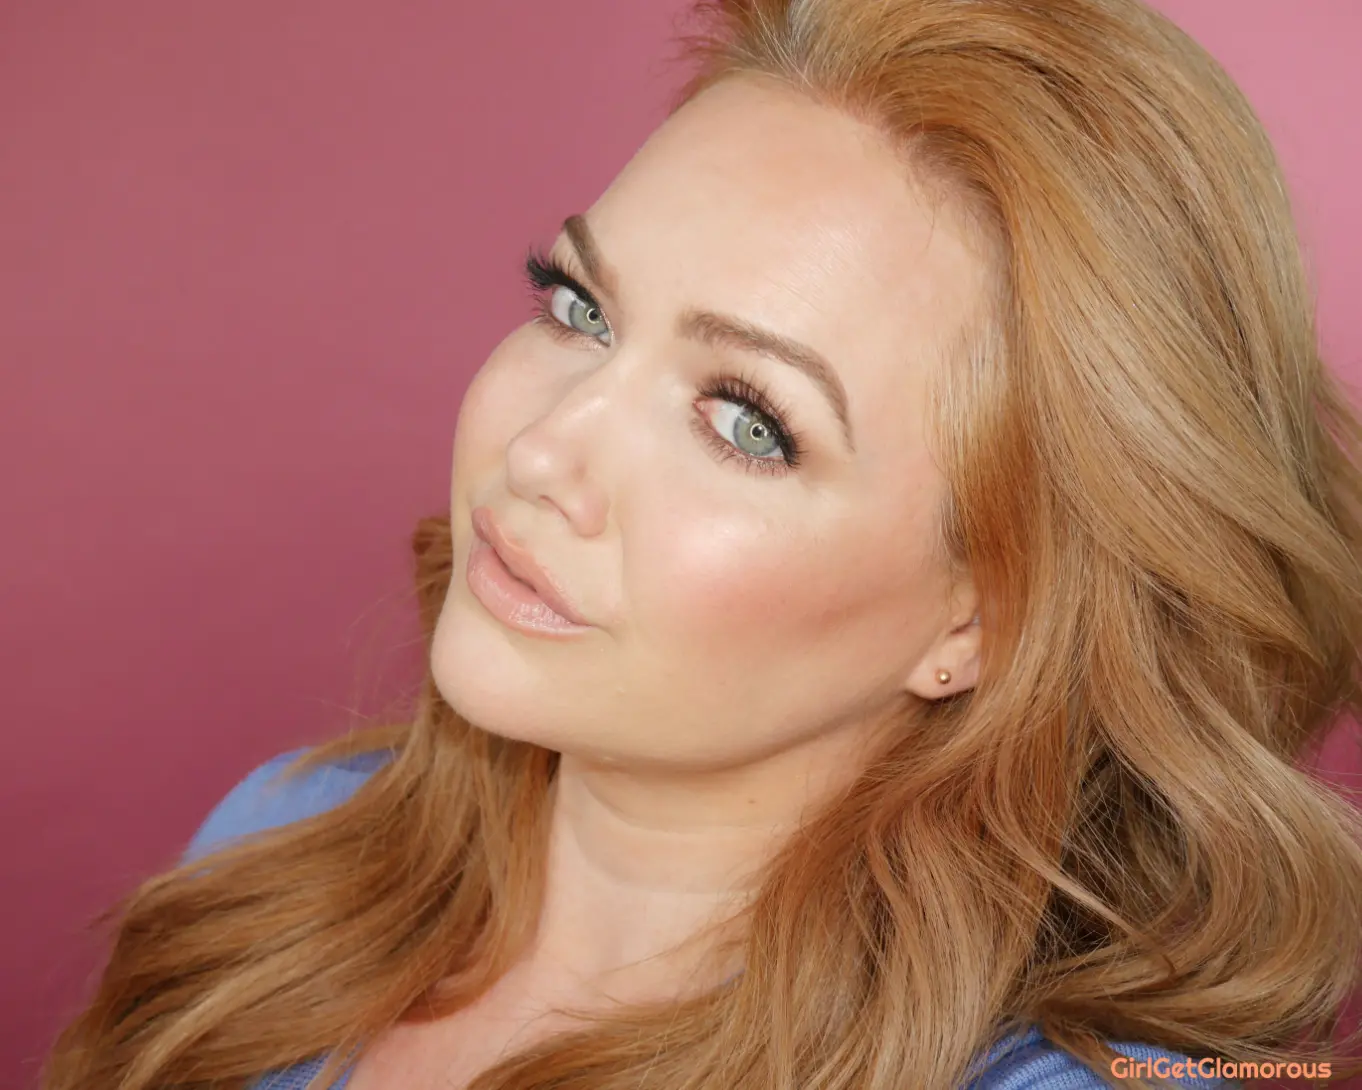
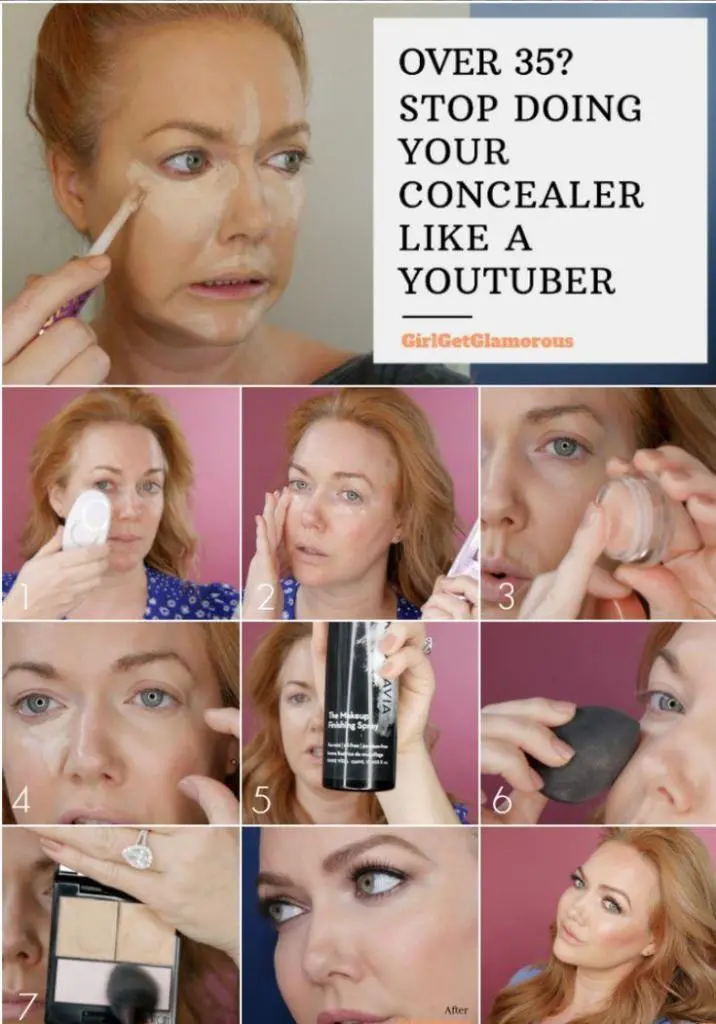
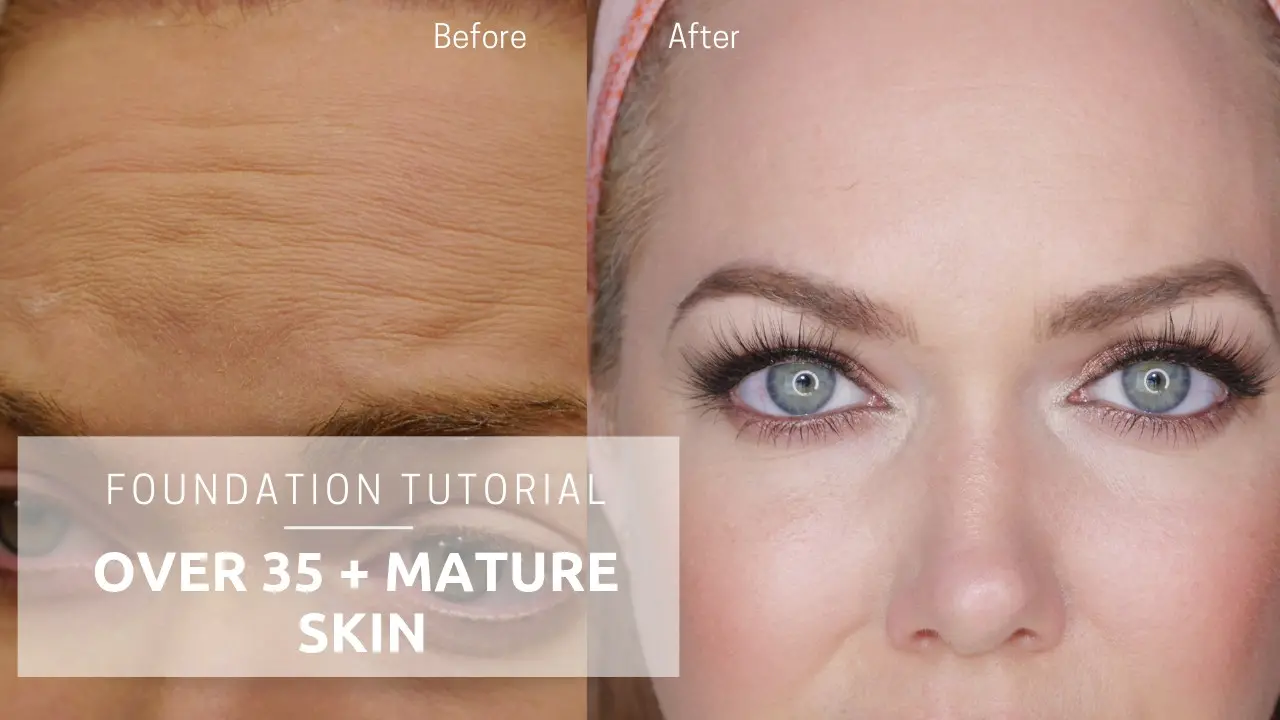
This concealer technique really changed how makeup looks on my skin. After I turned 35, so many of my favorite products and techniques that I tried just didn’t flatter my skin anymore. After switching to this concealer technique, my makeup looks brighter and fresh again!
This application style has been my “secret weapon” on clients, tested and perfected over the past few years. I’ve never shared it before, but couldn’t keep it to myself any longer. The whole point of my blog and channel is to help you look and feel your best, so here we go!
I recommend to bookmark this page so you can come back to it as you try this technique and click here to watch the video on YouTube. Also, if you find it helpful, send this page to a friend!
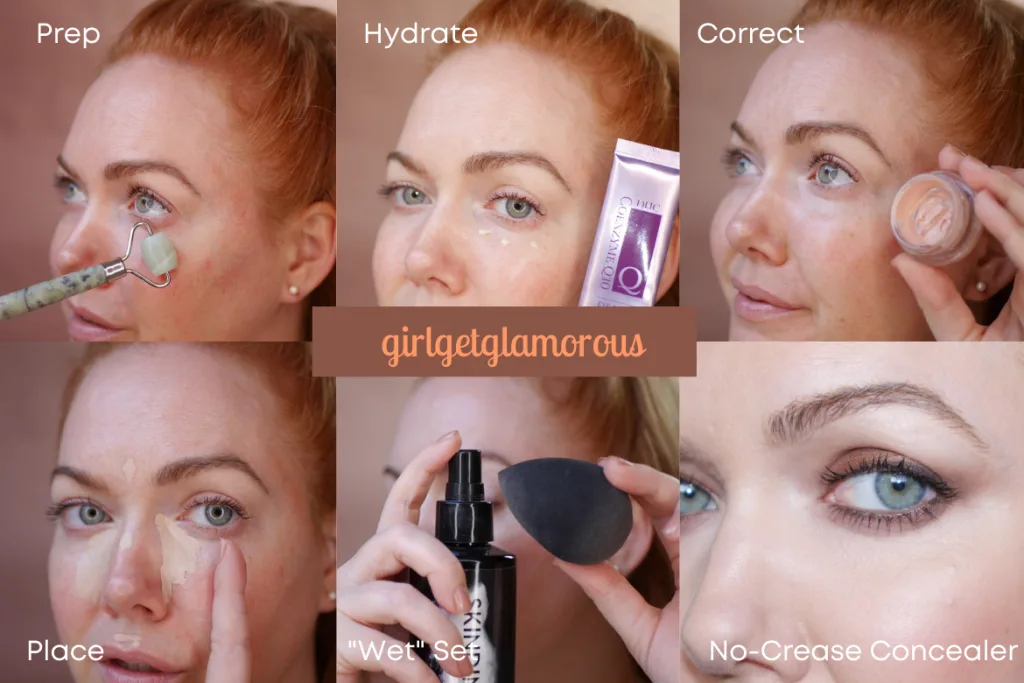
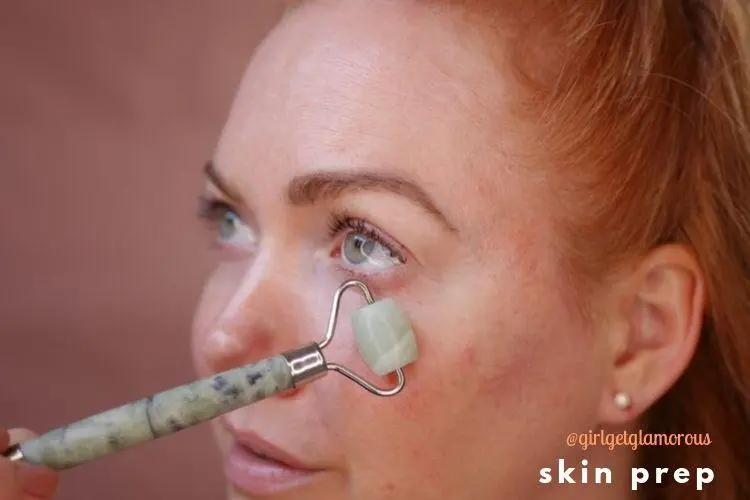
Massaging your skin helps with lymphatic drainage, which gets rid of retained water in the face and under your eyes. This will really help if you wake up with under eye bags. I use either a jade roller or the ZIIP Beauty device to smooth out my under eye area and prep it for skincare.
I’ve found that even just a few quick rolls on each side really wakes up my eyes. I tend to use the jade roller when I’m in a rush and the ZIIP device when I have a little time or before a big event.
Here is how I use the jade roller and here are my before-and-after results with two years of using the ZIIP.
shop skin prep | jade roller . ZIIP beauty device

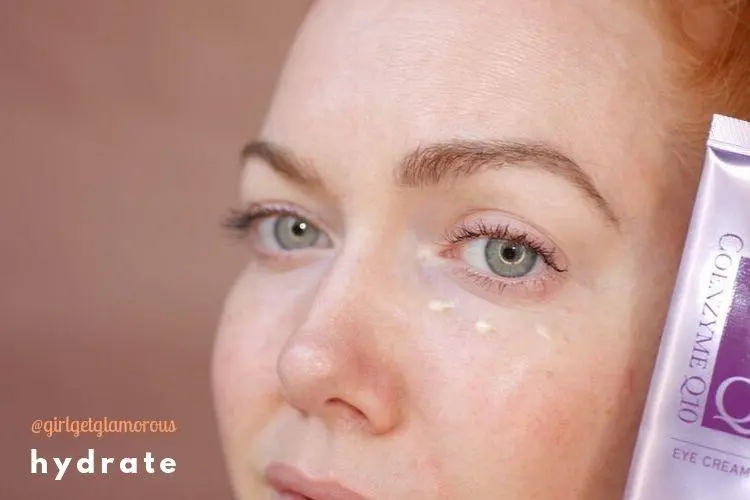
A well moisturized under eye area will make a world of difference in how your concealer looks! Hydrated skin will help your concealer start out and stay look fresh, not dry or cakey.
I love and use this affordable Japanese brand eye cream.
Hydrating eye cream is essential for a concealer base. I can’t emphasize this enough! It helps prevent concealer from clinging to dry patches and helps minimize any fine lines by plumping the skin.
shop eye cream | eye cream
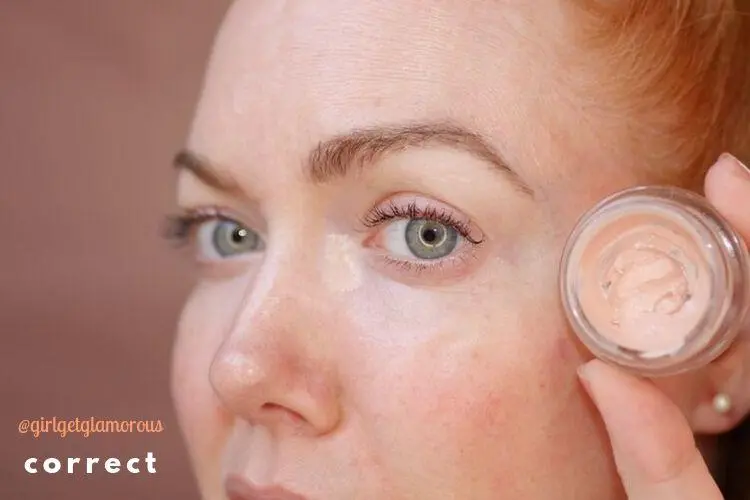
Color correcting is a game-changing step. A color corrector is a light pink, peach, or salmon colored product that you apply to only your dark circles. These peachy tones counteract the blue/purple tones at the inner corner and under eye area.
I use so much less concealer because I’m not piling on 3-4 layers of concealers to get rid of dark circles. Just one light layer of corrector and a dab of concealer.
It is a key step in making my concealer look better and my skin look smoother.
Less product overall = more natural looking finish on me.
shop color corrector | charlotte tilbury (I use Fair) . sephora . ulta beauty . maybelline (shade 160)
Related Post | Testing 30 New Concealers (Close Up!)
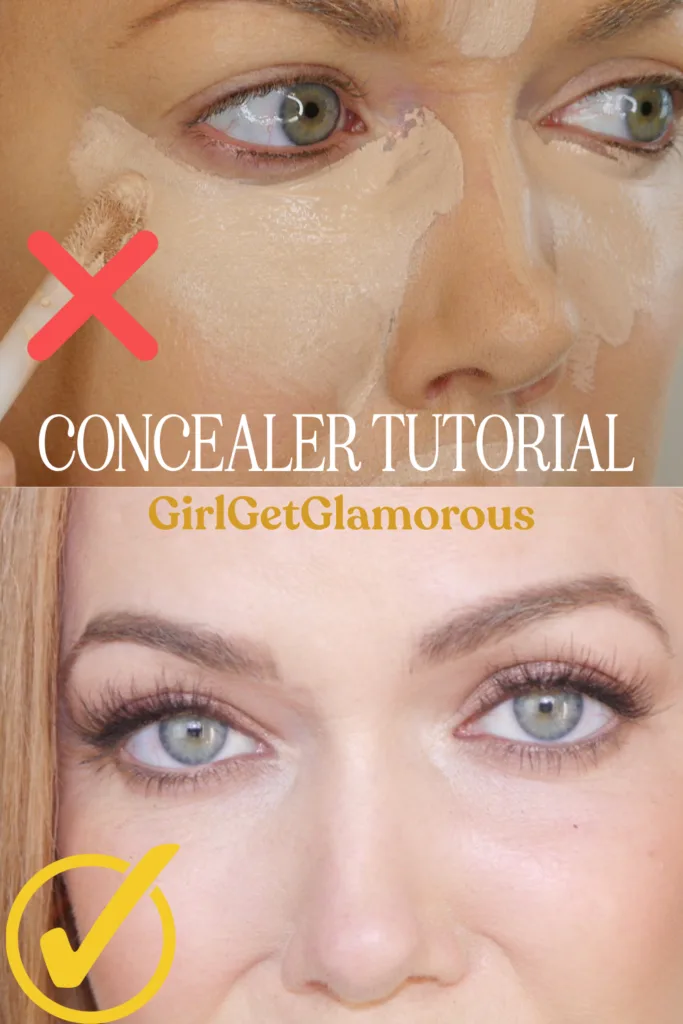
Making these two changes on myself and on client’s makeup has totally transformed how the concealer looks and wears throughout the day.
I only place concealer from my inner corner of my eye to the center of my eye.
I use tiny dots or dabs in a tiny triangle shape from the inner corner of my eyes, down the side of my nose, then to the center of my eye. Again, I don’t apply any concealer past the middle of my eye.
I do blend the concealer that I’ve placed out towards the outer corner or my eye. By not placing any concealer on the outer corner, this prevents concealer from settling into the fine lines on the outer corners of my eyes.
I use the smallest possible amount of product I can, blend it out, then add more as needed. Using light layers like this to build up the coverage, instead of one thick layer helps prevent creasing.
The video goes into depth for both of these tips!
shop my current favorite concealers | bare minerals (shade 2 or 4) . dior forever skin (shade 0N) . it cosmetics (shade 14) . drugstore (shade 820)
Related Post | My Favorite Concealers for Dry + Mature Skin
How I set my concealer is another step where a simple switch has made a huge difference!
Instead of putting a ton of powder over the blended concealer (a.k.a. “baking”), I use setting spray, spritzed directly into my blender, squished in, and then set my concealer by bouncing the blender into my skin. In the video I show this “wet set” technique up close!
After using spray, if I still need a bit more setting, I’ll ever-so-lightly dust a soft-finish setting powder over the triangle. Using the spray first allows me to get use less powder and gives my concealer a softer finish.
That’s it! I should also mention, this concealer technique works no matter what order you do your makeup in.
I generally do my concealer first, then eye makeup, then the rest of my face. But you can do concealer after foundation and this technique will still work perfectly!
shop setting products | setting spray . setting powder . beautyblender . softest powder brush . affordable soft setting brush
Related Post | My Over 35 Foundation Routine for Smooth Skin

ZIIP beauty device | eye cream | beautyblender Pro | under eye corrector | concealer | setting spray | setting powder | lashes “Double Tapped”
This post contains my affiliate links and I really appreciate when you use them. It costs you nothing extra to shop using them, your prices stay the same. They helps support the blog and make future posts possible. Thank you!
READ MORE
SOCIAL LINKS
Thank you for reading and being a part of the blog! – Molly


LEAVE A COMMENT
Great make up tips! Does your BB pick up a lot of the concealer after you spray it and then dab it to set the concealer? I’m afraid of the concealer lifting.
Thanks for your help!
You put. Spray over concealer than powder. Ty. Looks great. I’m 65 have bad circle will it help
I have similar hair color. What color lipstick are you using and eyeshadows?
Wow! Just Wow! I found your post on Pinterest & I was hooked. I ordered the products on Amazon “in case” I needed to return and, truth be told, wanted them asap. I am 51 and was looking for actual products and techniques instead of just “suggestions”. I followed your instructions and loved the results. However, the true test came a week later when I tried a new doctor for injections. I wanted to get under eye filled but was told the 15 yr old filler I had, needed to be dissolved first. This caused me to bruise like a banana! I look like I seriously lost a street fight or I got a nose job- but, the technique worked, especially the Becca Corrector! Thank you SO much for the details and the range of products you recommend. I will forever be a fan!
Oooh, I can’t wait to try this! I’m 41 and my fine lines are on the inner corners of my undereyes. Concealer and powder just make them look worse, so I’ve been moisturizing and living with the dark circles.. I’m excited to see if this helps. <3
well..honestly 35 is a bit early to talk about “mature” skin…mature is over 50..
Hi Mara! Collagen production starts to decline after the age of 25 and starts to become visible in most people in their 30’s, so it’s great to start adapting new makeup techniques in your 30’s and adding in collagen boosting routines (like microcurrent facials) instead of waiting until 50’s+.
I just tried this technique-AWESOME result. Can’t thank you enough for the hints. I’m 51 and this actually worked!
Thank you for this post! Tried it all and loved it! What mascara do you use? The only issue I had was some mascara transfer to my under eye area:0(