
 You might also like
 Makeup
Makeup
Makeup 


Welcome to the GirlGetGlamorous blog!
Subscribe for once weekly emails of the latest
blog posts and videos, sent right to your inbox.
I have been super lucky to get to attend not one, but two of my close friend’s weddings this year. At each wedding we danced all night and gave the bartenders a decent workout. Both weddings were beyond fun and so memorable in different ways.
Lover.ly, a wedding inspiration and planning site, reached out to me to do a collaboration with them on bridal makeup. Which is something I’d wanted to do a post on forever, but got weirdly scared that I’d somehow jinx my own chances of getting married someday. Is that crazy? Yes. Yes, it is.
I love that a good portion of the Lover.ly site features real brides on their actual weddings. I love a J. Crew wedding catalogue spread more than anyone I know, but seeing someone pull together a wedding with actual logistics involved, like where the guests are going to park, and still have it look beautiful is very rad to see.
Now, I’m NOT low maintenance, I can barely spell the word, but I do want makeup that won’t look crazy after three hours of dancing, but still looks beautiful in the pics. Fun + Superficial! My friend’s weddings this year solidified that I want to have fun, easy, gorgeous, hair and makeup that I really think about (ha!) then don’t have to think about again all night.
My dream wedding hair and makeup was inspired by this gorgeous dress:

How To:
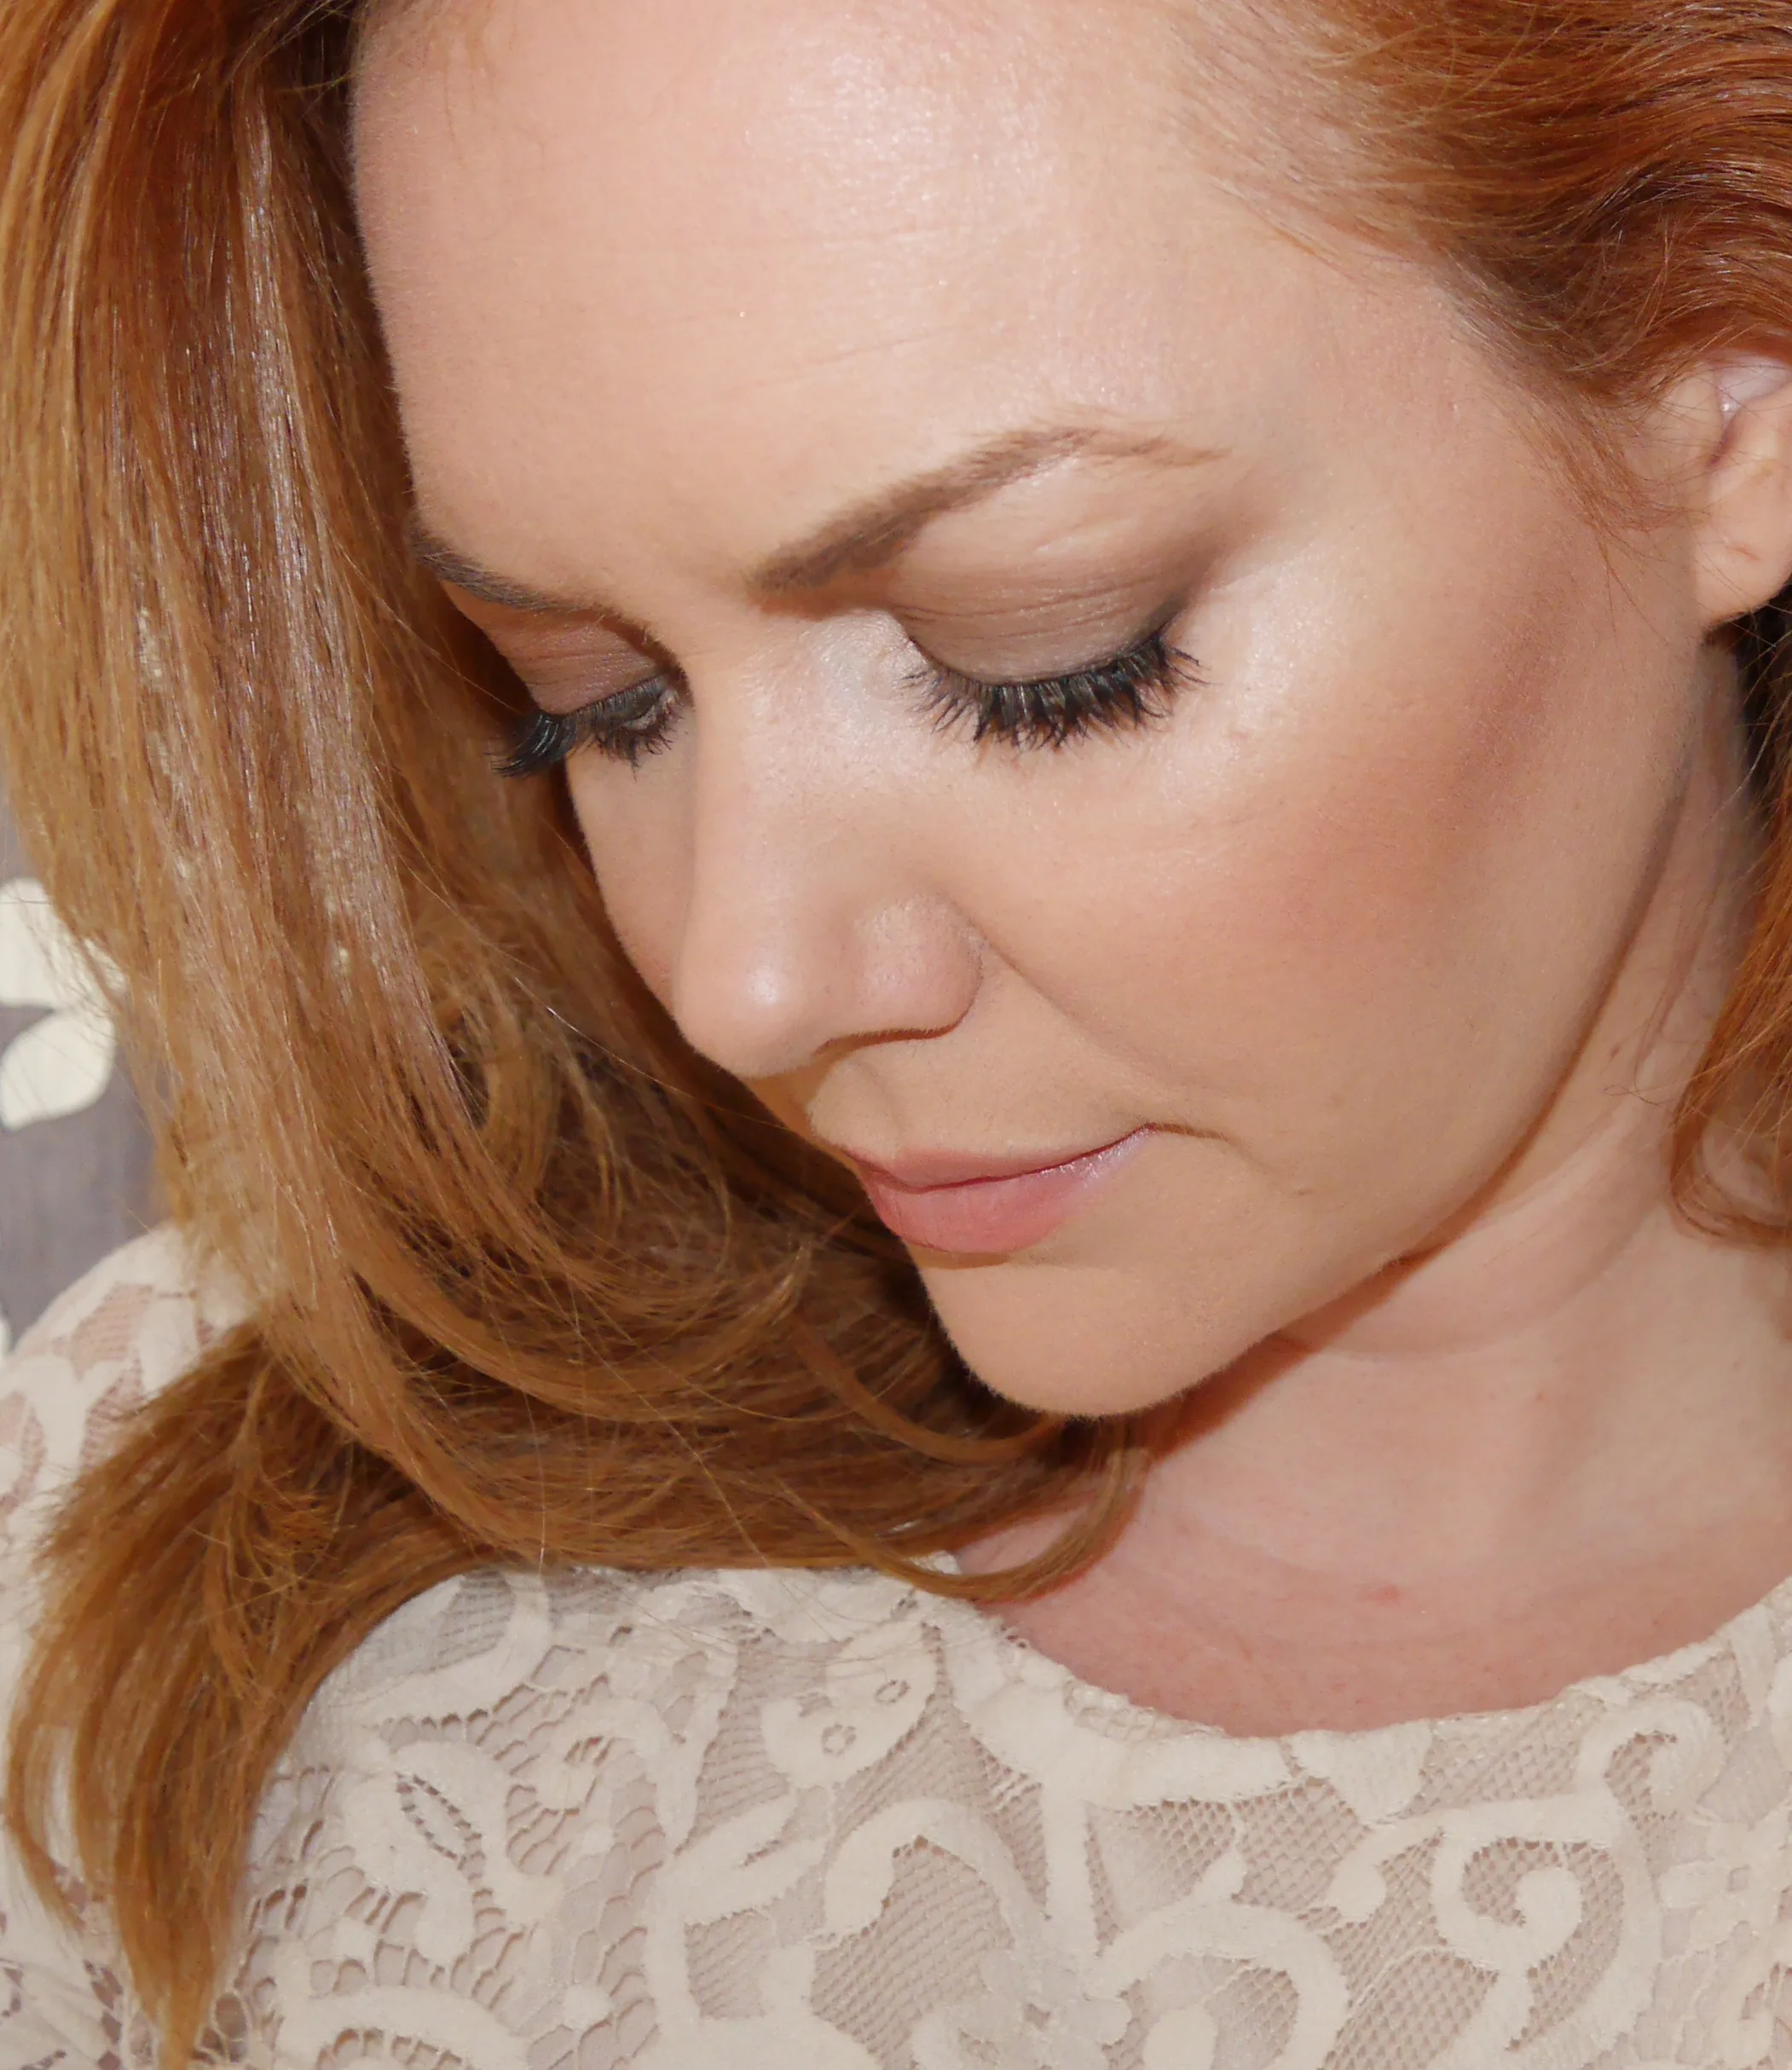
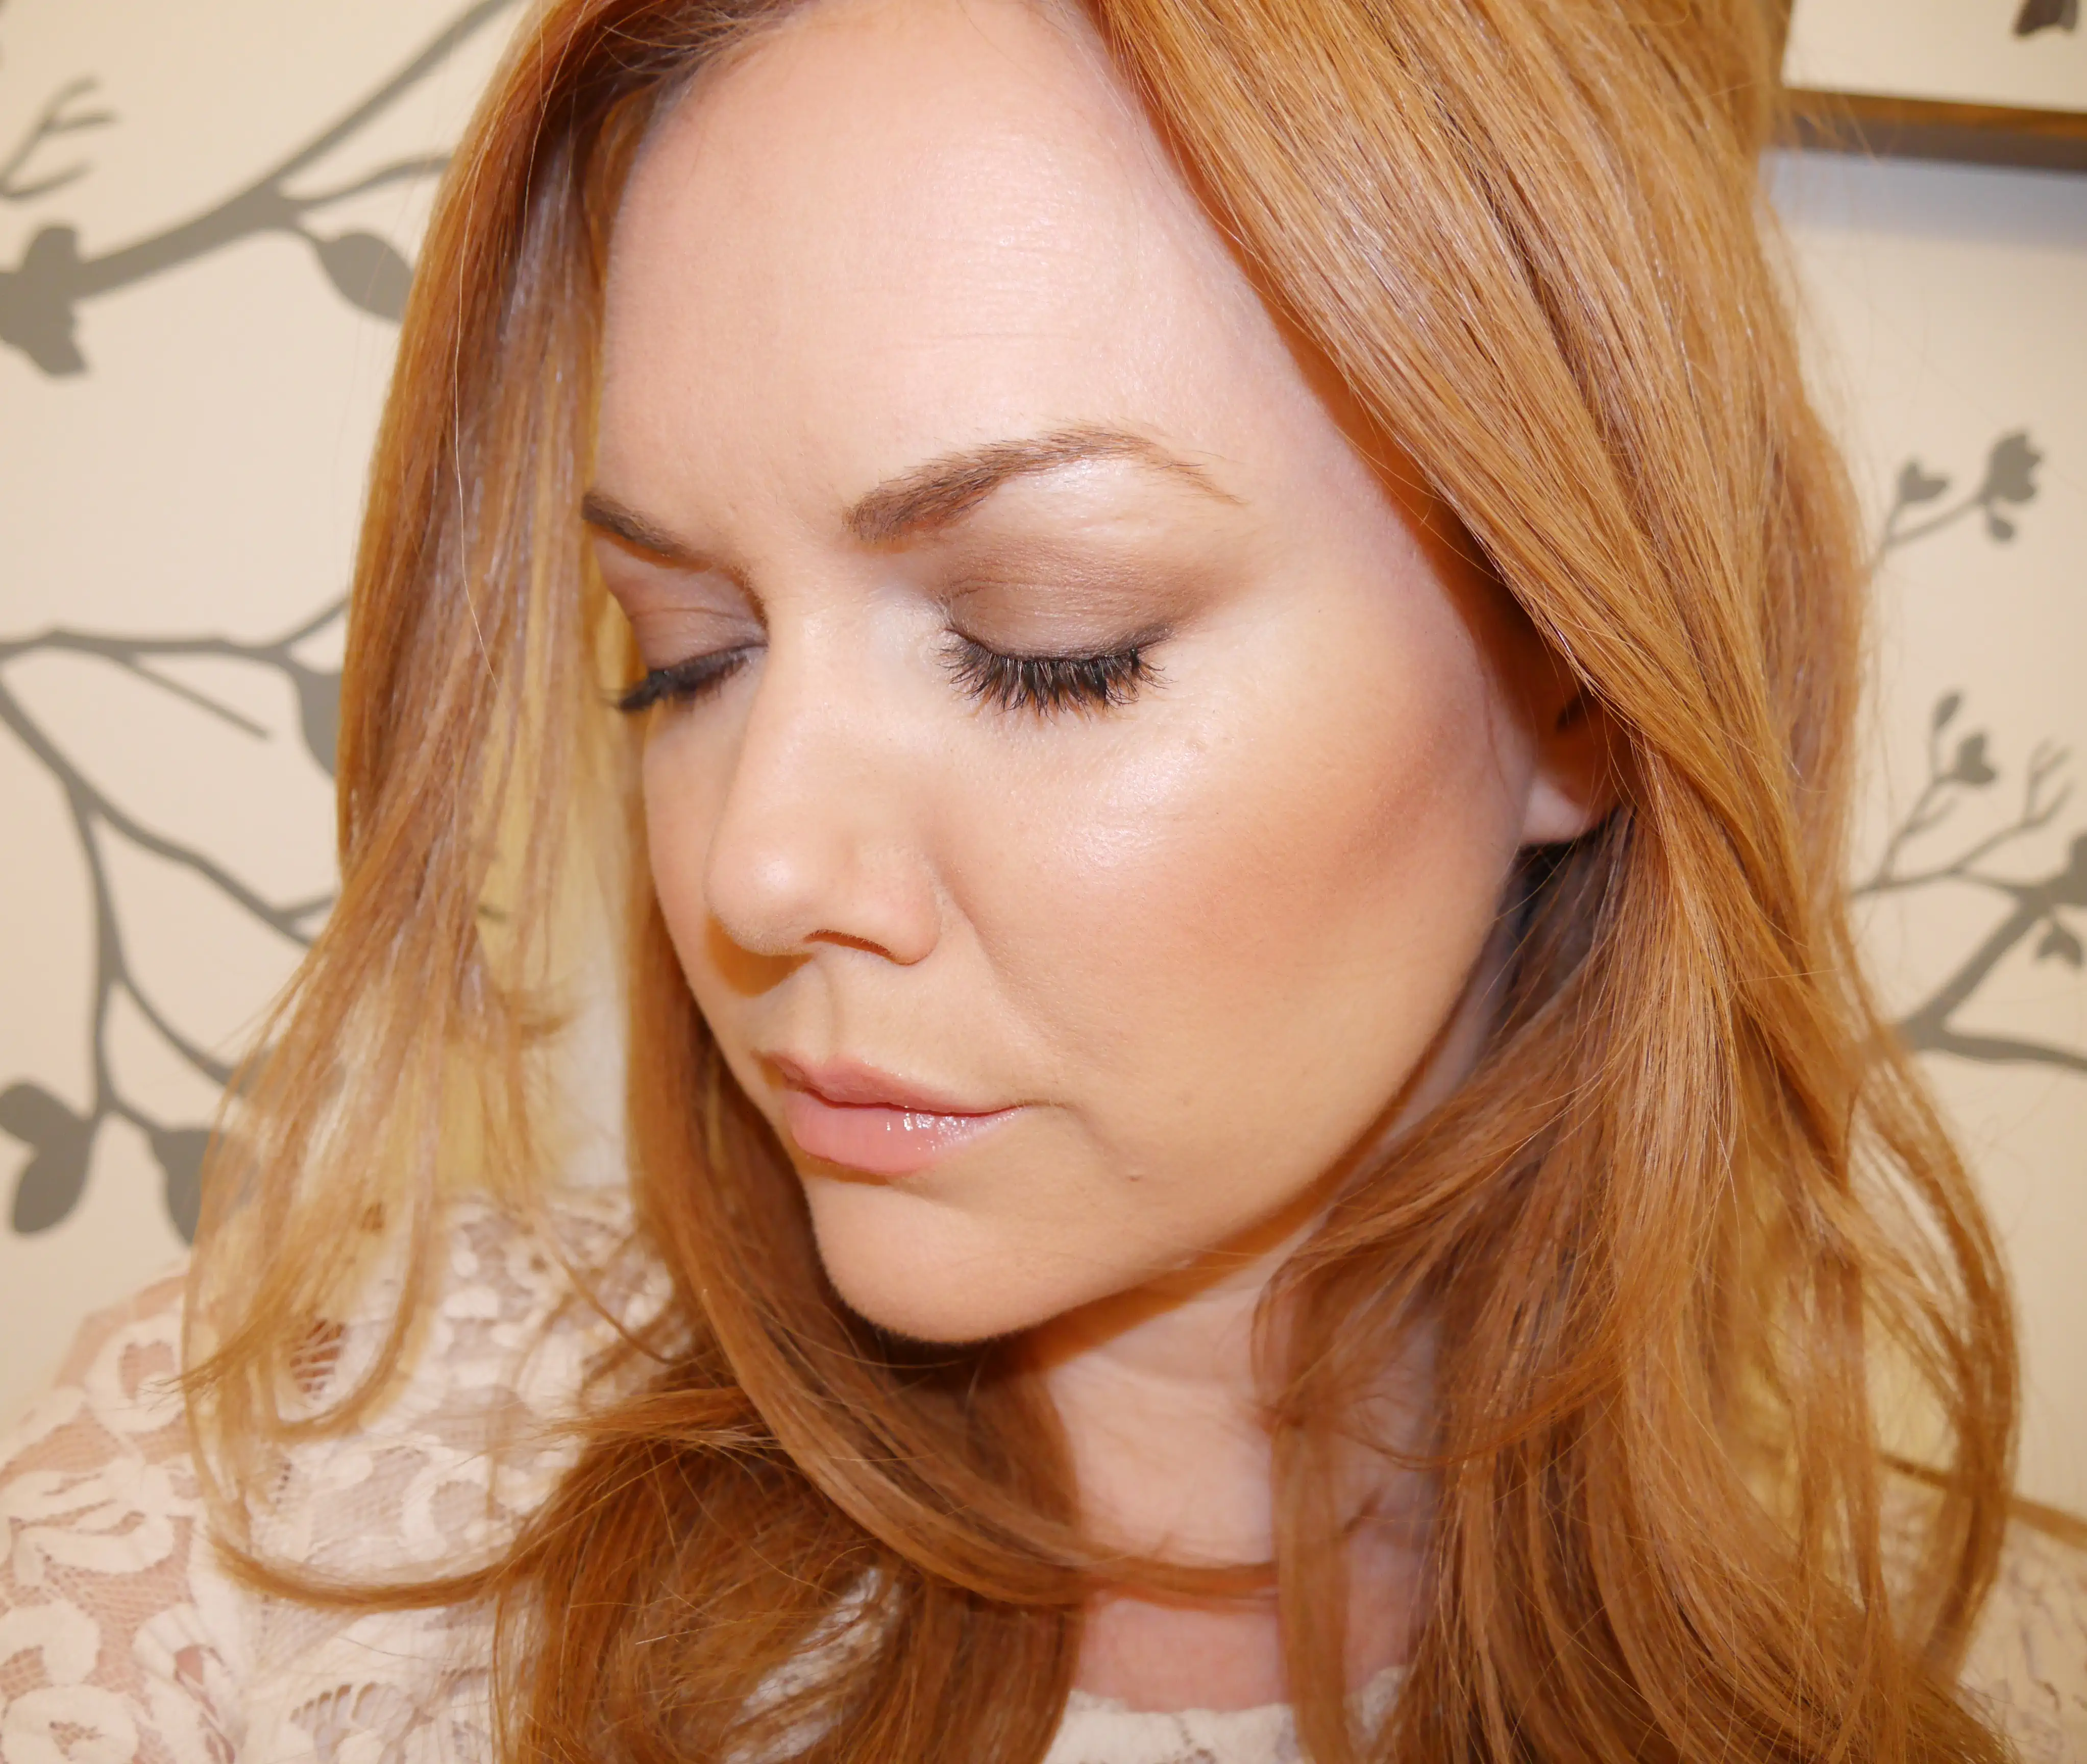
I start with my regular foundation and contouring routine, you can watch that video {here}. I added Hourglass Mineral Veil Primer to make sure the foundation really lasts, instead of using tinted moisturizer under my foundation. Also, I used Ben Nye cream contour in “Natural” under my Anastasia Contour powder in “Fawn.” I know this probably seems like a lot of makeup already, but I’ve found the key to making my makeup last is to start with a cream or liquid and set with a powder in a similar tone.
For this look, I use the Giorgio Armani Luminous Silk Foundation. I know this primer and foundation are two expensive products, but they both hold up exceptionally well, which is important to me for an all-day and night wedding. Drugstore options would be the E.L.F. Mineral Primer and L’Oreal Lumi foundation.
For blush, I’m using Too Faced Sweethearts blush in Peach Beach, a drugstore dupe is Milani baked blush in Luminso.
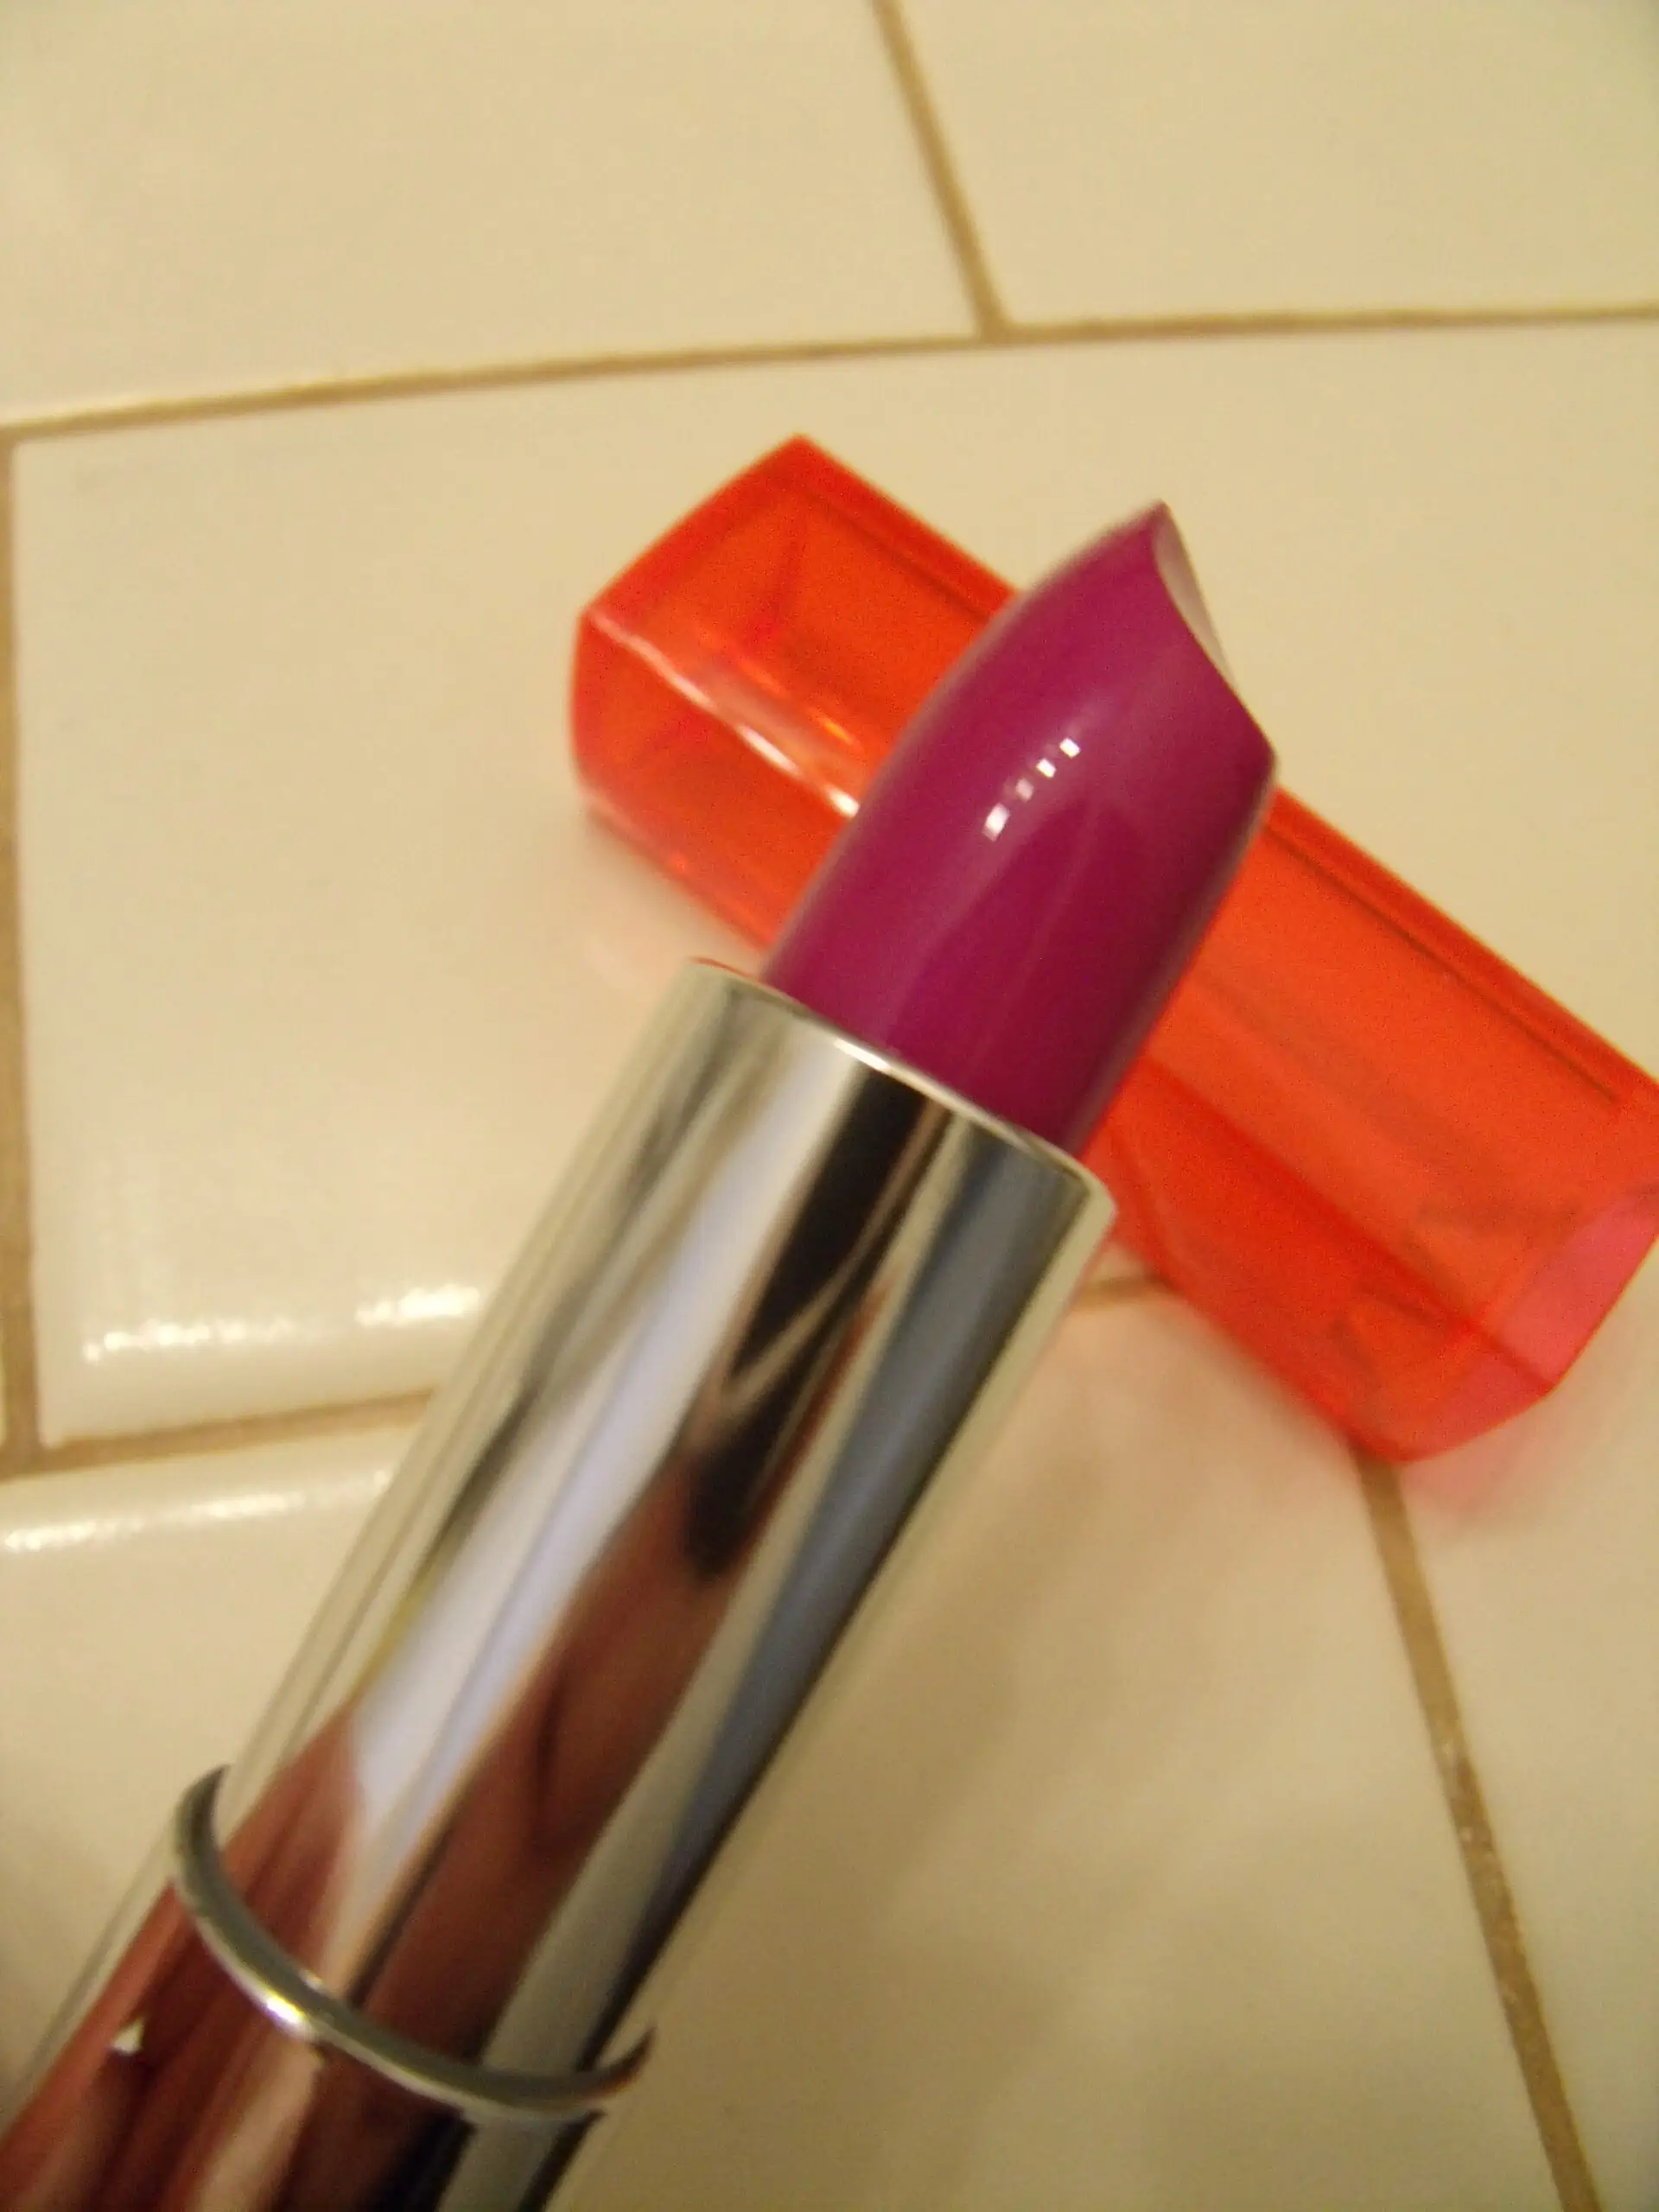
I’m using the Burt’s Bees Lip Crayon in “Sedona Sands” topped with their Lip Shine in the center of my lips in “Peach.”
For eyes, I’m using Lorac primer across my lids and under my eye slightly where the eyeshadow is going. This is anticipating happy tears. I feel all my feelings, all the time.
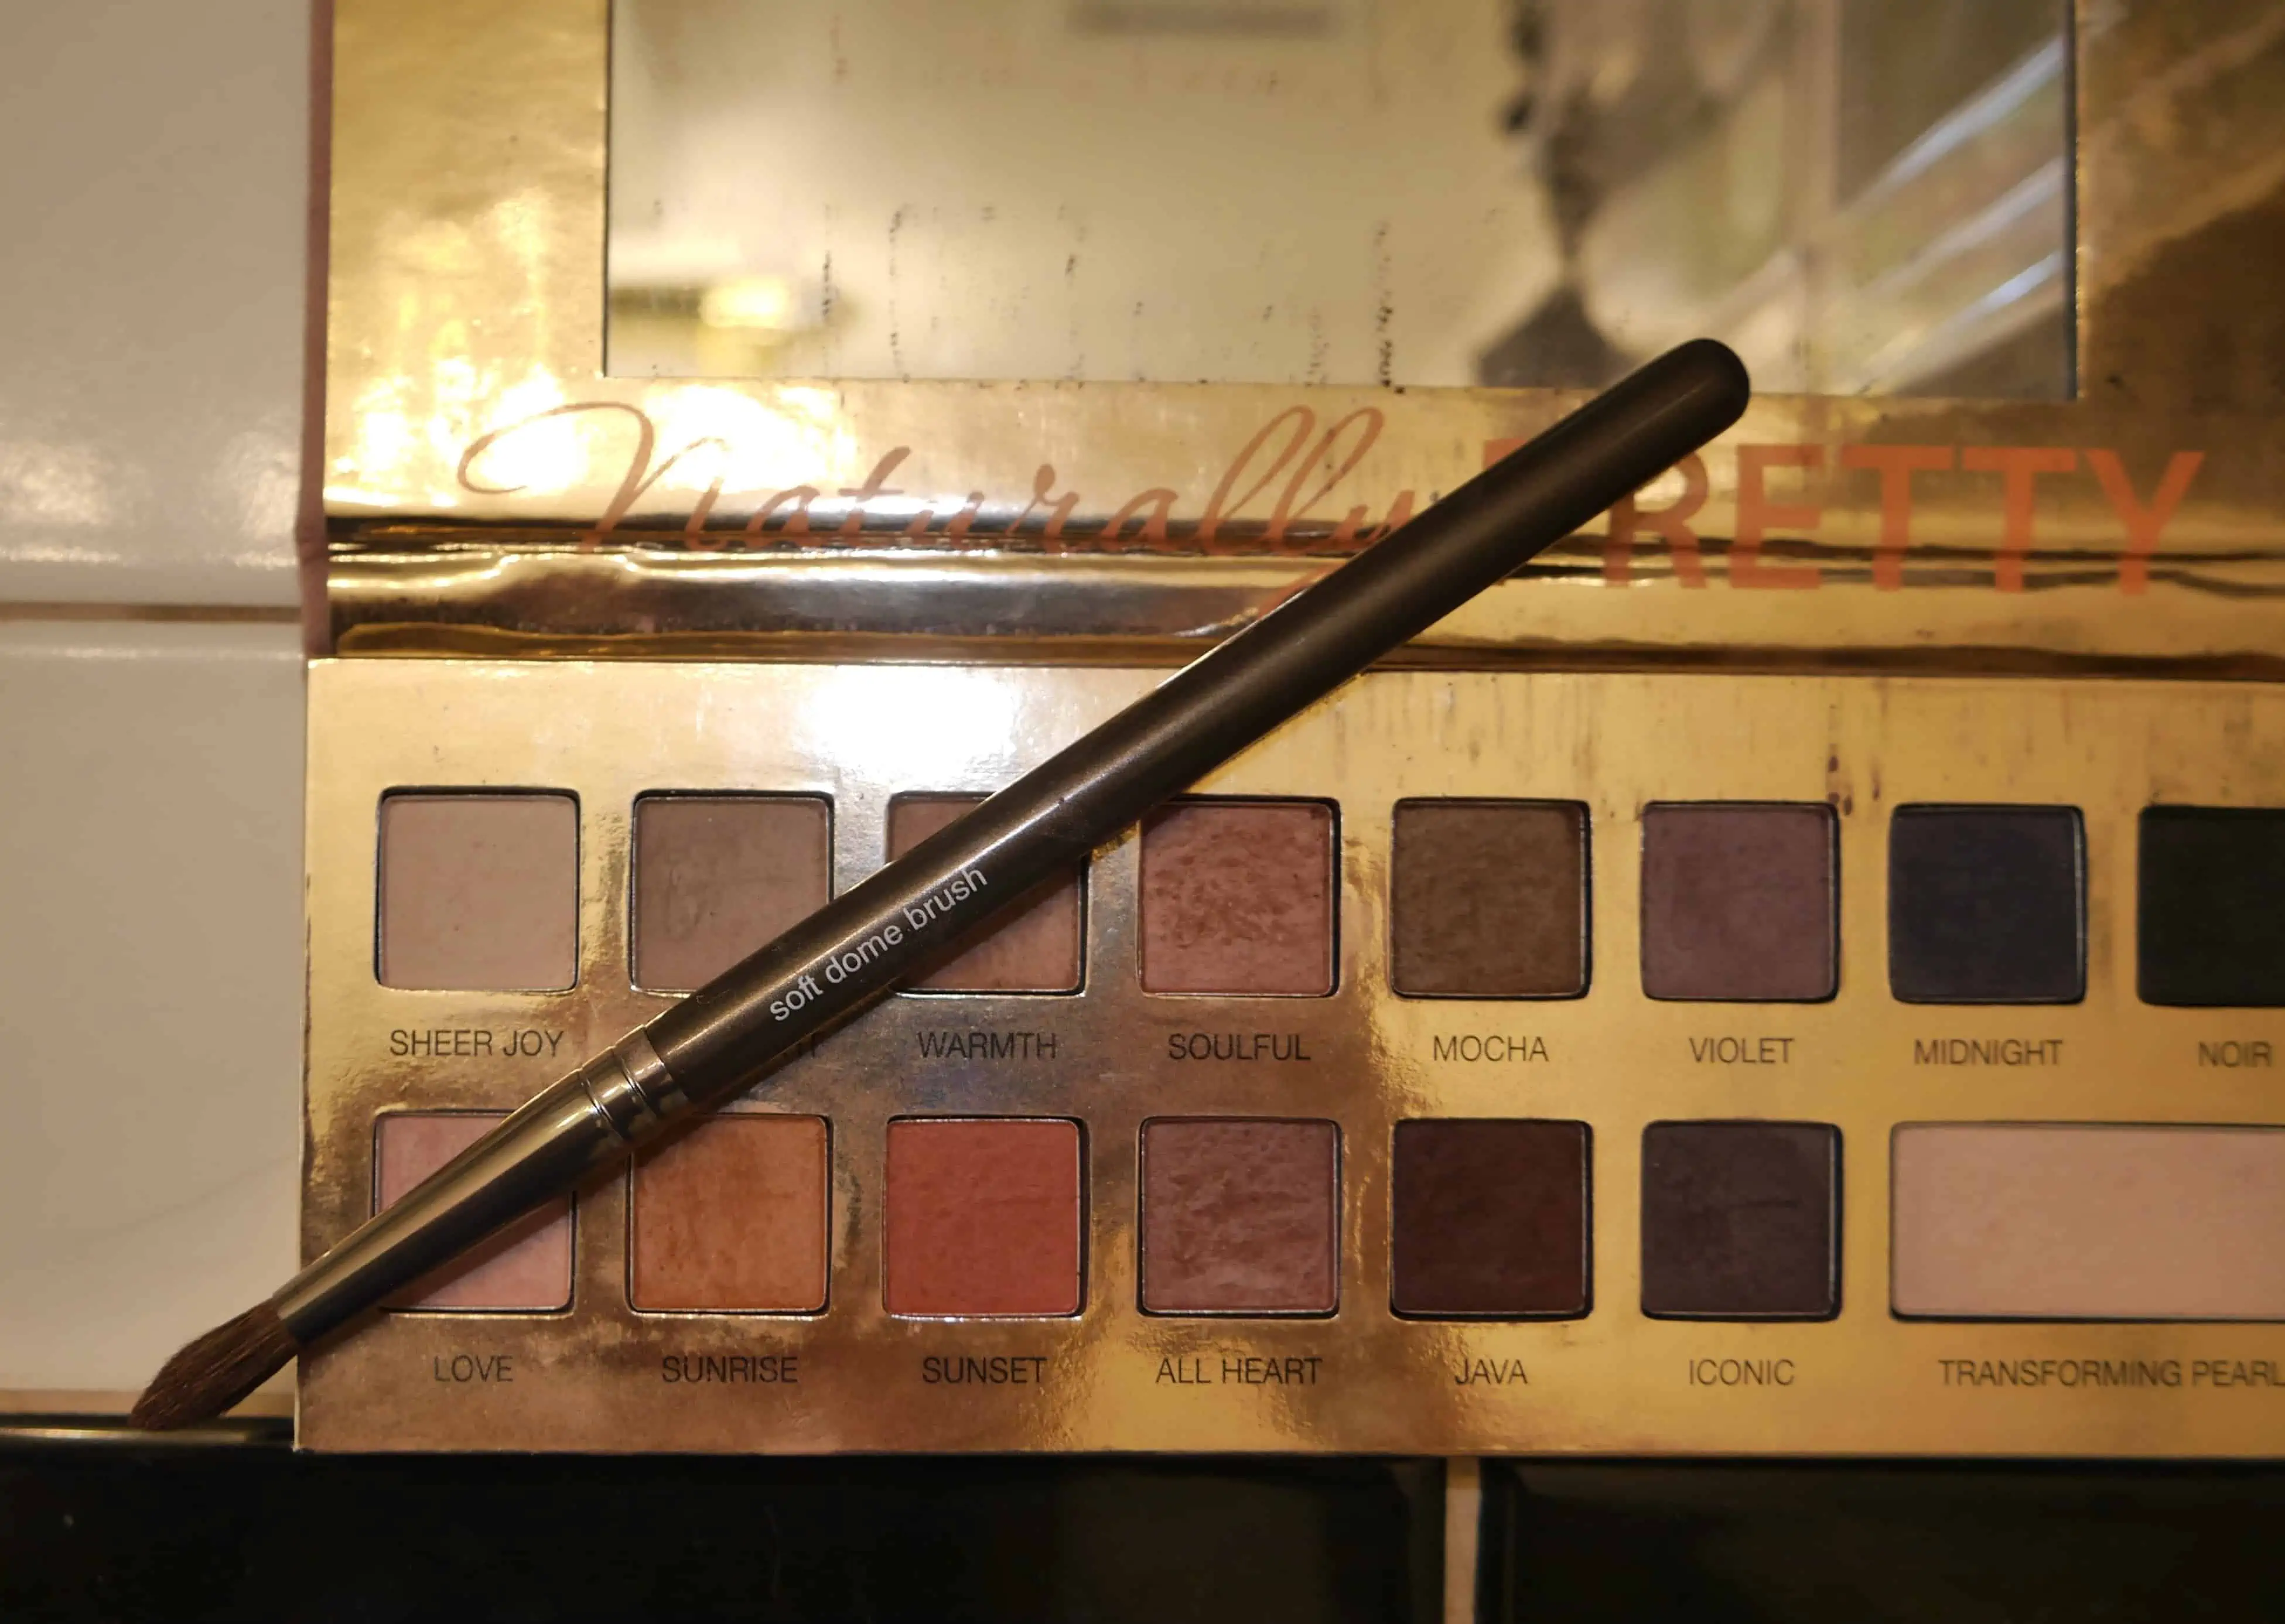
I am using the It Cosmetics Naturally Pretty palette. It’s a gorgeous palette that always looks soft on the eyes, with great pigment. Your eyes will look defined but not “done” so when you sweat/cry/dance it won’t look like “honey, you should excuse yourself and go find a mirror” smudged and terrifying. Brides just wanna have fun, ya know?
This palette is very soft looking, I don’t know how else to describe it. The shades are pigmented, just in a very muted way. I love how this looks, but it did take a little getting used to the first few times I used it.
I am using eye brushes from this It Cosmetics set, it’s an insane value for brushes of this quality (most brushes start around $30 each, this whole set of six is $39.50 total), along with a Makeup Geek Soft Dome Brush.
List of Products and Shades:
Eye primer: Lorac “Behind the Scenes” primer
Crease and under eye shade and Soft Dome Brush from Makeup Geek: Mixed “Soulful” and “Sunrise”
Lid shade and brush from It Cosmetics: “Mocha” for fair-to-light complexions, “Java” for medium-to-deep complexions.
Blending brush: Large fluffy eye brush from the set.
Eyeliner: It Cosmetics eyeliner in “Silk Taupe,” a nice, soft alternative to brown or black.
Shade to set liner: “Mocha” or “Java,” same as Lid shade.
Inner corner of eye and under eyebrow: My favorite product for this is Stila “Kitten” eyeshadow, but if you want to stick with just the It Cosmetics palette, you can use the “Transforming Pearl” shade.
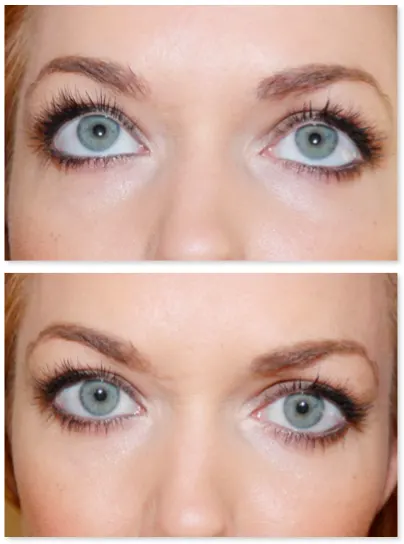
Lashes: I am using individual lashes from Ardell because they are MUCH easier to do initially and to keep up all night. If one falls off, it is less noticeable than when the front of a strip lash starts coming off. Also, when you look down, you won’t have an obvious false lash line, like with strip lashes. I use the “short” length, but you could use medium if you have naturally longer lashes than me. My lash glue is the “Dark Tone” from Duo.
Eye How To:
1: Start by priming lids with eye primer.
2: Line eyes on upper and lower inner rim with eye liner.
3: Go back and forth in the crease, using the soft dome brush, with the “Sunrise” and “Soulful” mix, blending well. I pat my brush in Souful first, then in Sunrise. Go under you eye with the same shades combo.
4: Use a clean fluffy brush (with no shadow on it) to blend this shadow into the crease and pull it out into a slightly “V” smokey shape.
5: If the crease shade still looks too intense for you, go right above it with the “Sheer Joy” shade to soften it up.
6: Pat down the “Mocha” shade all over the upper lid and blend.
7. Go over the upper and lower liner with the “Mocha” shade, using a liner or smudge brush.
8. Inner corner and under eyebrow arch area, get a touch of the “Kitten” or “Transforming Pearl” shade.
9. Curl lashes and apply mascara. Set out a dot of lash glue on the edge of the lash container, so that it starts to thicken while you apply your mascara.
10. Add 4 to 5 individual lash clusters to each eye. Some people prefer to add these before mascara, for a more dramatic look, but I prefer adding them after for a wispier look. Dot the end of each individual lash into the glue, then place on top of your natural lashes, as close to your lash line as possible, following the natural arch of your lashes. Just set it, making sure the lashes line up with the direction of your natural lashes, hold it for a few seconds, then let it dry and the glue set.
11. Spray your eyes and over your entire face with Urban Decay All-Nighter makeup setting spray. It makes a HUGE difference in how long and how well your makeup looks without smudging.
THE ALL IMPORTANT PICS:
This makeup will work equally as well on any lovely guests who can tear up a dance floor. I can heavily vouch for this.
Thank you for reading! Please feel free to share on Facebook or Pinterest and follow @girlgetglamorous on Instagram for daily makeup junkie-type posts.
Go Get Glam!


LEAVE A COMMENT